Learn about Stroke in Illustrator
In the previous article, you and TipsMake explored the Shape Builder tool in Adobe Illustrator. In this article, let's learn about Stroke in Illustrator.
Table of Contents
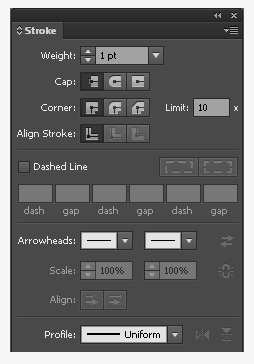
Use the Stroke function in Illustrator (Windows => Stroke) to specify whether a line is solid or dashed, dashed, etc. We can apply Stroke options to the entire object or use the Live Paint group and apply different Strokes to different edges within an object.
Continue reading the article below from TipsMake to learn more about Illustrator 's Stroke function .
1. Learn about Illustrator's Stroke feature.
Apply color, width, or stroke alignment in Illustrator.
Step 1: Select the object (to select an edge in the Live Paint group, we use the Live Paint Selection tool).
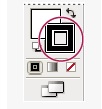
Step 2: Click the Stroke checkbox on the toolbar, Color Panel, or Control Panel.
Step 3: Select a color from the Color Panel, or a color swatch from the Swatches panel or Control panel. Alternatively, double-click the Stroke box to select a color using the Color Picker.
Note: If you want to use the current color in the Stroke box, you can drag the color from the Stroke box onto the object. The drag feature does not work with the Live Paint group.
Step 4: Adjust the stroke width in the Strokes Panel or Control Panel.
Step 5: If the object is a closed path (and not a Live Paint group), select an option in the Stroke panel to align the Stroke along the path:
: Center the stroke of the outline.
: Center the stroke of the outline. : Center the stroke of the outline.
: Center the stroke of the outline.
Note:
- In the current version of Illustrator, the option to align the stroke inside the border is applied by default when users create web documents. In previous versions of Illustrator, the option to align the stroke in the middle of the border was applied by default.
- If you attempt to align paths using different Stroke alignment settings, the paths may align incorrectly. Ensure that the alignment settings are consistent if precise edge matching is required during alignment.
2. Create strokes with different widths.
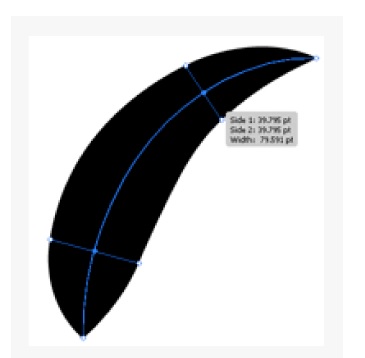
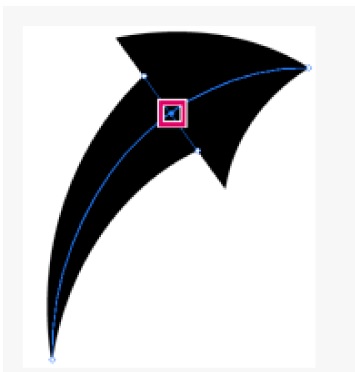
The Width tool on the toolbar allows us to create a variable for the Stroke width and save this variable to apply to other Strokes.
When you hover your mouse over a stroke using the Width tool, a hollow diamond icon will appear along the path with the handle. We can adjust the stroke width, move the width point, duplicate the width point, and delete the width point.
With multiple strokes available, the Width tool only adjusts the active strokes. To adjust a specific stroke, ensure that the selected stroke is active in the Appearance panel.
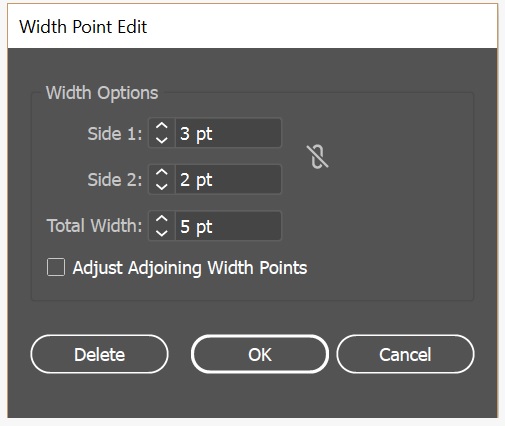
To create or edit width points, we use the Width Point Edit dialog box, double-click on the Stroke using the Width tool, and edit the values for the width point.
If you check the Adjust Adjoining Width Points box, the changes made to the selected width points will be affected.
To automatically select the Adjust Adjoining Width Points checkbox, press the Shift key and double-click the width point.
The Width tool distinguishes between continuous and discontinuous width points when adjusting the width variable.
To create a point with discontinuous width, follow these steps:
Step 1: Create two points of different widths on the Stroke.
Step 2: Drag one width point to the other width point to create discontinuous width points for the Stroke.
For discontinuous points, the Width Point Edit dialog box will display the side width as well.

3. Control the Width tool
Perform any of the following actions:
- Pull the handle outward or inward to adjust the stroke width at a position along the path. The width point is created at the corner or at the selected anchor point, which is directly attached to the anchor point during path editing.
To change the position of the width point, drag the point along the path.
To select multiple width points, press the Shift key while clicking to select the points. In the Width Point Edit dialog box, specify values for Side 1 and Side 2 of multiple different points. Any adjustments to one width point will affect all selected width points.
4. Save the stroke width configuration.
After setting the stroke width, save the changes using the Stroke panel, Control Panel, or Properties panel.

Perform any of the following actions:
To apply width profiles to selected paths, select a profile from the Width Profile menu listed in the Control Panel or Stroke Panel.
If a Stroke does not have a width variable selected, the Uniform option will appear in the list. Select the Uniform option to remove the width variable configuration from the object.
- To restore the default width configuration, click the Reset Profiles button located at the bottom of the Profile menu.
Note:
- Restoring the default width configuration in the Stroke Options dialog box will delete any saved custom configurations.
- If a configuration with a width variable is applied to the Stroke, it will be indicated by an asterisk (*) in the Appearance panel.
5. Create dotted or dashed lines.
We can create dotted or dashed lines by editing the object's Stroke properties.
Step 1: Select the object.
Step 2: In the Stroke panel, select Dashed Line . If the Dashed Line option is not displayed, select Show Options from the Stroke panel menu.
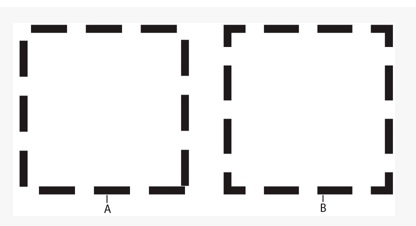
Step 3: Click the "Align Dashes to Corners and Path Ends, Adjusting Length to Fit" icon. This option allows you to create dashes at the corners and ends of the path in a consistent and predictable way. If you need to retain the dashes without alignment, select the "Preserve exact dash and gap length" icon.
Step 4: Specify the sequence of hyphens by entering the length of the hyphens and the spacing between them.
The numbers entered are repeated in order so that once you've set up the pattern, you don't need to fill in all the text boxes.
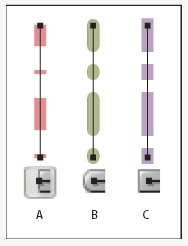
Step 5: Select the Cap option to change the ends of the dash. The Butt Cap option creates a square dash at the end; the Round Cap option creates a dash or a dot; the Projecting Cap option extends the end of the dash.
6. Change Cap and Join
A Cap is the beginning of an opening line, a Join where the line changes direction. We can change the Cap and Join of a line by changing the Stroke properties of the object.
Step 1: Select the object.
Step 2: In the Stroke Panel, select the Cap option and the Join option. If these options are not displayed, select the Show Options option from the Panel menu.
- Butt Cap : Creates lines with a square end.
- Round Cap: Creates lines with a semi-circular tip.
- Projecting Cap : Creates lines with square ends that extend half the width of the line.
- Miter Join: Creates lines with sharp angles.
- Round Join: Creates lines with rounded ends.
- Bevel Join: Creates lines with right angles.
7. Add arrowheads.
In Illustrator, we can access arrowheads in the Stroke panel and the associated adjustments to adjust their size. The default arrowheads are available in the Arrowheads list in the Stroke panel.
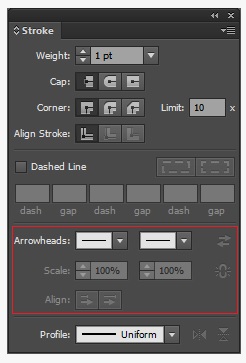
Additionally, we can also change the size of the arrowheads using the Scale option .
To adjust the path and align the beginning or end of the arrow, we use the alignment options, including:
- Expand the arrowhead at the end of the path.
- Place the arrowhead at the end of the path.
Note : To remove arrowheads from objects, select the None arrowhead option from the menu.
8. Customize the arrowhead
To create custom arrowheads, open the Arrowheads.ai file , located in ShowPackageContentRequiredResources on your Mac.
And ShowPackageContentSupport FilesRequiredResources on Windows.
Follow the instructions in the file to create custom arrowheads.
In the article above, you and TipsMake have explored Illustrator's Stroke feature. If you have any questions or need clarification, please leave your comments in the section below the article.
Along with the Stroke tool, the Shape tool in Illustrator is also widely used to create complex objects by merging and deleting simpler objects. You can learn more about Shape in Illustrator through our article on taimienphi.
Was this article helpful?
Your feedback helps us improve.
Related Articles
 What is Adobe Illustrator? Learn Adobe Illustrator for what5 minutes read
 Stroke: Causes, identification signs and emergency 'golden time'4 minutes read
 Getting to know Adobe Illustrator13 minutes read
 Common Adobe Illustrator shortcuts9 minutes read
 Tutorial drawing ... 'unicorn' in Adobe Illustrator10 minutes read
 Nutrition for people suffering from stroke: What to eat and what to abstain?7 minutes read
Reader Comments 0
Sign in with email or Google to join the discussion.