Getting to know Adobe Illustrator
If you are passionate about graphics and are starting to learn about Adobe Illustrator, follow the article below to learn the basics of this great graphics application.
In recent decades, creating content to reach customers, audiences, . on digital platforms is a strong development trend worldwide. Not out of that trend, software development companies also in turn offer products that aim to best serve the creativity of artists, designers,.
Among them, it is possible to mention Adobe Corporation with specialized software that is quite famous in the world of content creators such as Photoshop, Flash, After Effects,. In 1985, with the requirement to design an application Initially for the Apple Macintosh, Adobe embarked on the development of the Illustrator software. Adobe Illustrator can be considered as vector image editing software - vector images are products created from objects, basic shapes, and limit points. They use algorithms to blend colors based on previously created bounding lines.
Completely different from another famous Adobe software, Photoshop, which only edits images in bitmap format. It is this difference that gives vector products an advantage when they can be easily zoomed freely without fear of image breakage. But the disadvantage of Illustrator is also because it cannot edit bitmap images, so with those images we need to use other editing software such as Adobe Photoshop, Corel PaintShop , .
Now, Adobe, together with Creative Cloud, has released illustrator CC , which brings improvements such as synchronization of color, font and program settings, saving documents to the cloud, and integrations. with Behance (creative collaboration network), as well as other features such as compatibility with new tools, CSS extraction and data file storage in many popular formats.

Adobe Illustrator software interface
Here, we will learn about the interface as well as to know the use of each area in Illustrator software.
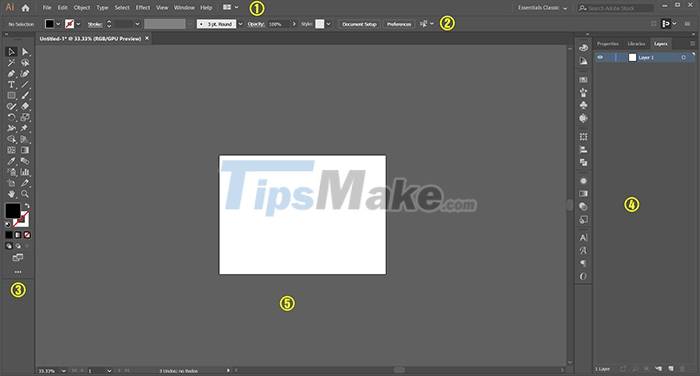
1. Title bar and menu (Menu bar)
This is the area that includes the software icon, zoom buttons, close application windows, and the program's command menus.
2. Feature bar
In the properties bar will display the customizations of each tool that the user is using, helping the user to quickly change the basic parameters.
3. Toolbars (Tools)
On the left hand side of the interface will be a toolbar containing the toolboxes that work directly with the Illustrator program.
4. Panel
On the right hand side, we have a command panel area or command group of each tool with specific features and purposes in the working process.
5. Workspace
In the large space in the middle is the working area of Illustrator software. When starting a new session, drawing boards or paper sizes will appear in this area.
Instructions for creating a new workspace
To start a new session, the first thing we need to do is create a drawing board or paper size suitable for the needs of the job. You can use the key combination Ctrl + N or at the menu bar, we select the File command menu and select the new create command New .
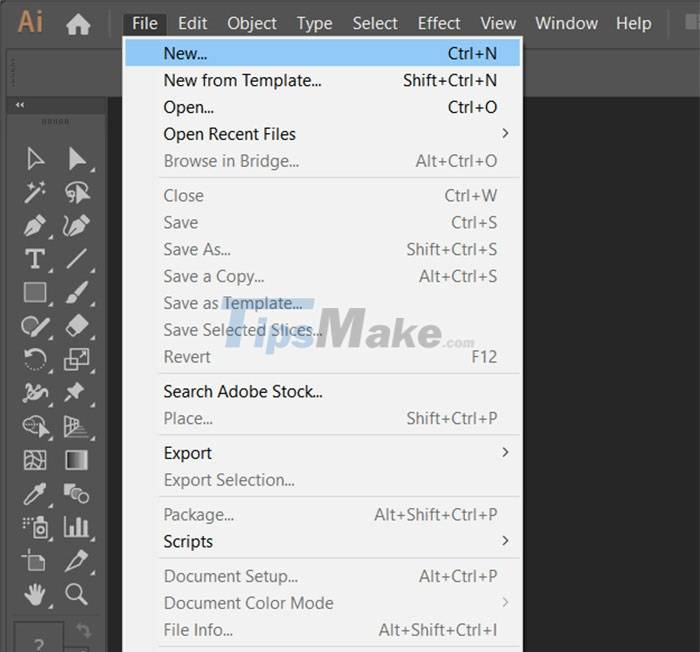
After choosing to create new, the task window will open for us to choose the size of the drawing board, color system, number of artboards, . In that window will also contain the basic sizes commonly used used in the design or the sizes that we have used so that users can easily choose.
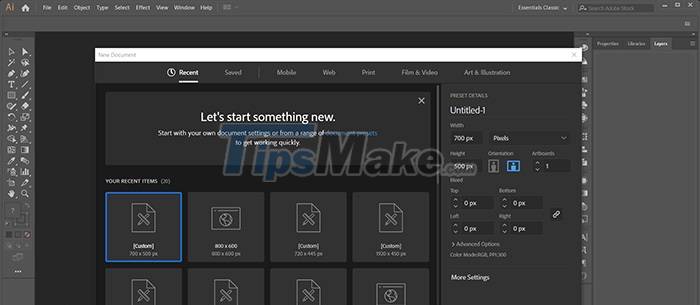
Users can also easily customize the drawing board size parameters to suit their work needs, by entering the necessary parameters in the right sections of the task window in the Preset Details section . We will have areas in turn from top to bottom including the name of the design document, the size of the width and the height of the drawing board, the selection menu of the drawing unit's measurement unit, the selection of the table. Draw placed vertically or horizontally, the scroll bar selects the number of artboards.
Next down in the Bleed section , we will select the cropping compensation area, which is an extension of the drawing board for processing and cropping for printed products, so that the finished product will not be damaged. the phenomenon of excess or undercutting affects the aesthetics and overall design of the design. Normally the size at the crop offset is set to 0.3, but if we simply design a product for presentation on an electronic screen, there is no need to specify this area.
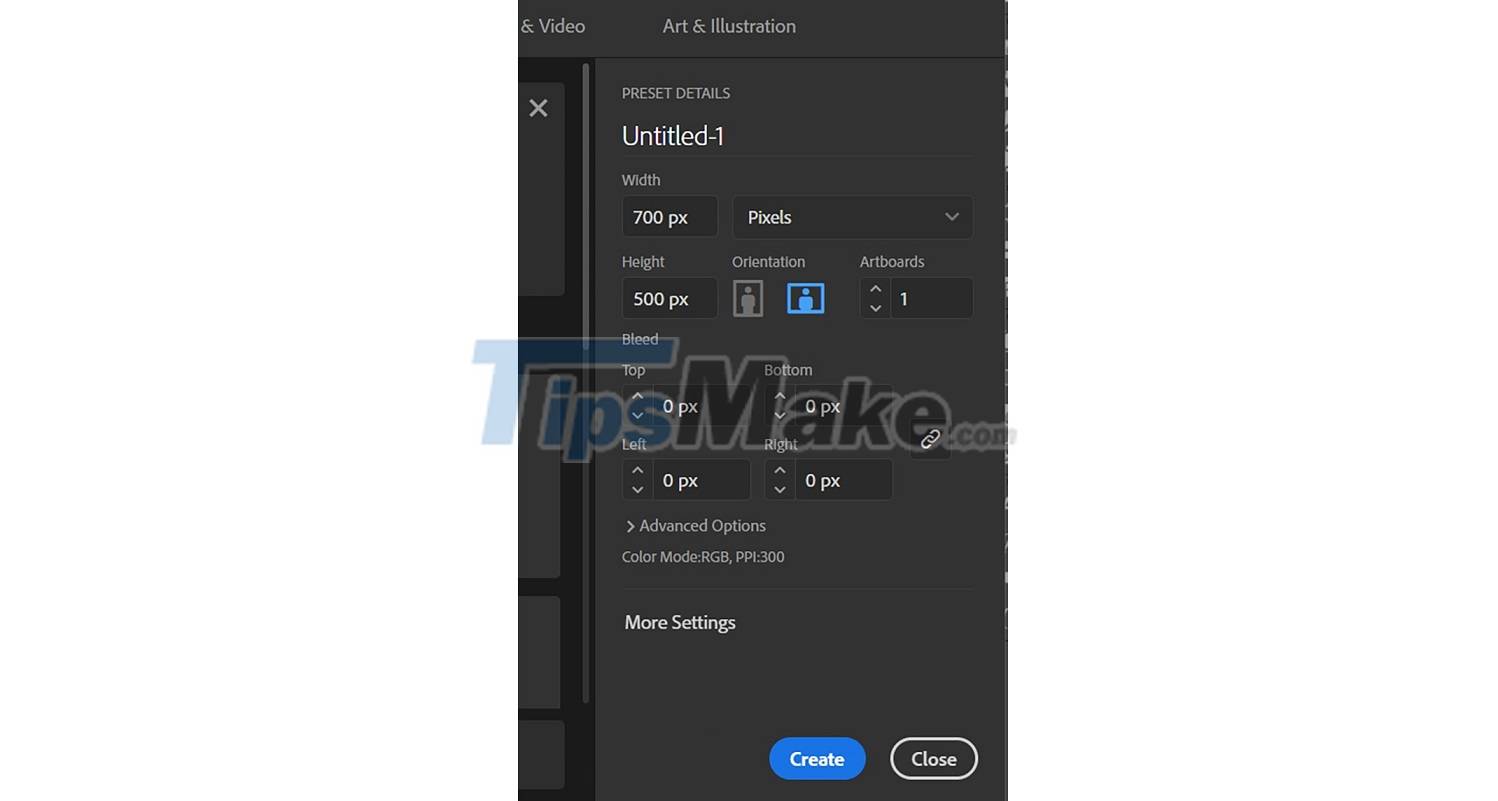
In addition, we also have more advanced options in the Advanced Options section including color system selection (CMYK for print products, RBG for electronic display), pixel density (for products). Printing requires a pixel density of over 120 to ensure sharpness after printing, with on-screen presentation designs from 72), preview mode.
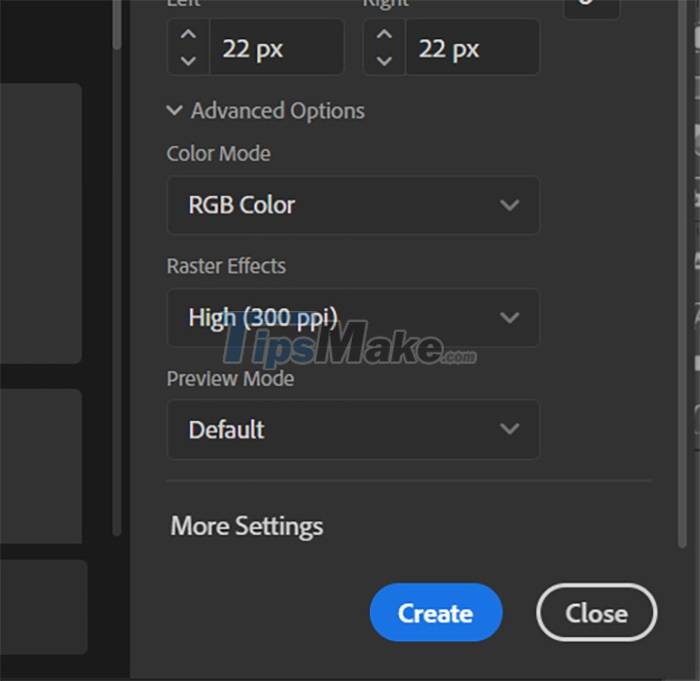
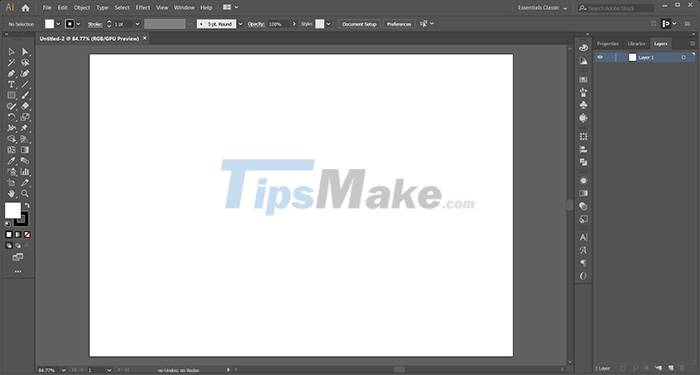
After selecting the drawing board size and necessary parameters, we select the Create button to create a new drawing board. At this point, in the middle area of the Illustrator software interface will appear a new white drawing board and the designs in this white area are the final products that will appear after we export the data. into whatever format you want.
Instructions for storing data and exporting design files
The storage of data during the design process as well as the export of design files for printing also needs attention. Just a small mistake will lead to data corruption, file not being opened.
Usually, after having a finished product, it is necessary to pay attention to the following factors before storing.
First: The number of artboards in the design file.
Adobe Illustrator is a powerful vector graphic design software with a multitude of effects and support tools, so the number of elements contained in a drawing board can be very large. If there are too many drawings in the same design file, when storing it, it will create a very large file, which can easily lead to the inability to reopen the file no matter how powerful the computer system is. go on. To avoid this situation, you should only do a maximum of 6 to 10 drawings in the same file with small designs and only 1 drawing board with large designs such as outdoor banners, event backdrops, . .
Second: Pay attention to the version of Illustrator software you are using
If you are using the latest version, then archiving the data and reopening it in a lower version of the previous software will result in the loss of some effects that are only available in the new version. So make sure you use the same version of Illustrator if you have to open the file on another computer.
Tuesday:
In current versions of Illustrator, the images used in the design only exist as a link to the original image to reduce the final archive file size. As for the font, it depends on whether the computer is installed or not, so to avoid unnecessary mistakes, always export the file with the font and image used in the design to avoid losing the image or font damage when opening the file on another computer.
Common vector graphics file formats
For Adobe Illustrator software, we will have 3 main commonly used archive file formats that are Adobe Illustrator (.ai), Illustrator EPS (.eps) and Adobe PDF (.PDF). With each format will have its own advantages and depending on the purpose of use, we choose which format to store.
Adobe Illustrator format (.ai) is the main format of Illustrator software, maximum support for saving and opening files, small size. However, it can only be opened in Adobe Illustrator software.
The Illustrator EPS (.eps) format is a vector archive format. It can contain 2D vector graphics, bitmap images, and text. EPS files also include an embedded preview image in bitmap format. EPS files are often used to save artwork, such as logos and drawings. They are a common format used to transfer image data between different operating systems. The EPS format is supported by a number of different drawing software and vector graphics editing applications such as Illustrator, Photoshop, and CorelDRAW. The disadvantage of this format is that the file size can be much larger than other formats.
Adobe PDF format (.PDF) is a portable document format, a fairly popular text file from Adobe Systems. Just like the Word format, PDF supports raw text along with fonts, images, sounds, and many other effects. A PDF document will be displayed the same on different working environments. However, because support for many different applications can be opened, the elements in the design pattern will also be reduced, not separated as clearly as in other vector storage formats.
How to store data and export files
To store the data that we are working on or have completed, we can use the Ctrl + S key combination or select the Save command in the File command menu on the menu bar.
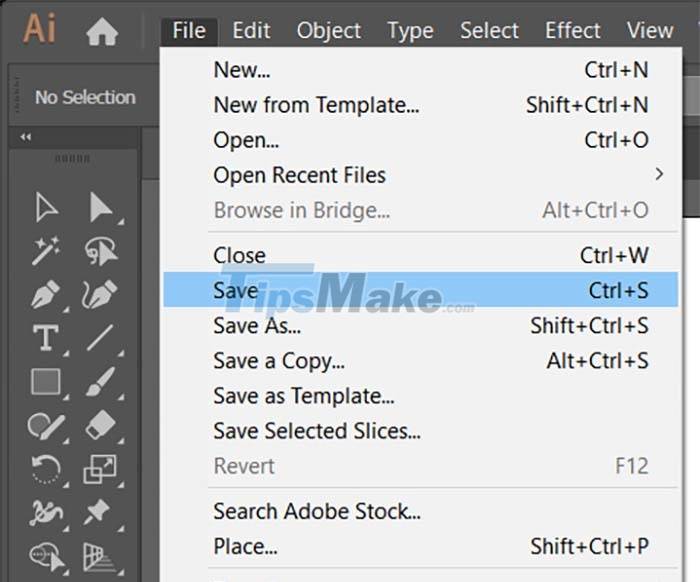
After selecting the Save command , a new task window will appear allowing us to choose the location of the folder containing the data file, the name of the file and the file format we want to store.
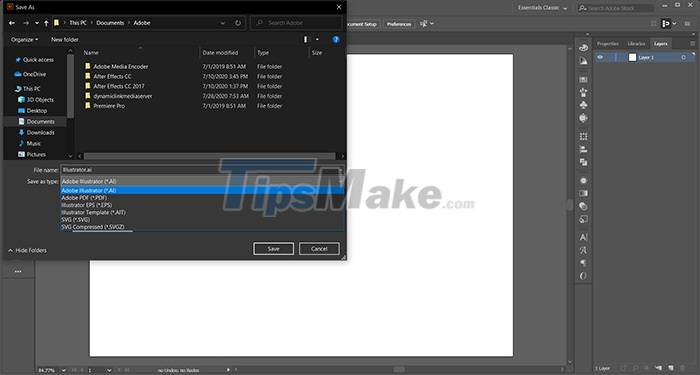
Continue to select the Save button with each format that we choose, there will be corresponding task windows that appear for users to choose the storage version they want.
Note: When storing under a lower version, some effects may be lost due to not being supported from a higher version. For PDF format, users can choose the quality of image storage depending on their needs.
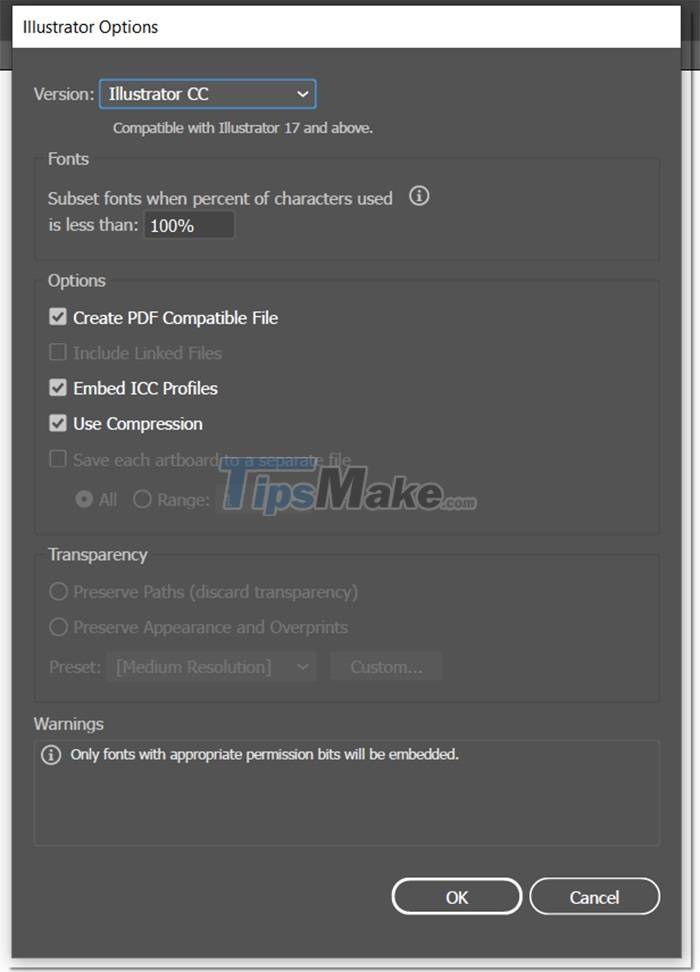
Archive version selection window with .ai format.
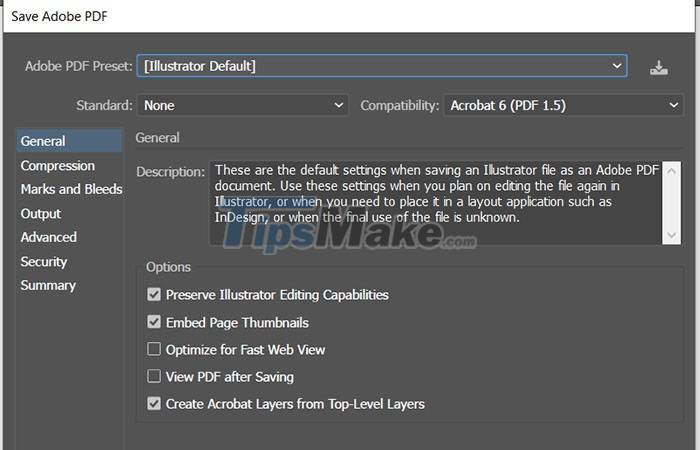
With PDF format, you can choose the quality of the archive file.
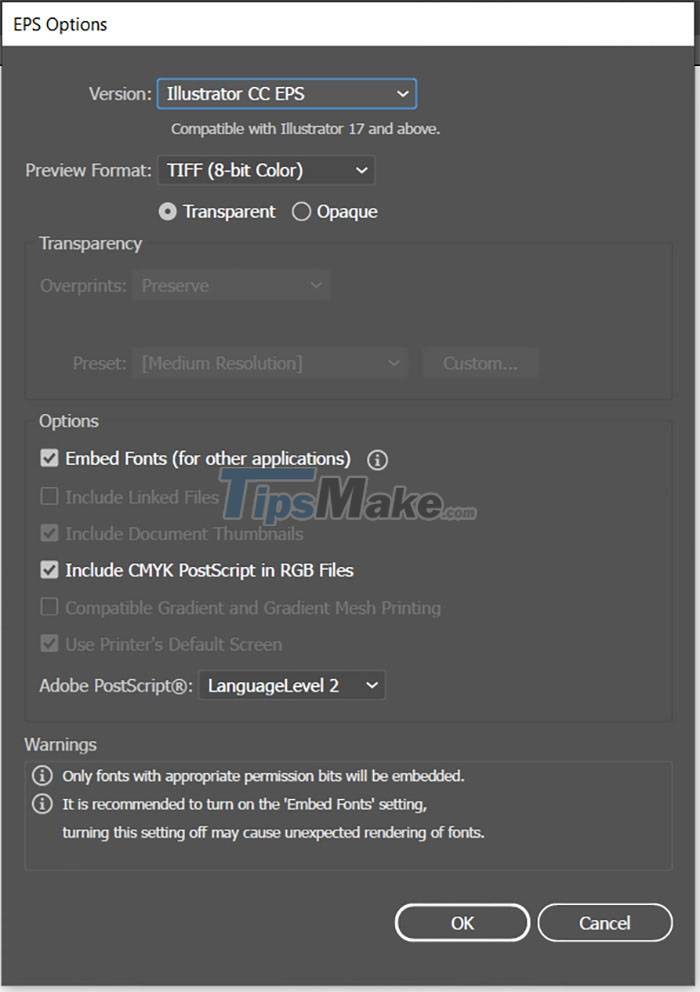
Archive version selection window with .eps format.
Then we choose OK to finish creating the archive file. However, to export the file to print or continue editing on another computer, we need to do an extra step to pack all the data about the font, the used images into a certain folder. to avoid damaging the design when it is reopened.
In order to help users save time in collecting data used in their designs, since Illustrator CC version has been integrated with the Package command in the File command menu . We can use the default keyboard shortcut Alt + Shift + Ctrl + P to quickly open.
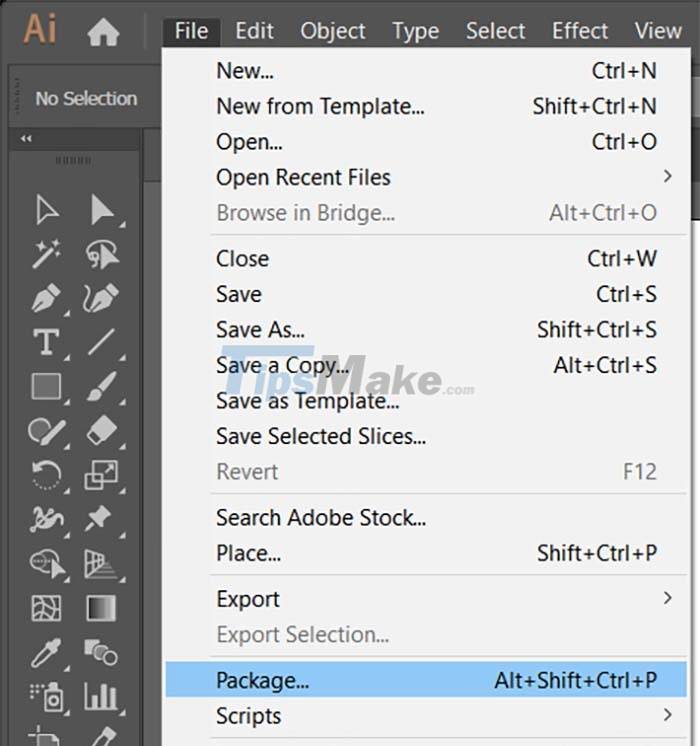
Select the Package command in the File command menu.
In the Actions window of the Package command , Illustrator allows the user to choose a location to save the packaging folder, the name of the packing folder, and options for creating a copy of the font, the original image file, and creating a report about the package. Design files. Select the Package button to pack and export to the archive directory. After having this folder, users can copy, edit and print on other computers without fear of font errors or loss of images in the design.
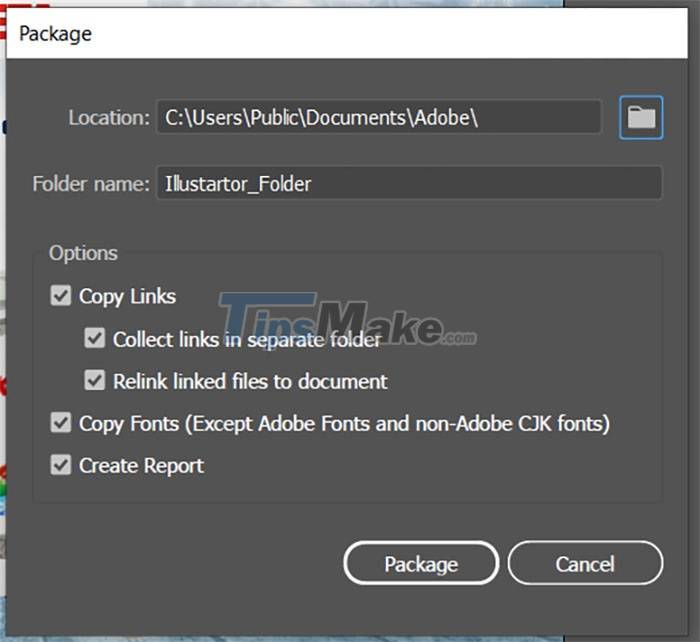
The Package command task window.
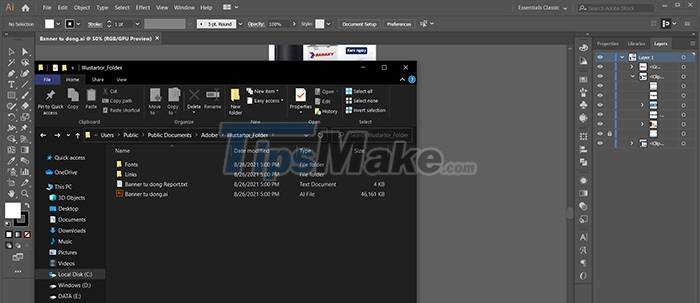
The packaging letter contains all the data used in the design file.
The above is the basic information to familiarize yourself with Adobe Illustrator vector graphic design software , to help you understand more about the use, interface of the software as well as ways to create new sessions and store design files. next.


 4 ways to fix IDM error Fake Serial Number
  How to Convert Excel to Dat
  5 best free CSV splitting tools, CSV file splitting software
  How to create ISO file with WinRAR
  Using Notepad ++ compare two files with a plugin
  Instructions to fix errors WinRAR diagnostic messages, downloaded files are corrupted