How to Create and Edit Gradients in Adobe Illustrator
To learn how to create and edit gradients in Adobe Illustrator, please refer to the article below from TipsMake. Additionally, you can refer to other articles already published on TipsMake to learn more about cropping images in Adobe Illustrator.
Table of Contents
Refer to the content below to learn how to create and edit gradients in Adobe Illustrator .
How to create and edit gradients in Adobe Illustrator
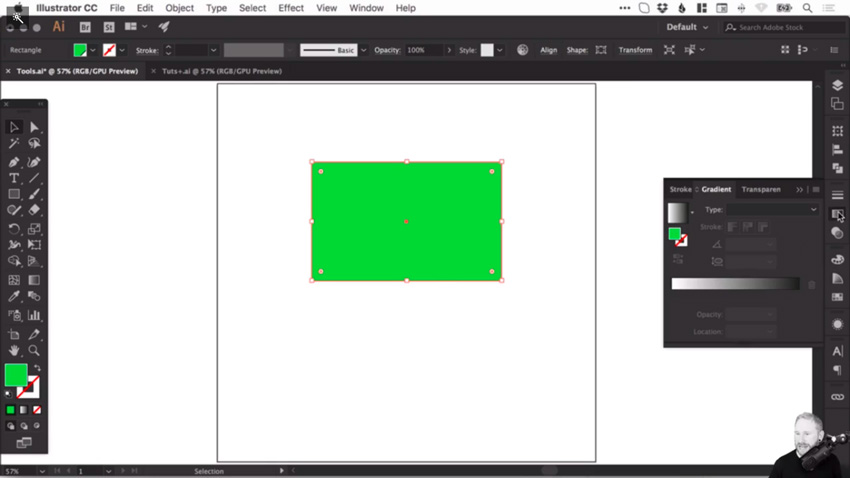
1. Create a simple gradient.
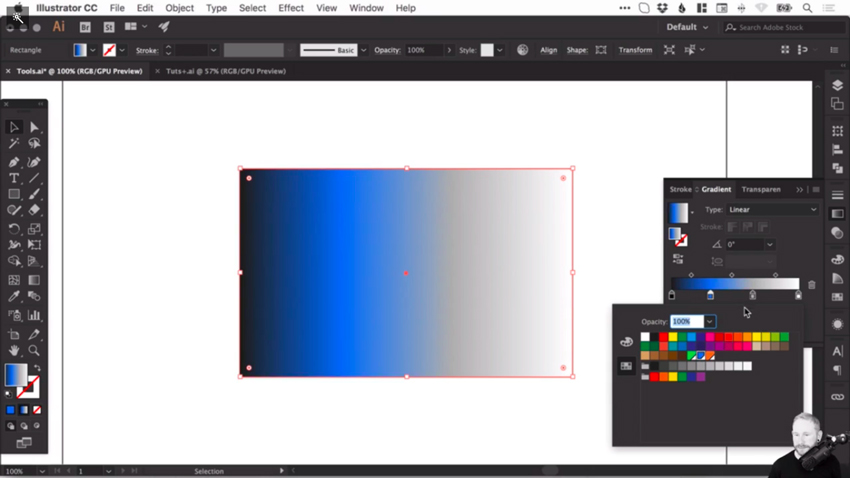
To create a simple gradient, first we use the Rectangle Tool to create a simple rectangle and work on it. Next, open the Gradient panel by clicking the icon on the toolbar or accessing Window => Gradient.
Click anywhere on the gradient slider to create a default black and white gradient. The Reverse Gradient icon just above allows you to reverse the direction, going from left to right or right to left. Or you can manually adjust the gradient angle by entering a value in the box.
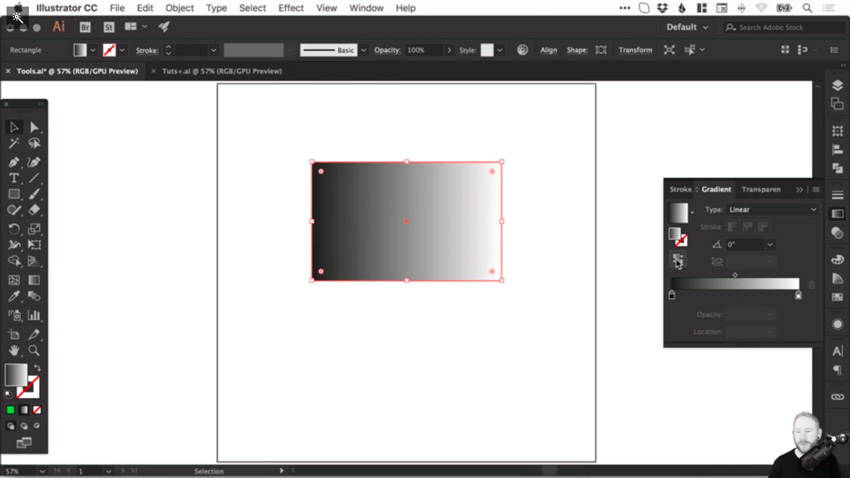
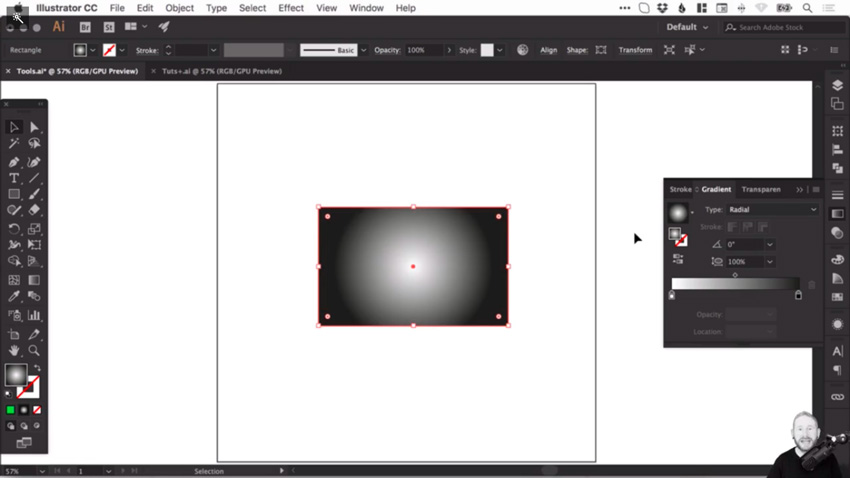
Additionally, there are many options and preset settings, and we can also apply gradients to the fill or stroke. If you change the Type setting from Linear to Radial, it will radiate from the center toward the edges (and can also be reversed).
2. Change the Gradient Color
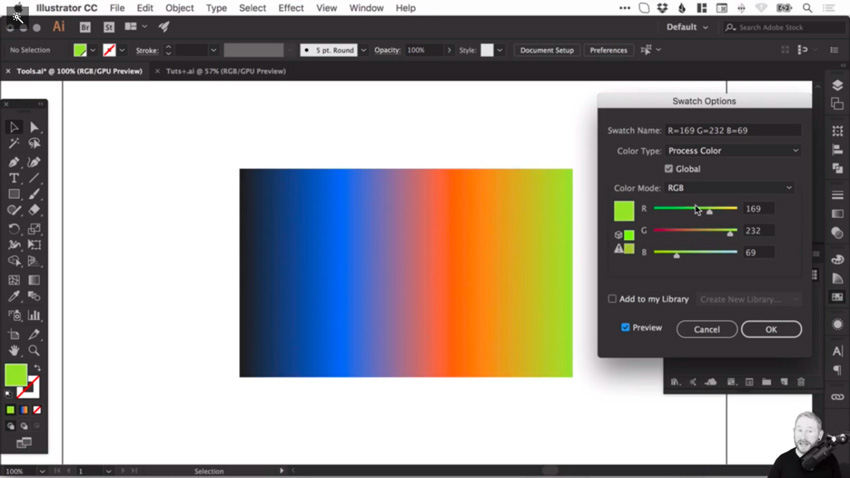
If desired, we can also adjust the color of the starting point. For example, if we want more black, we can drag the arrow icon on the slider to the right.
Next, any gradient requires a minimum of two colors. When you hover your mouse over the slider on the screen, a plus sign icon will appear; click on it to add other color samples, or alternatively, you can double-click on the color sample and select any color.
If you use Global Swatches, you can access the Swatches panel and change the colors, and it will automatically update in all cases, including gradients.
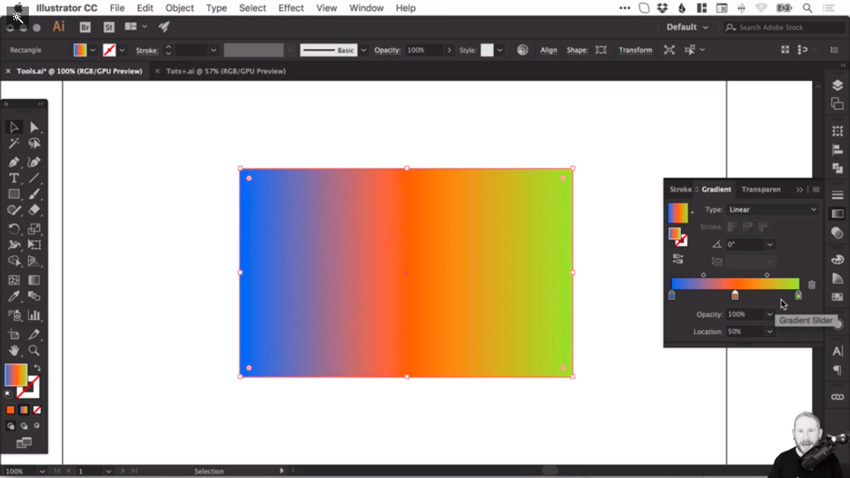
Change the position and opacity of the gradient.
To delete any color swatch, simply click and drag it out.
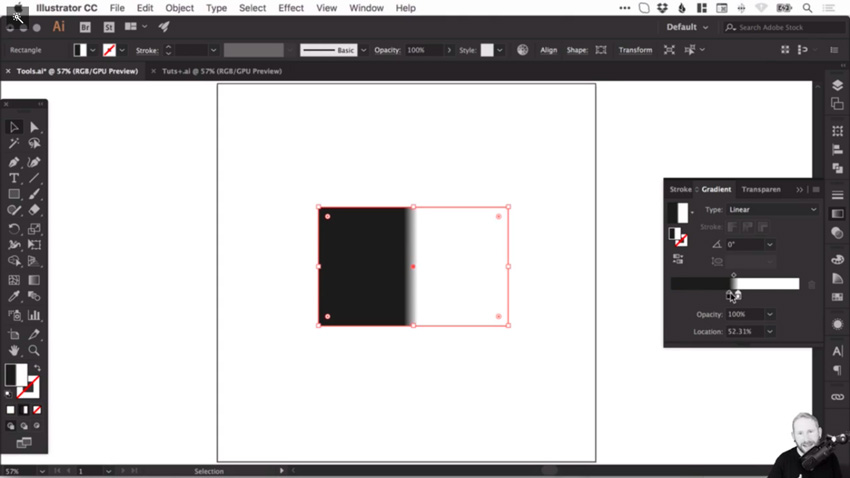
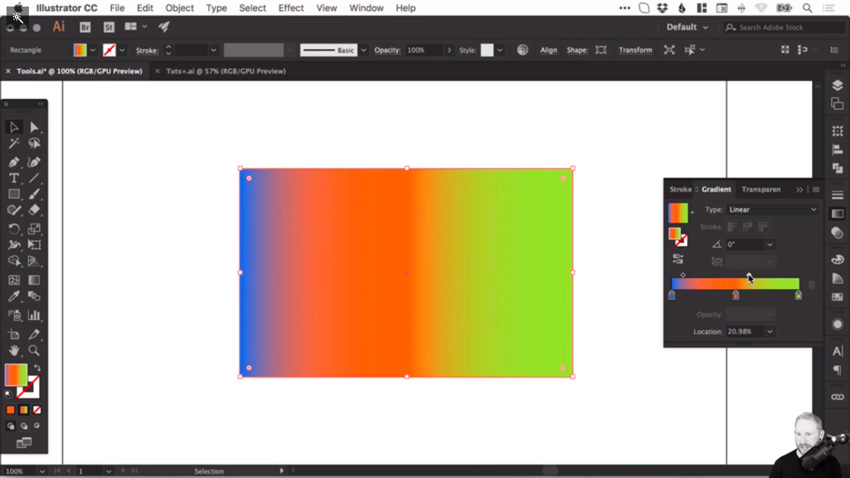
Additionally, if desired, you can expand the range of different colors by dragging the color swatches or entering values into the Location box. For orange, you can enter a value of 50% to display it in the center.
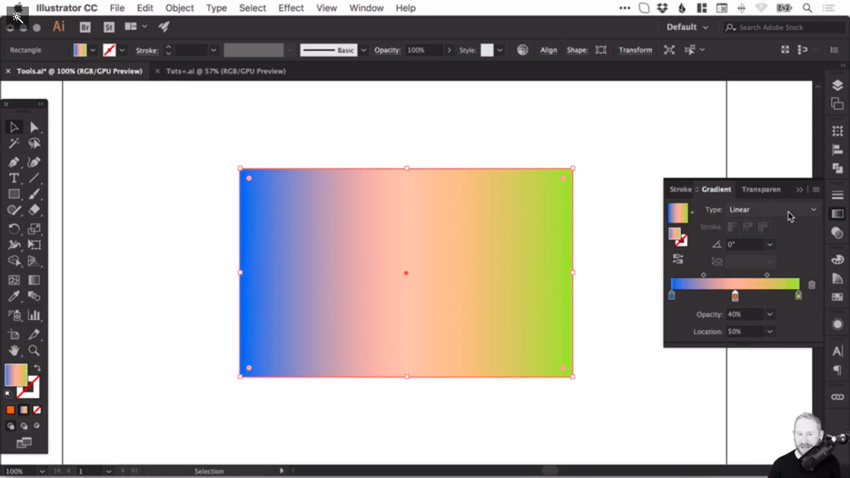
To change the opacity of any color swatch, select the swatch and choose a value from the dropdown menu or enter a value into it.
To adjust the position of individual colors, use the small diamond icon in the upper corner of the slider, or you can enter a percentage in the Location box if you want to enter precise values.
In summary, the above article from TipsMake has guided you on how to create and edit gradients in Adobe Illustrator. Additionally, if you have any questions or need clarification, please leave your comments below the article, and TipsMake will answer your questions as soon as possible.
The Mesh Tool in Illustrator is also an important tool, but its usage is quite complex. You can learn more about the function of the Mesh Tool in Illustrator in Taimienphi's articles.
Was this article helpful?
Your feedback helps us improve.
Related Articles
 Adobe Illustrator 2021.26.0 - download Adobe Illustrator 2021.26.0 here3 minutes read
 What is Adobe Illustrator? Learn Adobe Illustrator for what5 minutes read
 Instructions on cropping and deleting shapes in Adobe Illustrator3 minutes read
 What is Adobe Illustrator? Adobe Illustrator job openings.5 minutes read
 Tutorial drawing ... 'unicorn' in Adobe Illustrator10 minutes read
 Getting to know Adobe Illustrator13 minutes read
Reader Comments 0
Sign in with email or Google to join the discussion.