Table of Contents
To change the color of clothing or another object in Photoshop, first isolate the object, then apply a color adjustment. A masked Hue/Saturation adjustment layer is the most flexible method because you can refine the selection or change the color later. The Replace Color command is faster for simple, evenly colored objects but edits pixels directly.
Method 1: Use Replace Color for a quick edit
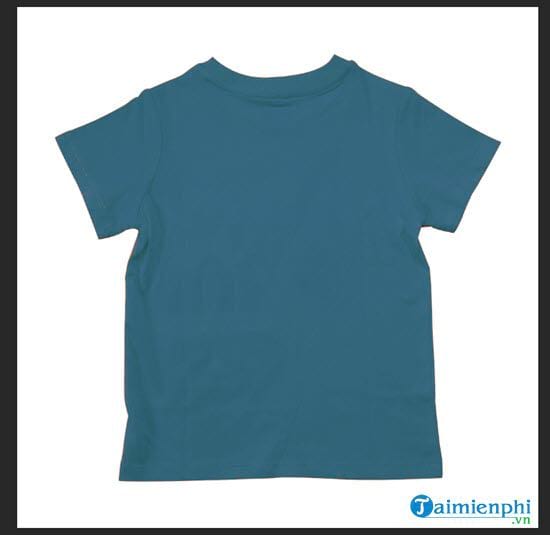
The example below changes an orange shirt to navy blue. Work on a duplicate layer so the original pixels remain available.
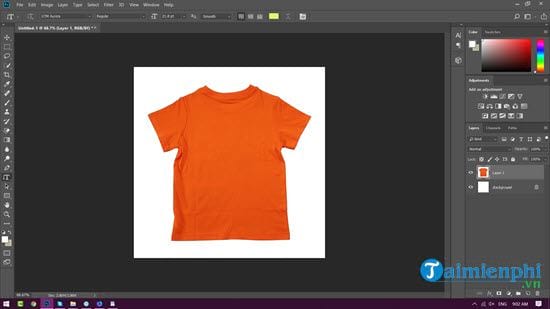
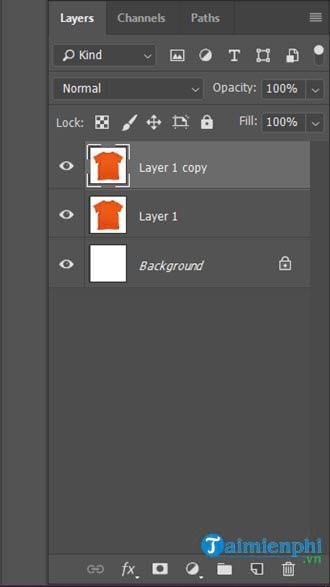
- Select the image layer and press Ctrl+J on Windows or Command+J on macOS to duplicate it.
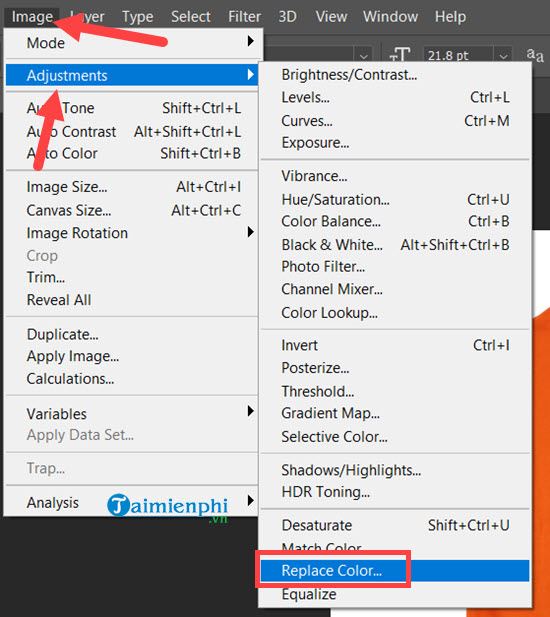
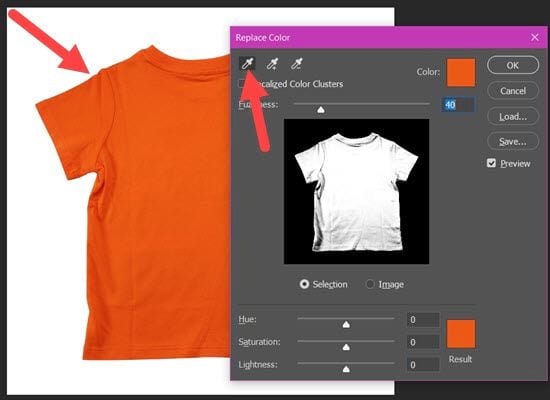
- Choose Image > Adjustments > Replace Color.
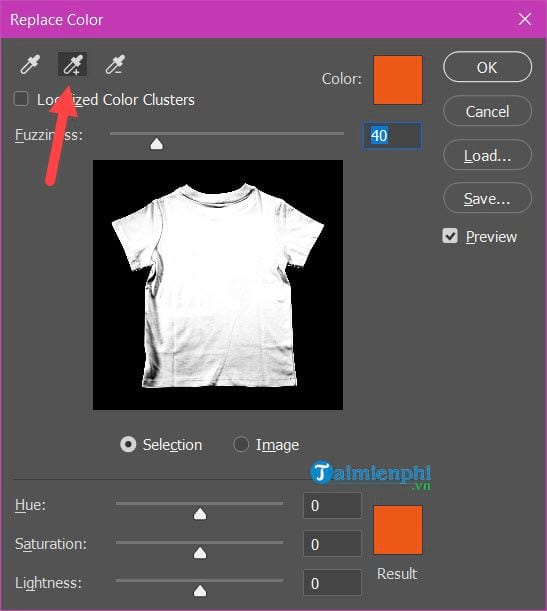
- Use the Eyedropper to sample the main color. Use the Add to Sample eyedropper on lighter and darker areas that belong to the object.
- Adjust Fuzziness until the preview mask covers the object without including nearby areas.
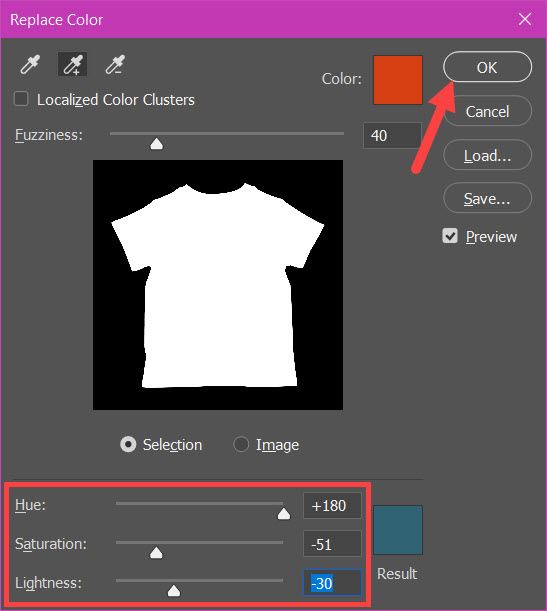
- Change Hue to choose the new color. Refine Saturation and Lightness carefully, then click OK.
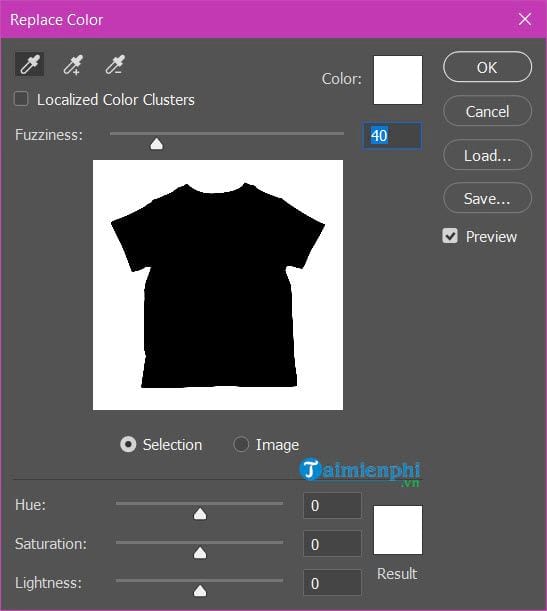
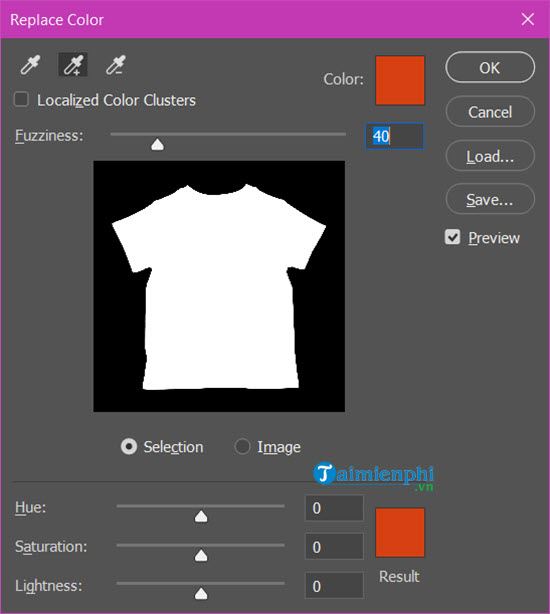
Hue selects a different color family, Saturation controls color intensity, and Lightness changes brightness. Large Lightness changes can flatten natural shadows, so use it sparingly.
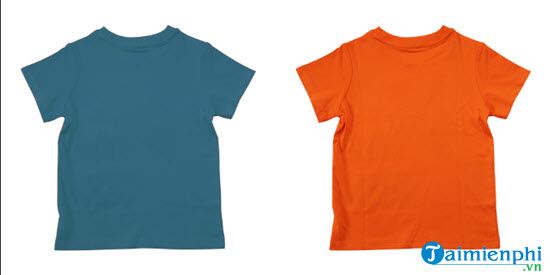
Method 2: Use a masked Hue/Saturation layer
This non-destructive workflow is better when edges are complex or you may revise the color later.
- Select the object with Select Subject, Object Selection, Quick Selection or another suitable selection tool.
- In the Adjustments panel, add a Hue/Saturation adjustment. Photoshop converts the selection into a layer mask.
- Move Hue and Saturation in the Properties panel. If the original color is affecting the result too strongly, enable Colorize and readjust.
- Click the mask thumbnail and paint with white to reveal the adjustment or black to hide it. Use a soft brush around fabric, hair and anti-aliased edges.
How to get a convincing result
- Preserve texture: avoid extreme Lightness settings that remove folds and highlights.
- Inspect edges at 100%: correct halos and any color that spills onto skin or the background.
- Use a selection for mixed-color scenes: Replace Color may affect every similar hue in the image unless the area is limited first.
- Save an editable copy: keep a PSD with masks and layers before exporting a flattened image.
Adobe's Hue/Saturation recoloring guide documents the current adjustment-layer workflow. For related editing skills, see how to make borders in Photoshop, combine layers, and browse these Photoshop project tutorials.
Related Articles
 How to Choose and Change Object Colors in Photoshop Fastest3 minutes read
 How to Use Photoshop CS5 - Part 1: Toolbox12 minutes read
 How to Change Colors for Photos in Photoshop: How to Use Photoshop5 minutes read
 How to Use Photoshop from Az for Beginners6 minutes read
 How to Choose All the Same Colors in Photoshop6 minutes read
 Changing the Design Colors in Canva Is Very Simple4 minutes read
Reader Comments 0
Sign in with email or Google to join the discussion.