Table of Contents
Illustrator’s Mesh tool turns a filled vector object into a network of mesh lines, points and patches. Each point or patch can carry a different color, and Illustrator blends those colors across the surface. This makes gradient meshes useful for controlled highlights, shadows and rounded volume that a single linear or radial gradient cannot describe.
How a gradient mesh works
- Mesh line: a curved row or column that organizes the color transitions.
- Mesh point: an intersection that has anchor handles and a color value.
- Mesh patch: the area bounded by neighboring mesh lines.
- Boundary point: a point on the object edge that helps control both silhouette and color flow.
More points do not automatically create more realism. A small, well-placed mesh is easier to color and shape than a dense grid. Add a point where the reference changes direction, value or hue—not simply to make the mesh look detailed.
Practice project: shade a grape
1. Prepare a template layer
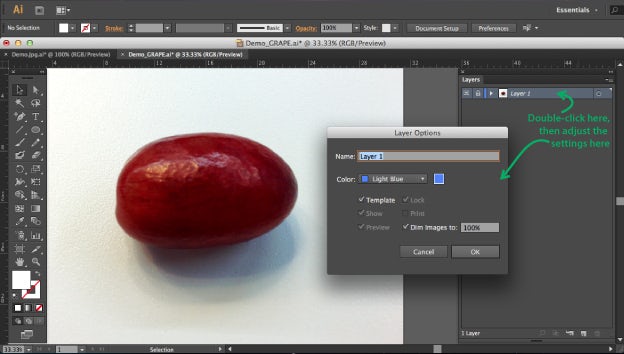
Place a clear reference photo, open the Layers panel and double-click its layer. Enable Template and choose a dimming percentage that leaves the reference visible without overpowering the vector work. Lock the template, then create a new layer above it.
2. Draw the base object
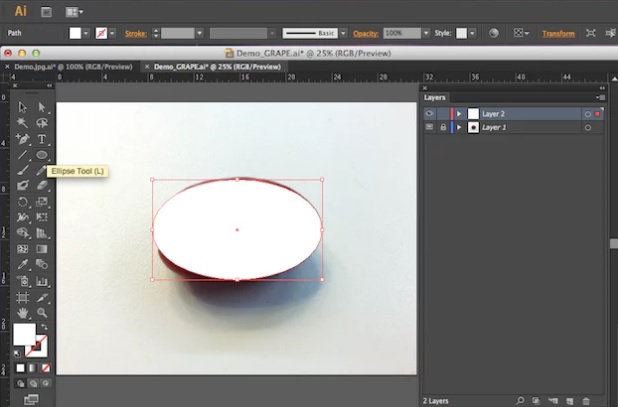
Use the Ellipse tool (L) to draw a simple closed shape over one grape. Adjust its boundary with Direct Selection so the silhouette follows the reference. Start with a plain fill; the color will be replaced as the mesh develops.
3. Use Outline view without losing the reference
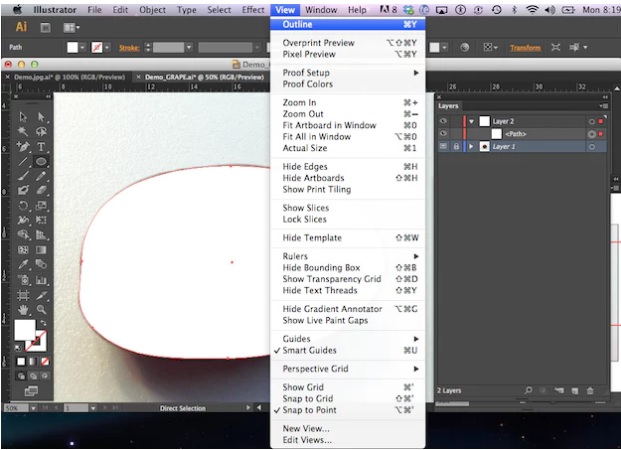
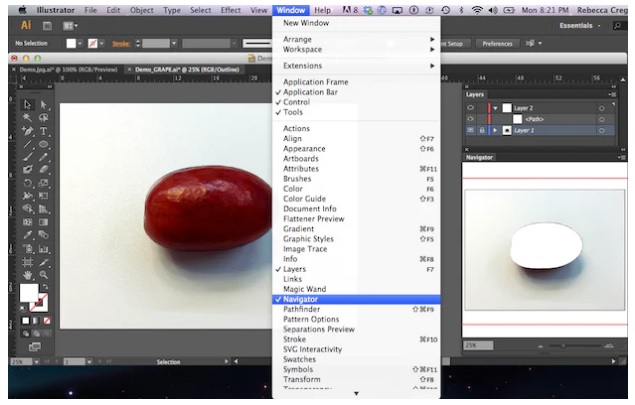
Choose View > Outline when you need to see paths and mesh lines clearly. A template layer can remain visible behind the outlined vector. Open Window > Navigator if you want a small preview of the colored result while editing the mesh structure.
4. Add the first mesh point
Select the object, activate the Mesh tool (U), and click near the center. Illustrator adds crossing mesh lines and points. The exact layout follows the shape, so avoid starting with an unnecessarily complex path.
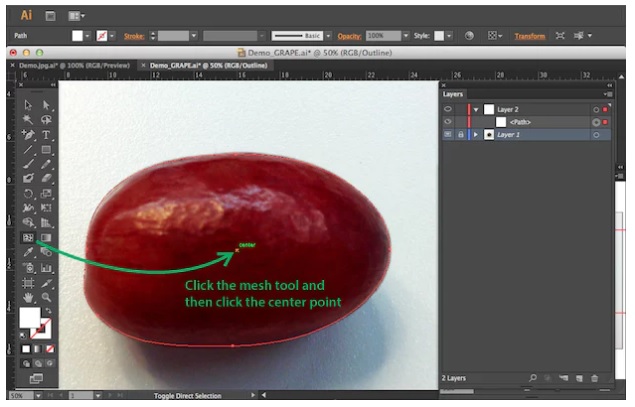
5. Add points only where the lighting changes
Add a few points around the highlight, midtone, reflected light and shadow. For this small grape, five or six strategically placed points can be enough. Drag points and their handles so the mesh follows the rounded surface rather than forming a rigid square grid.
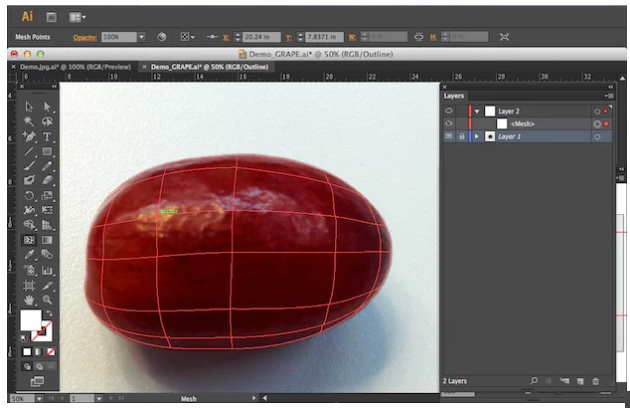
6. Sample and apply colors
Select a mesh point or patch with the Mesh or Direct Selection tool. Activate the Eyedropper (I) and sample the corresponding color from the reference, or choose a controlled value from Swatches or Color. Repeat for the main highlight, local color, shadow and reflected-light areas.
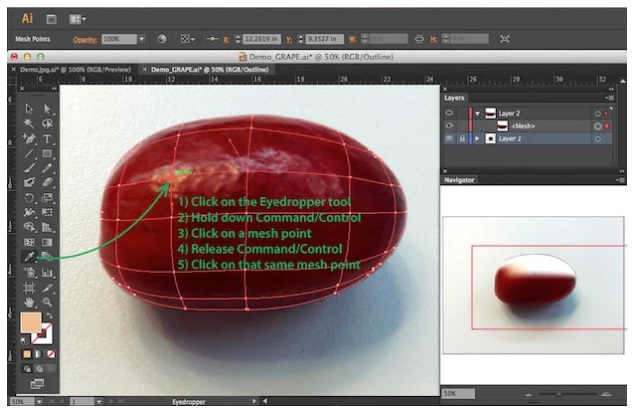
Use the photo as guidance rather than sampling every pixel. Too many unrelated samples can produce muddy transitions. It is often better to define a small color family and adjust the points by eye.
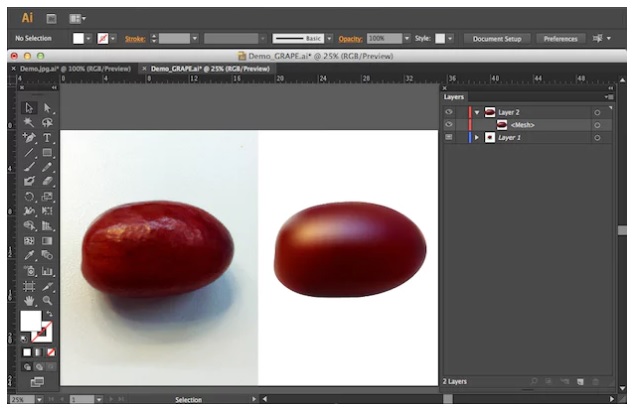
Refine the mesh
- Return to View > Preview and inspect the colored result at several zoom levels.
- Move a mesh point to reposition its color influence.
- Adjust direction handles to make a mesh line follow the surface contour.
- Select several points with Shift when they need a coordinated color or position change.
- Keep the object edge clean; boundary points control both the silhouette and nearby color.
- Save versions before adding more rows or columns, because simplifying an overbuilt mesh can be tedious.
Common Mesh tool problems
| Problem | Likely cause | Fix |
|---|---|---|
| Color bands or pinches | Mesh lines cross too tightly or handles change direction abruptly | Spread points apart and smooth the handles |
| Muddy color | Too many sampled hues in a small area | Reduce the palette and use fewer points |
| Uneven outline | Boundary points were moved while adjusting color flow | Correct the silhouette with Direct Selection |
| Hard-to-edit grid | Too many points were added early | Restart from a simpler shape or earlier saved version |
| No visible depth | Highlight, midtone and shadow values are too similar | Increase value separation gradually |
When to use another gradient
Use a linear gradient for a change along one axis, a radial gradient for a simple centered glow, and a freeform gradient when you need several color points without editing a full mesh. Choose a mesh when the color flow must follow a complex surface and you are prepared to control the geometry.
Adobe’s mesh overview and Mesh tool instructions cover the current controls. On TipsMake, review Illustrator color basics, basic vector shapes, or recoloring vector artwork.
Related Articles
 Getting to Know Adobe Illustrator14 minutes read
 Learn About Mesh Routers9 minutes read
 Learn About Stroke in Illustrator11 minutes read
 What Is Adobe Illustrator? Learn Adobe Illustrator for What5 minutes read
 AI Software Shortcuts: Common Adobe Illustrator Shortcuts9 minutes read
 Tutorial Drawing. 'Unicorn' in Adobe Illustrator11 minutes read
Reader Comments 0
Sign in with email or Google to join the discussion.