Tutorial drawing ... 'unicorn' in Adobe Illustrator
Creating cute, soft images doesn't need to use complex tools and extraordinary knowledge about Adobe Illustrator.
This article TipsMake.com will show you how to draw a unicorn image in Adobe Illustrator using basic manipulations, techniques and shapes. You will find that creating cute, soft images doesn't need to use complex tools and extraordinary knowledge about Adobe Illustrator.
Let's follow it!
1. How to draw unicorns
Step 1:
Open Adobe Illustrator and create a new file of size 850px by 850px.
We will start by creating the unicorn's head, neck and body. Draw an ellipse with the Ellipse Tool (L) and create a rectangle using the Rectangle Tool (M) as shown in the image below. Next create a slightly larger ellipse, place it at the bottom, overlap the rectangle.
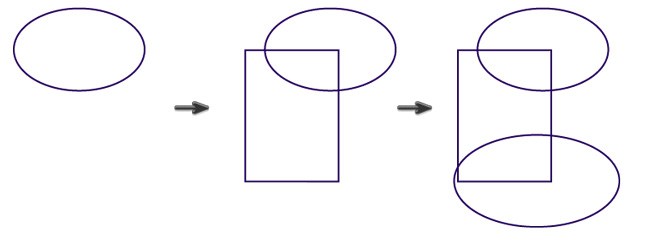
Step 2:
Select the rectangle and click Effect> Warp> Arc . In the new window, adjust the options like the image below. Align to no anchor point of the new shape outside the ellipse is the beginning of the unicorn.
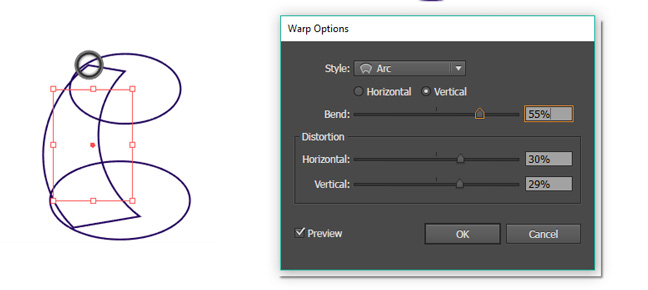
Step 3:
Change the ellipse below by going to Effect> Warp> Flag and adjusting the options like the image below.
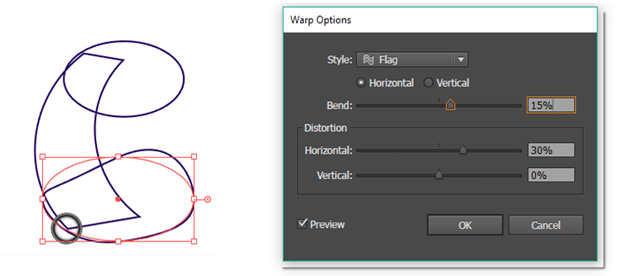
Step 4:
Now, expand the edited shapes to break its properties. Select each image you just modified and go to Object> Expand Appearance. Then select all three images, select Window> Pathfinder to merge them into one image.
To complete the shape, use the Anchor Point Converter ( Shift-C ) and edit the anchor point until you get the result you want. If you want to delete some anchor points, use the Delete Anchor Point Tool (-).
Note: Follow the Stroke panel , select the Round Cap option in the Cap, Round Join section in the Corner section and make sure that these buttons are always enabled.
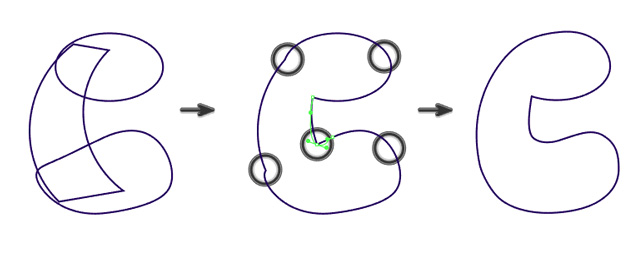
Step 5:
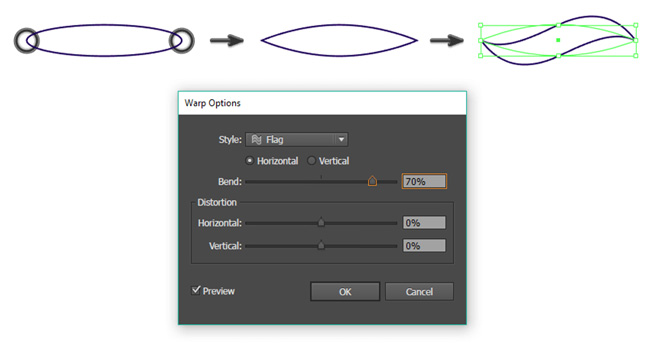
In this step we will draw smaller details for the unicorn. Draw a thin horizontal ellipse and use the Anchor Point Converter (Shift-C) to make a sharp ellipse at both ends.
Next, use the Flag effect to make this shape. Go to Effect> Warp> Flag and apply options like the image below. Don't forget to expand the shape you just edited to break the properties of the object, go to Object> Expand Appearance .
Step 6:
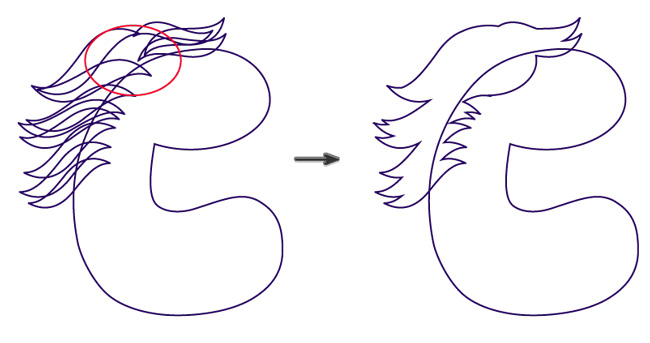
Make a few copies of this shape and place them along the left side of the unicorn you drew above, this will be the mane. If the images do not fill in the space between the images, just add an ellipse similar to the red ellipse inserted in the image below.
When you are satisfied with the length and shape of the mane, select all the shapes you created and merge them by clicking the Unite button on the Pathfinder panel (Window> Pathfinder).
Step 7:
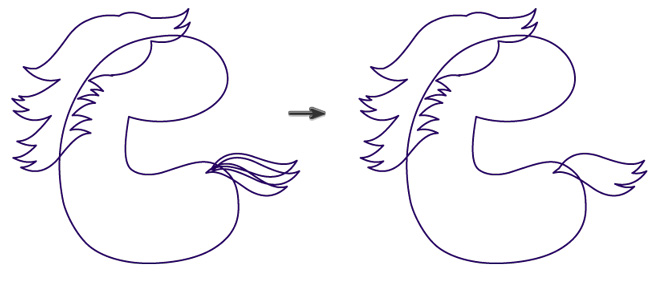
Use the same technique as above and give a unicorn a tail.
Step 8:
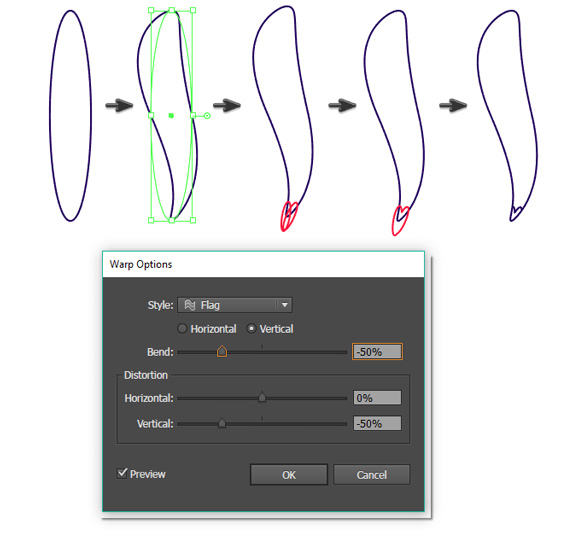
This step we draw to the feet. Create a vertical ellipse, go to Effect> Warp> Flag and use the options below. Expand this image (Object> Expand Appearance).
Draw more hooves, add two small overlapping ellipses as shown in the image below (red ellipse). Select both of these small ellipses and merge them: press the Unite button on the Pathfinder panel (Window> Pathfinder).
Now copy an extra long ellipse to make the foot drawn above (Control-C, Control-F) and then select this image and hold Shift to select the nail shape, combine the two shapes by clicking Intersect on the Pathfinder panel. So you've got a pretty little nail, attached it to the original long ellipse, so you're done with one leg.
Step 9:
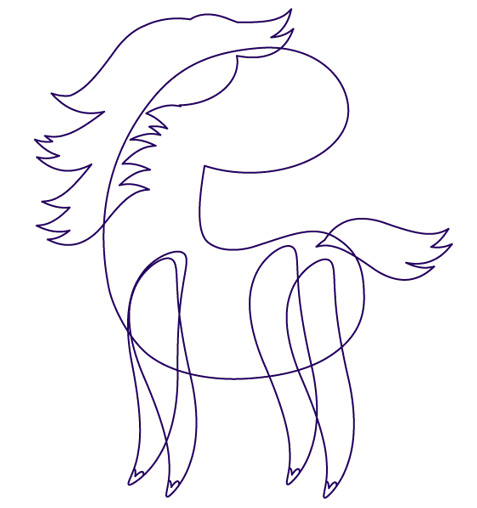
Attach your feet to the unicorn and create three more copies. Note that the foot in front is slightly higher for beauty.
Step 10:
Draw one more ear for the unicorn. Use the Ellipse Tool (L) to draw an ellipse. Then use the Direct Selection Tool (A), select the right and left anchor points and slide them down. Copy the created image, shrink it and place it inside the larger image.
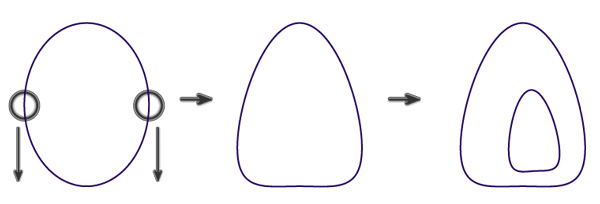
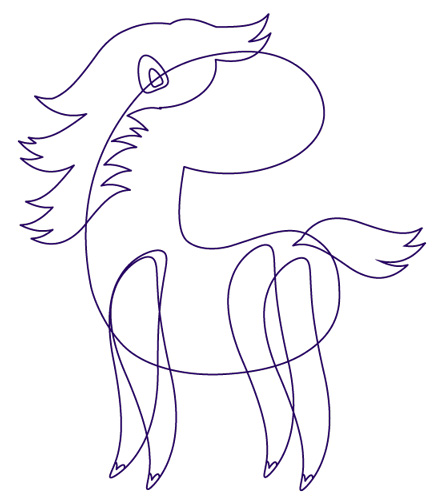
Put your ears on the top of the unicorn.
Step 11:
Adding a horn is really a legendary unicorn. Apply the same method as you did with the ear. Create a vertical ellipse, then move the right and left anchor points all the way down using the Direct Selection Tool (A).
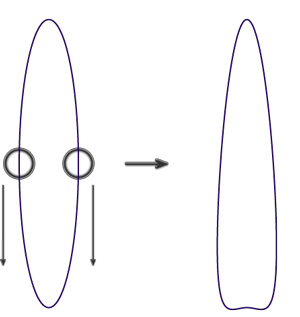
Put the horn on the top of the unicorn.

Step 12:
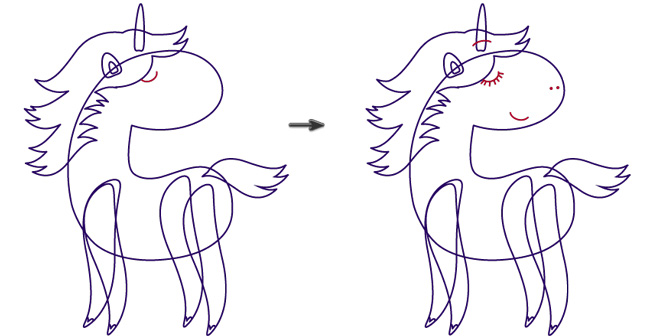
Add a pair of romantic eyes, dreamily into the cute smiley face, start with an ellipse, then grab the Scissors Tool (C) click on the left and right of the ellipse to delete the upper part of Ellipse.

Step 13:
Put an eye ring on the unicorn position and add some eyelashes with the Segment Tool ().
Make a copy of the arc (eyes closed without eyelashes) to make the mouth of the unicorn. Add two small circles like nostrils.
While drawing the ellipse, remember to hold down the Shift key to get a nice, even circle. Place another copy of the arc on the horn to make the horn look as if it is inside the mane.
Step 14:
Almost done! Now, make our image look more natural.
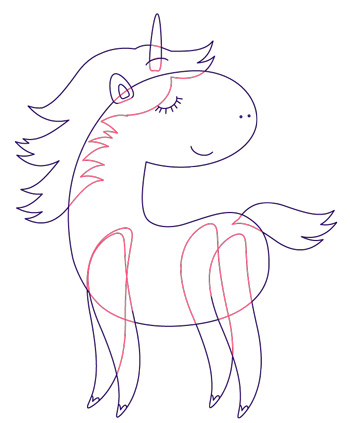
But first, ungroup all the pictures: select all (Control-A) and go to Object> Ungroup. Repeat a few times until the Ungroup command is no longer active.
Now, cut out some unnecessary parts using the Scissors Tool (C). Check the unicorn carefully and decide what parts to remove. As shown in the following figure, I will cut the pink lines.
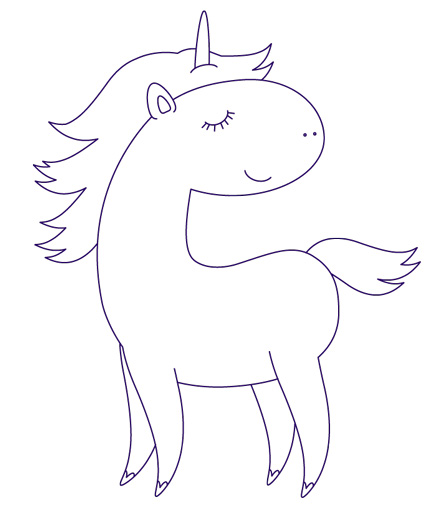
And done !!! Our work is here:
2. Create rainbows and clouds
Draw more rainbows and clouds to make our images more vivid.
Step 1:
There will definitely be a rainbow - the place where unicorns live and always appear.
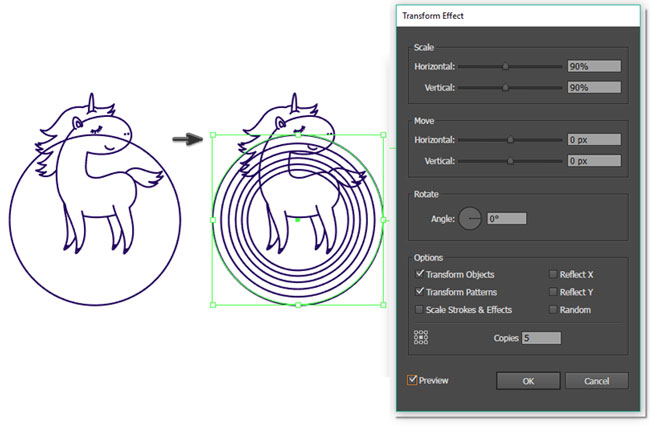
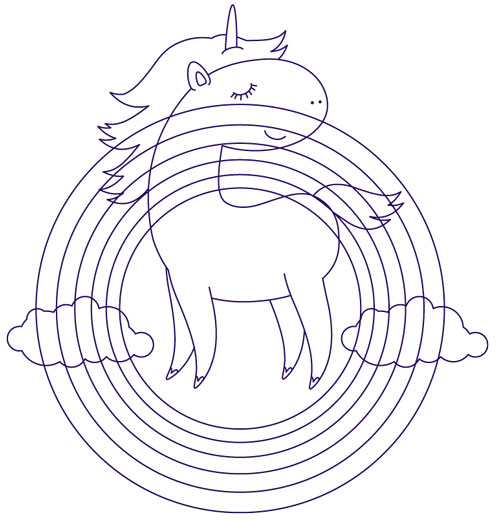
First, draw a large circle, use the Ellipse Tool (L) and remember to hold down the Shift key so that the drawing is a circle. Create five copies of this circle with decreasing radius. Go to Effect> Distort & Transform> Transform and enter the options as shown below with all copies. Expand these circles: Object> Expand Appearance.
Step 2:
Now we will learn how to draw a cloud. Just draw a circle using the Ellipse tool (L) and remember to hold down Shift. Create multiple copies for this circle (Control-C and Control-V a few times) and resize some images. Distribute these circles so they intersect in the cloud shape.
Finally, select all circles and merge them using the Unite button on the Pathfinder panel (Window> Pathfinder). Our cloud is ready.

Create a copy of this cloud and place them on both sides of the unicorn.
Step 3:
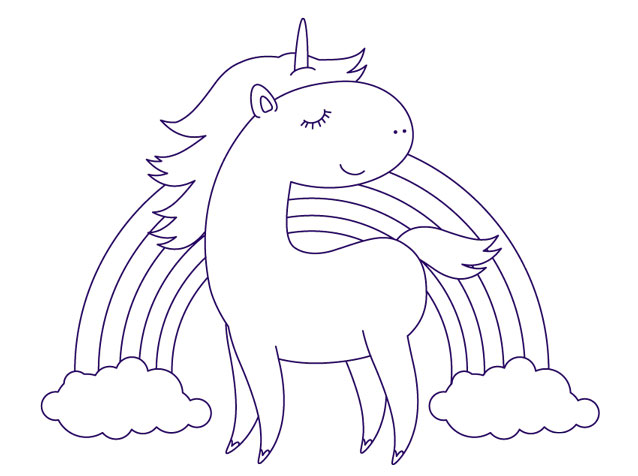
In this step, we will cut the rainbow lines delivered with the image of unicorns and clouds. Before cutting the rainbow lines, ungroup them by going to Object> Ungroup. Repeat a few times until the Ungroup command is no longer active.
Now, select the Scissors Tool (C) and click on the rainbow paths intersecting with unicorns and clouds, erase unnecessary parts to the rainbow image that appears behind the unicorn and the cloud.
3. Fill in the image you just created
Step 1:
Select all objects in the image (Control-A) , click Object> Expand , in the pop-up window choose Stroke> OK . To color the object, create a rectangle (Rectangle Tool (M)) , fill any color in this image.
This rectangle must cover the entire image and be placed behind (Control-X, Control-B) . Press Control-A , select Trim on the Pathfinder panel. Then ungroup the whole image or the image will be grouped and the rectangular frame will disappear.
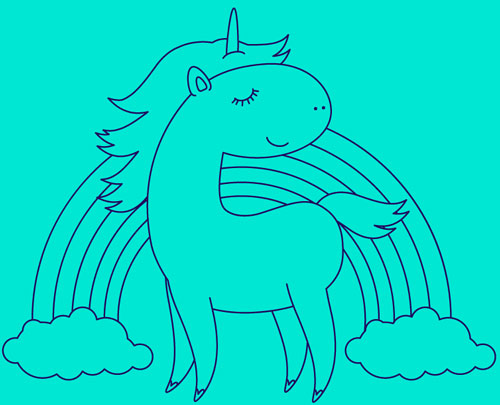
The resulting image will look like this:
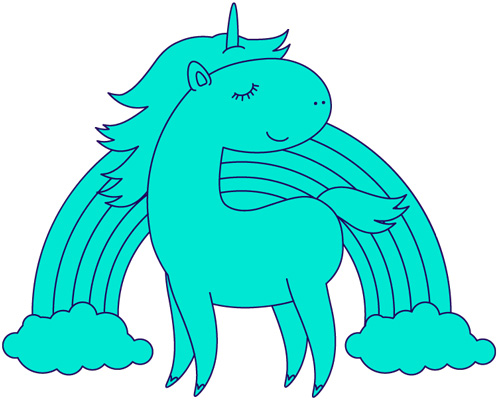
Step 2:
You can now change the colors of different parts of the image to your liking.
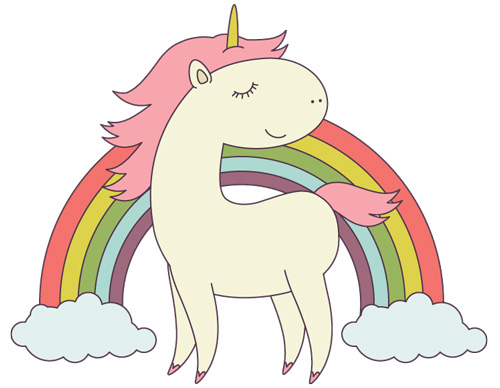
Step 3:
If you want, you can add a few stars around the image. To create stars, use Star Tool , remember to hold Control key on the keyboard while drawing.
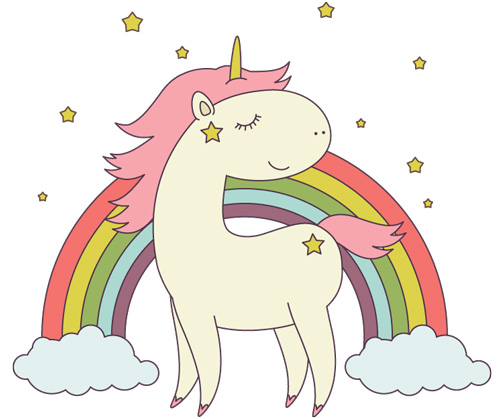
Step 4:
Add a size square 850px by 850px behind to make the background.
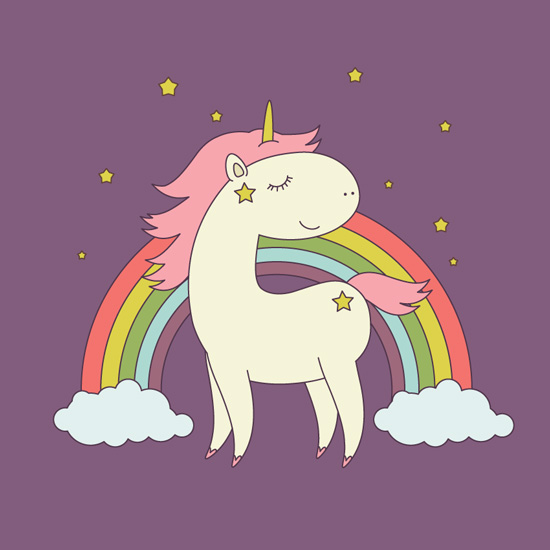
Done! The work is complete!
It can be seen that by using simple techniques and transformations you can create a funny image that looks as if you have used more complex tools.
Try it, not too hard. Comment your results to share with TipsMake.com. Good luck!


 How to cut a circle image on Paint
  How to fix the error of saving JPEG images into JFIF on Chrome
  Instructions on how to crop a circle image online
  How to create a 3x4 photo in Paint
  How to batch format photos in Windows 10
  How to delete text in photos with Paint