Instructions to enable/disable Driver Verifier to avoid system errors
Driver Verifier on Windows 10 helps check for driver errors but can cause blue screen (BSOD). You need to know how to enable/disable it properly to avoid system errors. TipsMake will guide you in detail.
Table of Contents
Need to check for faulty drivers on Windows 10 but are worried about running into problems? This guide helps you safely enable/disable Driver Verifier to avoid unwanted system errors.
How to run Driver Verifier
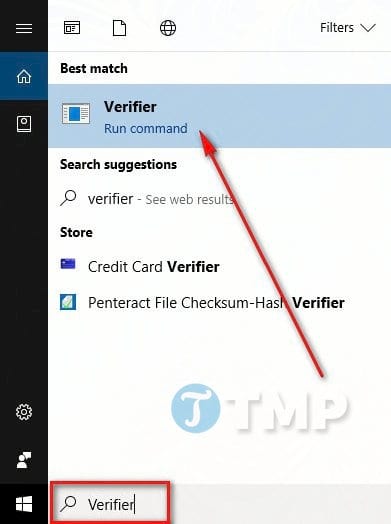
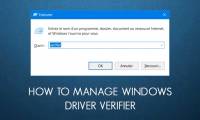
The most common way is to type Verifier into the Search box on the Taskbar, then click Verifier Run command .
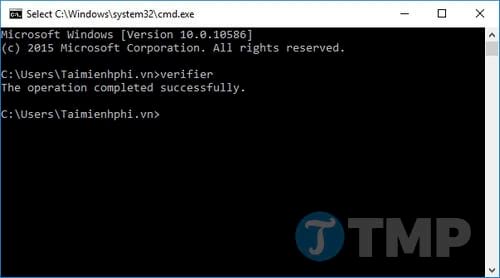
Alternatively you can also open CMD, and type Verifier in there and press Enter.
Finally, you can open the Win 10 Task Manager , then create a new task and select to open Verifier. To do this, click File , then select Run new task .

On the Create new task window, in the Open box, enter Verifier and click OK.

The Verifier will now run.
Configure Driver Verifier settings
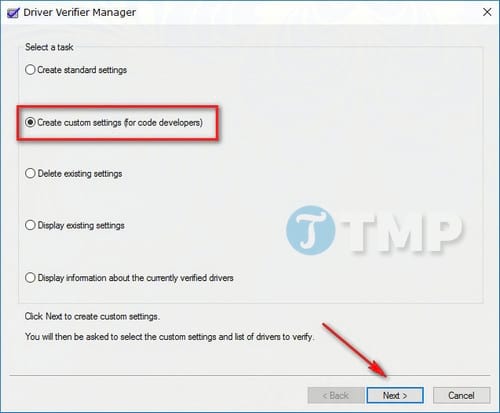
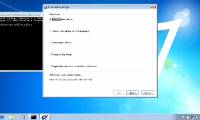
Once Verifier is open, the next step is to configure and enable the settings for Verifier to work properly. First, select the Create custom settings (for code developers) option , then click the Next button at the bottom.
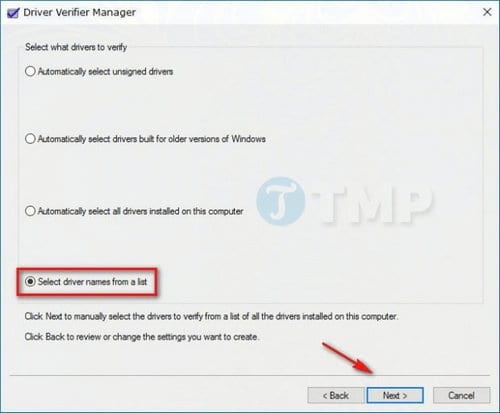
Check Select driver names from a list , then select the Next button again.
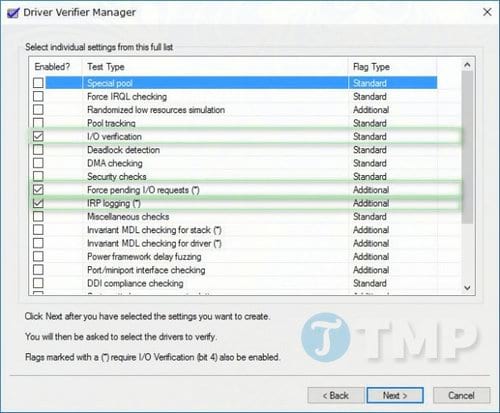
Next, check the options I/O verification , Force pending I/O requests and IRP Logging and click Next .
All you need to do now is check the list and check all the non-Microsoft drivers. To see if the drivers are from Microsoft or not, look in the Provider column.
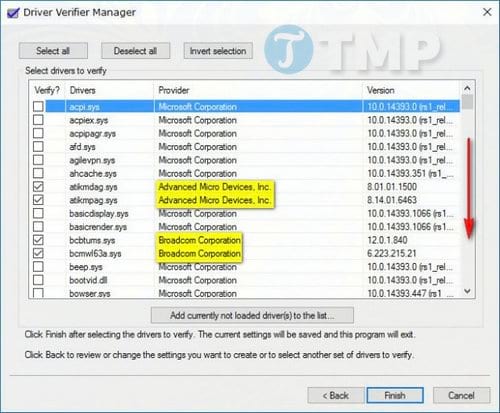
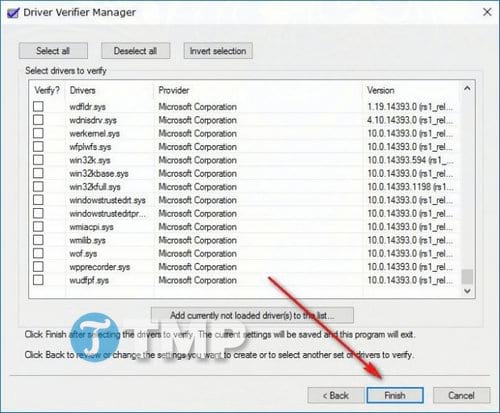
Click the Finish button at the bottom of the list.
How to disable (turn off) Driver Verifier?
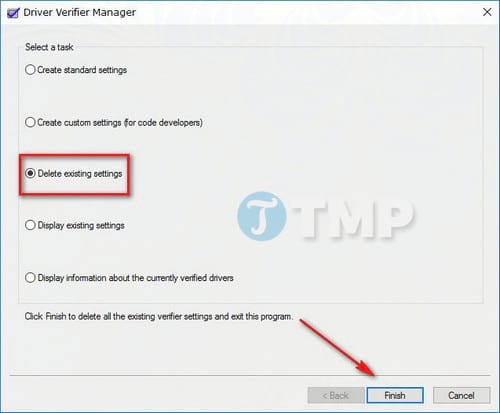
If you want to disable it completely, just run Verifier again like in the steps above (via the Search box, Command Prompt or Task Manager), then select Delete existing settings from the menu. Then click the Finish button to turn off (disable) Driver Verfier.
Driver Verifier helps check for faulty drivers on Windows, but can cause blue screen errors (BSOD) if not used properly. If you encounter problems, you can disable Driver Verifier using Command Prompt or enter Safe Mode to fix driver errors.
Was this article helpful?
Your feedback helps us improve.
Related Articles
 How to use Driver Verifier on Windows 104 minutes read
 Learn about Driver Verifier in Windows 109 minutes read
 Android System Key Verifier protects you from scammers and impersonators without you even knowing it.9 minutes read
 3 Way How To Install Driver Windows 105 minutes read
 Summary of driver error codes on Windows and how to fix them (Part 1)25 minutes read
 Instructions to fix Driver Power State Failure on Windows4 minutes read
Reader Comments 0
Sign in with email or Google to join the discussion.