How to set password to protect files on Windows 10
Want to protect your data on Windows 10? BitLocker, WinRAR, 7-Zip and OneDrive are useful tools. In this article, TipsMake will guide you how to set a password to protect your files most securely.
Table of Contents
Protecting files on Windows 10 with a password helps increase security. Below, TipsMake will guide you through 3 ways to set file settings easily and effectively.
Method 1: Using LockNote
LockNote is a free text editor that helps you protect your notes by creating encrypted executable files. Instead of saving them as regular text files, LockNote integrates the content into an executable file (.exe) and requires a password to open.
To use, simply copy the content to be protected, paste it into LockNote, then save it and set a password. When you need to access it, double-click the executable file, enter the password and you can view the content. The steps are as follows:
Step 1 : Download the software to your computer.
- LockNote download link
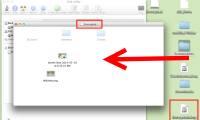
Next, unzip the Zip file you just downloaded to get the LockNote folder, then open the LockNote folder you just unzipped to find the LockNote executable file.
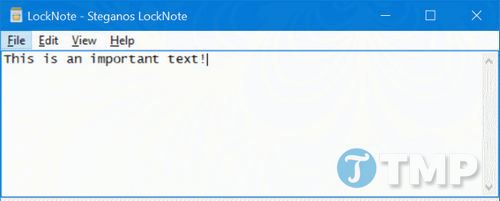
Step 2 : Double-click the executable file to run the LockNote program. By default, LockNote will display some text, you can delete all of this text, then copy and paste the text you want to protect with a password.

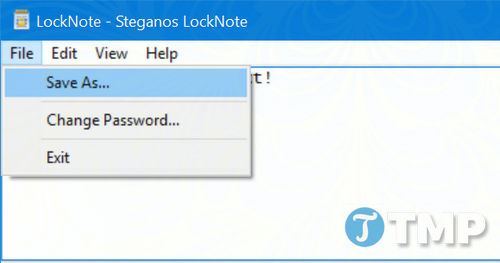
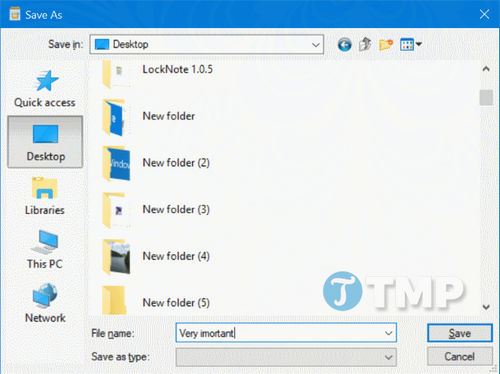
Step 3 : Click on the File menu , then select the Save option , select the location to save the file, name the file, then click the Save button to be asked to enter the protection password.
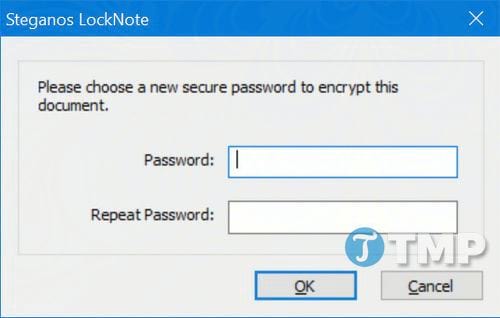
When prompted, enter your password and re-enter it to confirm. Click OK .
Double-click the executable file you created earlier, then enter the password to view the contents of the file.
Method 2: Using 7-Zip
In this method you compress the file using 7 Zip in that file containing your text, then create a password to protect the Zip file. To access the text file inside the protected Zip file, you will have to enter the password. Here is how to do it:
Step 1 : Download 7-Zip to your computer and install it.
Download 7-Zip to your computer and install it here: Download 7 Zip
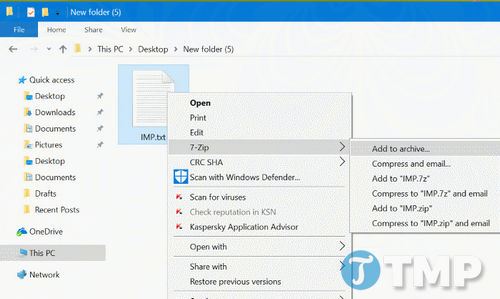
Step 2 : Right-click on the file you want to password protect, click 7-zip and select the Add to archive option . The 7-Zip Add to Archive dialog box will appear on the screen.
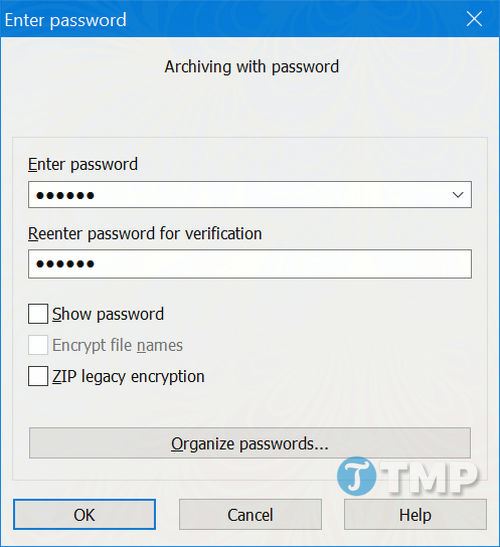
Step 3 : Here, under Archive , enter a name for your password protected Zip file and choose a location to save the file.
In the Archive format section , select Zip . In the Encryption section , select the default ZipCrypto or choose the popular encryption AES-256 .
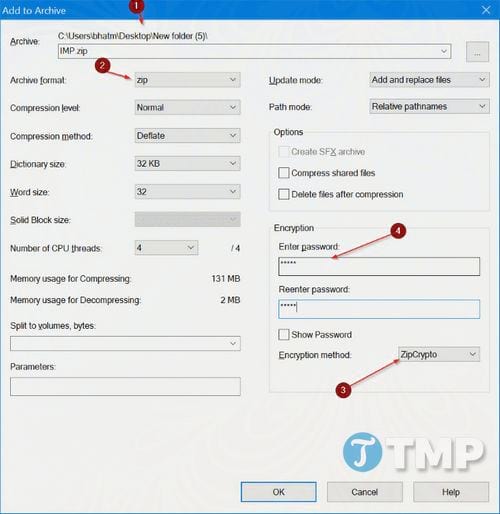
Finally enter the password you want to use to protect the text file, then enter it again to confirm and click OK .
Method 3: Using WinRAR
WinRAR also has similar features to 7-Zip, so you can use either of these two file compression and decompression software to set up a password to protect text files on Windows 10.
Step 1 : Download WinRAR to your computer and install it.
Download WinRAR to your computer and install it here: Download WinRAR
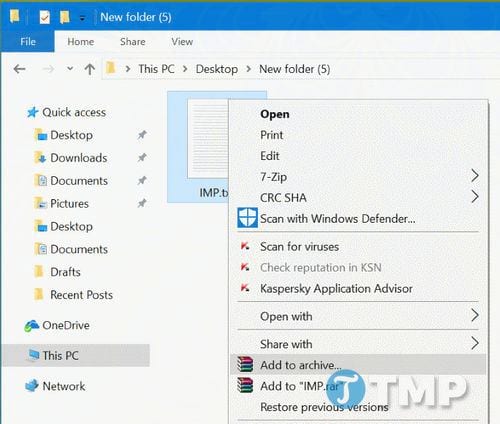
Step 2 : Right-click on the text file you want to protect, then click the Add to archive option to open the Archive name and parameters dialog box.
Step 3 : In the General tab , enter a name for the Zip file, select ZIP in the Archive format section , then click the Set Password button .
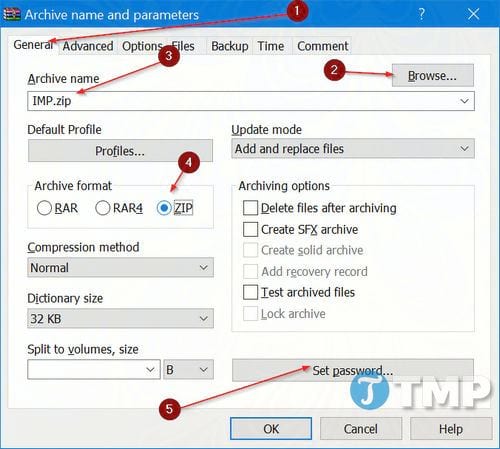
Step 4 : Enter the password you want to use, then re-enter it. Click OK .
You can password protect files on Windows 10 using software such as WinZip, Bandizip, PeaZip or use the built-in feature in Word, Excel to encrypt documents. If you do not want to install third-party software, try protecting Word, Excel files with a password to ensure data security.
Was this article helpful?
Your feedback helps us improve.
Related Articles
 How to Set Password for Folder and File in Windows8 minutes read
 How to Password Protect PDF Files7 minutes read
 Instructions for setting password to protect files and folders in Windows7 minutes read
 How to Password Protect a Website8 minutes read
 How to Password Protect Folders5 minutes read
 Password setting tools for PDF files7 minutes read
Reader Comments 0
Sign in with email or Google to join the discussion.