How to Install and Use Fonts in Linux
But while font rendering is far from perfect in Linux, one thing this open source platform does well is allow users to easily manage their fonts. From selecting, adding, and adjusting, you can work with fonts quite easily in Linux.
Table of Contents
Although font rendering has come a long way over the past few years, it continues to be a problem in Linux. If you compare the look and feel of similar fonts on Linux and macOS, the difference is clear. This is especially true when you are glued to the screen all day.
But while font rendering is far from perfect in Linux, one thing this open source platform does well is allow users to easily manage their fonts. From selecting, adding, and adjusting, you can work with fonts quite easily in Linux.
Along TipsMake find out details through the following article offline!
Add new fonts in Linux
There are two ways to do this:
- Provides fonts on a per-user basis.
- Make the font available system-wide.
First, let's see how to add fonts on a per-user basis. The first thing you have to do is find the font. Both True Type Fonts (TTF) and Open Type Fonts (OTF) can be added. To add fonts manually, create a new hidden directory in ~ / called ~ / .fonts. This can be done with the command:
mkdir ~ / .fonts
With that folder created, move all your TTF and OTF files into the directory. Any fonts you add to that folder will now be available for use by the installed applications. But remember, those fonts will only be available to one user.
If you want to make that collection of fonts available to everyone, here's what you need to do:
Step 1. Open the Terminal window.
Step 2. Change the folder containing all your fonts.
Step 3. Copy all those fonts using sudo cp * .ttf * .TTF / usr / share / fonts / truetype / and sudo cp * .otf * .OTF / usr / share / fonts / opentype.
The next time a user logs in, they will have access to all those beautiful fonts.
The GUI font manager in Linux
There are several ways to manage your fonts in Linux, through the GUI. How to do this will depend on the desktop environment. First, let's check out KDE. With KDE included with Kubuntu 18.04, you should see a font management tool - Font Management - pre-installed. Open that tool and you can easily add, remove, enable, and disable fonts (and get information about all installed fonts). This tool also makes it easy to add and remove fonts for personal and system-wide use.
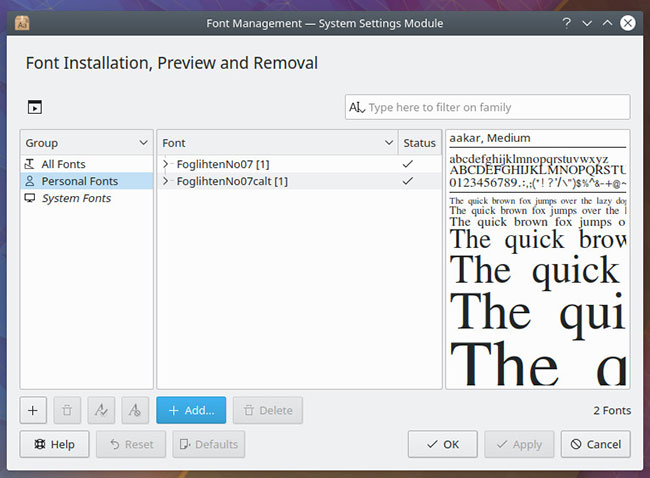
Let's say you want to add a font specific to your personal use. To do this, download your font and then open the Font Management tool. In this tool, click Personal Fonts, then click the + Add button.
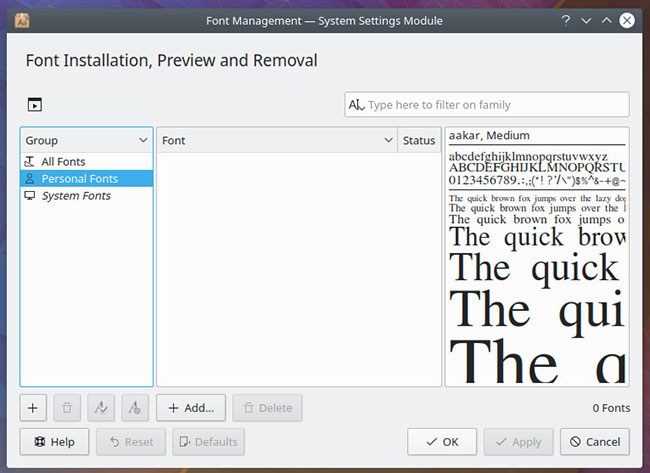
Navigate to the font location, select them and click Open. Your font is then added to the Personal section and is immediately available for your use.
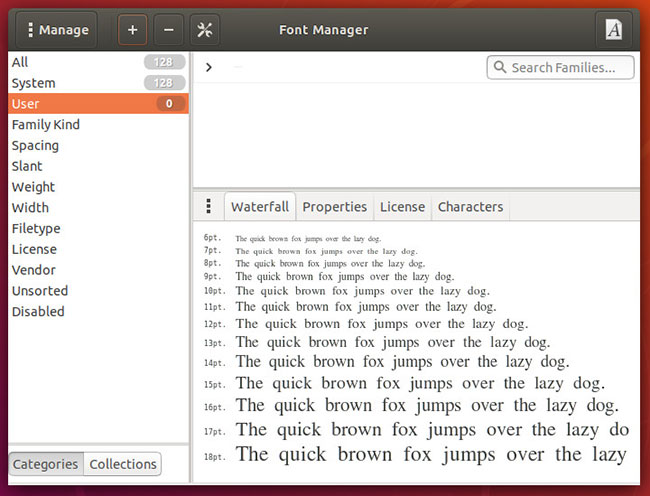
To do the same in GNOME, you need to install an application. Open GNOME Software or Ubuntu Software (depending on which distribution you are using) and search for Font Manager. Select Font Manager and then click the Install button. Once the software is installed, launch it from the on-screen menu. With the tool open, install fonts on a per-user basis. Here's how to do it:
Step 1. Select User from the left pane.
Step 2. Click the + button at the top of the window.
Step 3. Navigate to and select downloaded font.
Step 4. Click Open.
Edit fonts in Linux
There are 3 concepts you must first understand:
Font Hinting: The use of mathematical instructions to adjust the appearance of the font border so that it is aligned with the rasterized grid.
Anti-aliasing: This technique is used to add more realism to a digital image by smoothing jagged edges on curves and diagonal lines.
Scaling factor: An expandable unit that allows you to increase the point size of the font multiple times. So if your font is 12pt and you have the aspect ratio of 1, then the font size will be 12pt. If your aspect ratio is 2, the font size will be 24pt.
Let's say you have your fonts installed, but they don't look as good as you would like. How do you adjust the font's appearance?
In both the KDE and GNOME desktops, you can make a few tweaks. One thing to consider with font tweaking is that everything is subjective. You may have to constantly tweak it until you get the font exactly the way you want it (depending on your specific needs and preferences).
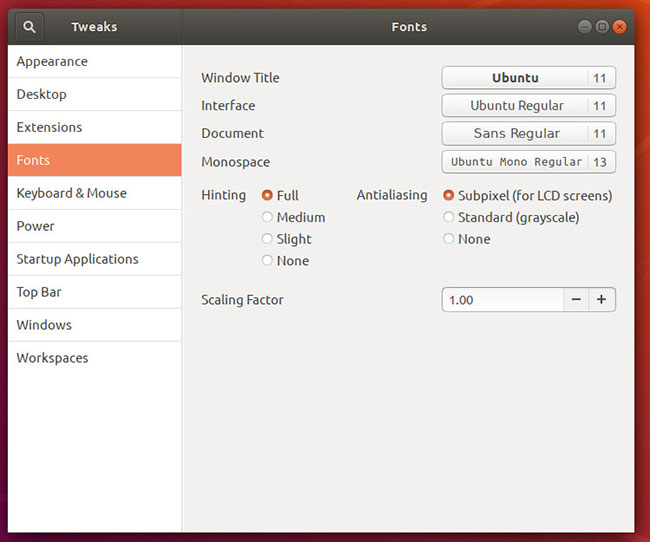
First, consider KDE. Open the System Settings tool and go to Fonts. In this section, you can not only change the different fonts, but also enable and configure the anti-aliasing and font scaling factor.
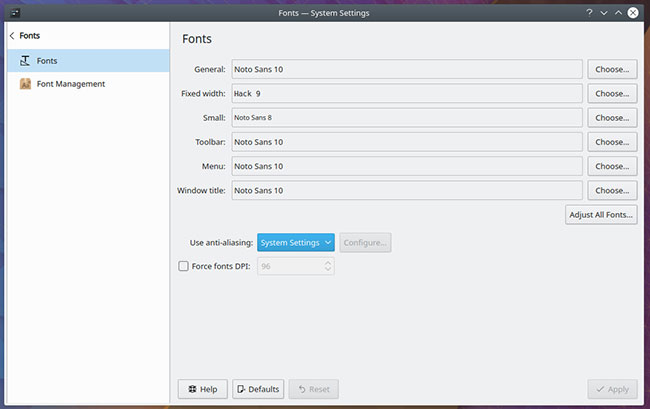
To configure anti-aliasing, select Enabled from the drop-down menu, and then click Configure. In the results window, you can configure the exclusions range, subpixel rendering type, and hinting type.

Once you've made your changes, click Apply. Restart any running apps and the new settings will take effect.
To do this in GNOME, you must use Font Manager or GNOME Tweaks. For this, GNOME Tweaks is the better tool. If you open GNOME Dash and don't find Tweaks installed, open GNOME Software (or Ubuntu Software) and install GNOME Tweaks. Once installed, open it and click on Fonts section.
Was this article helpful?
Your feedback helps us improve.
Related Articles
 How to install and remove fonts on Linux7 minutes read
 How to install and remove fonts on Mac10 minutes read
 How to install new fonts in Windows, Mac and Linux6 minutes read
 How to install and uninstall fonts on Windows 113 minutes read
 How to Install Custom Fonts in Ubuntu2 minutes read
 The simplest way to install additional fonts for computers and laptops3 minutes read
Reader Comments 0
Sign in with email or Google to join the discussion.