Table of Contents
This guide provides a clear overview of pc windows 11, including Camera Management on Windows 11 PC, Modify the Camera's Security Settings. Use it to understand the topic, compare the available options, and make a more informed decision.
This article will show you how to manage the camera on a Windows 11 computer, including modifying privacy settings to ensure the overall security of the system.
Camera Management on Windows 11 PC
You should first modify the system's default privacy settings for the camera. Above all, make sure that you are not giving unrestricted access to your camera.
Modify the Camera's Security Settings
Step 1: Open the Windows 11 Settings application by pressing the Win + I key combination.
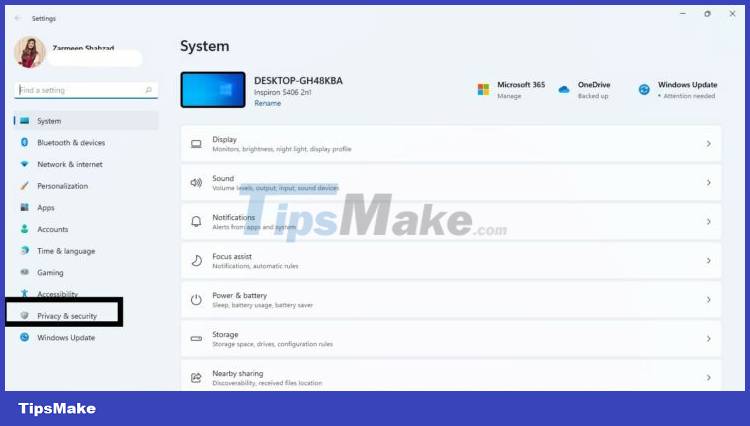
Step 2: On the Settings application interface that appears, click on Privacy & Security in the left pane.
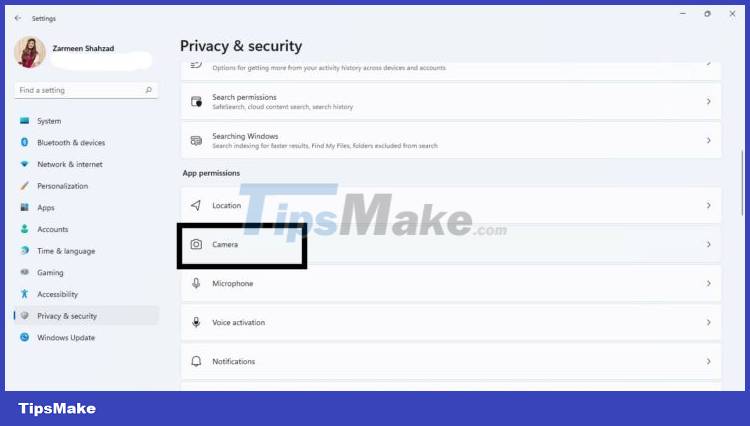
Step 3: Navigate to the location of the Camera entry in the App Permissions section and click on it.
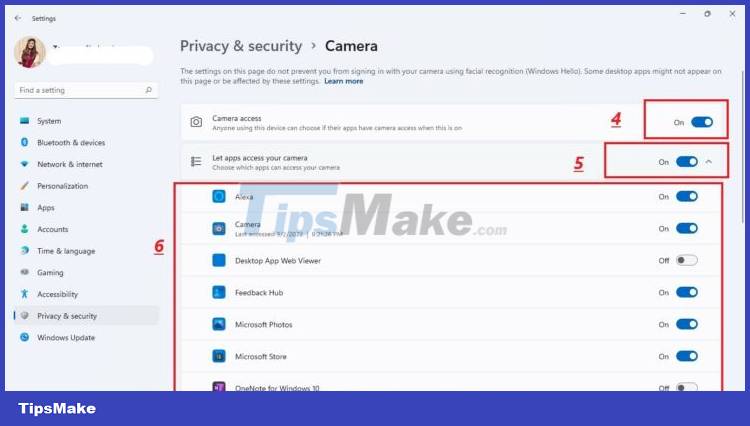
Step 4: Make sure the toggle next to Camera access option is set to 'On'
Step 5: If you want all apps on the system to have access to the Camera, set the Let apps access your camera switch to On.
Step 6: You can also decide which apps are allowed to access the camera and vice versa by customizing the corresponding toggle next to them. You should do this carefully, as granting camera access indiscriminately can sometimes seriously compromise your privacy and security.
Turn Off or on the Camera on Windows 11
If for some reason, you want to turn off the camera and don't need to use it for a while, follow the steps below:
Step 1: Open the Windows 11 Settings application by pressing the Win + I key combination.
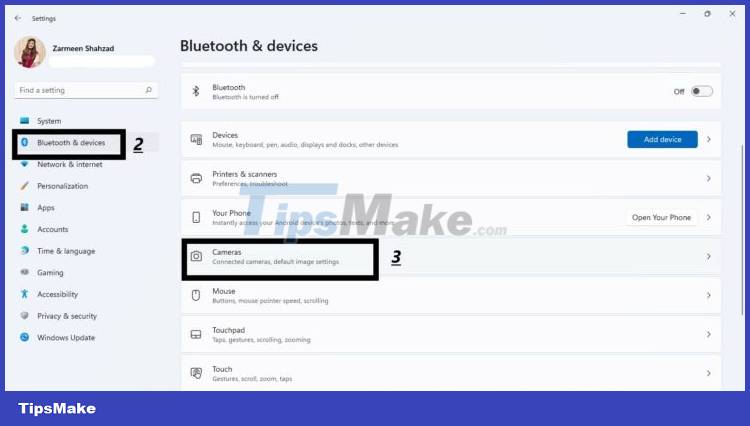
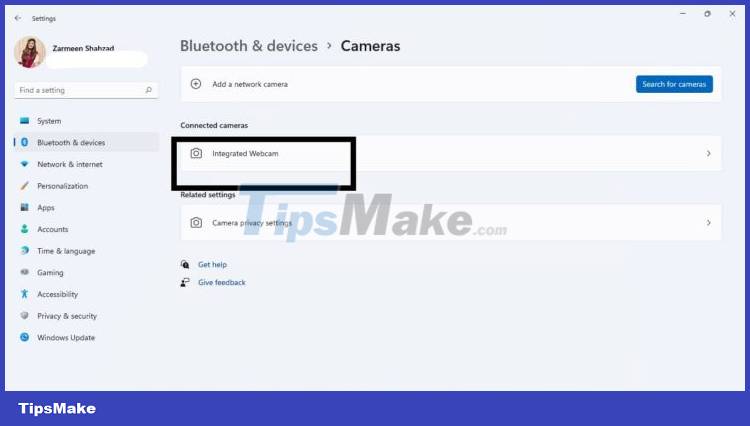
Step 2: On the Settings application interface that appears, click on Bluetooth & devices from the left pane.
Step 3: Next, look to the right pane and select Camera.
Step 4: In the Connected cameras section, click to select the camera you want to turn off.
Step 5: Click to select Disable.
Step 6: Confirm your action by selecting Yes.
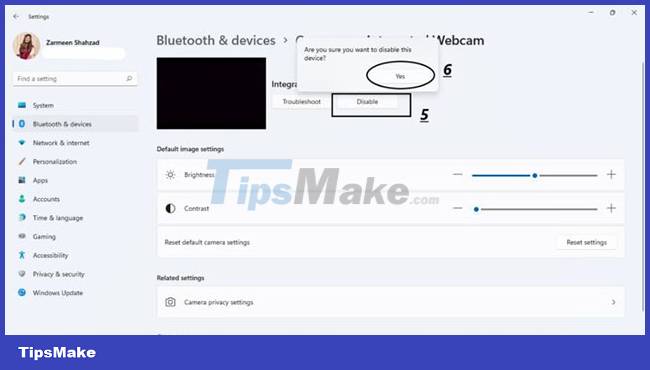
Follow the same procedure to turn the camera back on when needed.
Above are the basic settings to help you better manage the camera on your Windows 11 PC.
Conclusion
Understanding PC Windows 11 makes it easier to compare options, avoid common mistakes, and apply the information in this guide more effectively. Review the relevant requirements before making changes or choosing a solution.
FAQ
What is PC Windows 11?
Above all, make sure that you are not giving unrestricted access to your camera.
Why is PC Windows 11 important?
Understanding PC Windows 11 helps you evaluate features, compatibility, performance, and potential limitations before you choose a product or follow a procedure.
What should you consider when using or choosing PC Windows 11?
Consider your specific goal, compatibility requirements, available features, cost, security, and the practical recommendations described in this guide.
Related Articles
 Surveillance Camera: Should Buy Wired or Wi-Fi?11 minutes read
 Instructions to Make Your Camera from a Simple Matchbox2 minutes read
 Smartphone Cameras Will Gradually Replace DSLR Cameras Completely9 minutes read
 Things to Know Before Installing a Wired Security Camera System6 minutes read
 Basic Guide When Buying Digital Cameras7 minutes read
 Keep Home Security Cameras Safe: Step-by-Step Guide12 minutes read
Reader Comments 0
Sign in with email or Google to join the discussion.