Instructions for installing UltraViewer on Windows 11 and how to use it
UltraViewer is free, easy-to-use remote computer control software. Download and install UltraViewer on Windows 11 to help users work and repair computers remotely without having to go onsite. Below is an article explaining how to install and use UltraViewer on Windows 11 in the simplest way.
At the present time, there are many software that support remote computer control such as Teamviewer or Splashtop, AnyDesk. but Ultraview is the most popular tool because it has a light installation capacity, is multilingual, and full of features. Fully featured and supports all Windows operating systems. Download and install Ultraviewer, control the computer remotely without having to sit directly on the computer that needs support.
Instructions for downloading and installing Ultraviewer for Windows 11
Step 1: Download the latest version of Ultraviewer for Windows 11 here: Download Ultraviewer
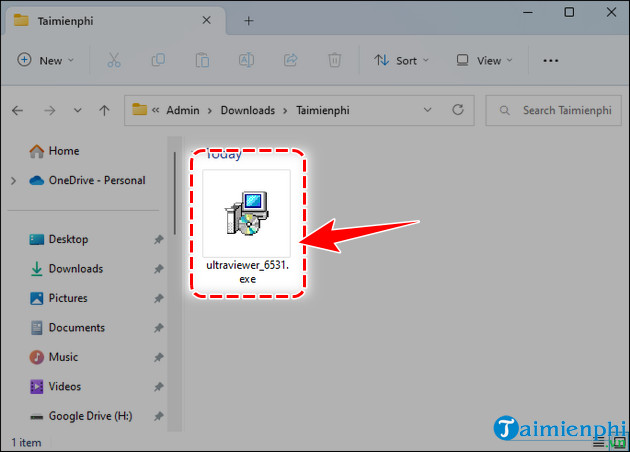
Step 2: Click directly on the downloaded Ultraviewer for Windows 11 installation file .
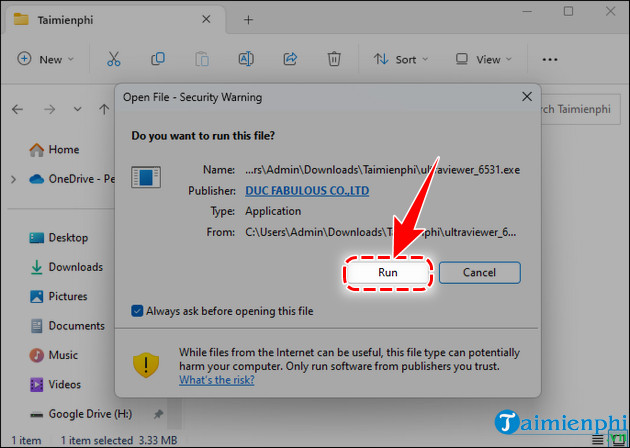
Step 3: Select Run at the Open File notification panel .
Step 4: Select Create a desktop shortcut => click Next => Install and the process of installing Ultraviewer for Win 11 takes place completely automatically.
- Create a desktop shortcut: Create an Ultraviewer Icon for Win 11 on the main screen.

Step 5: After finishing, check Launch Ultraviewer => click Finish .

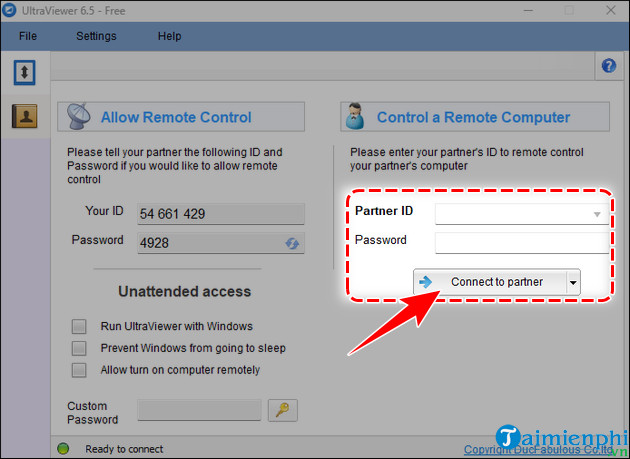
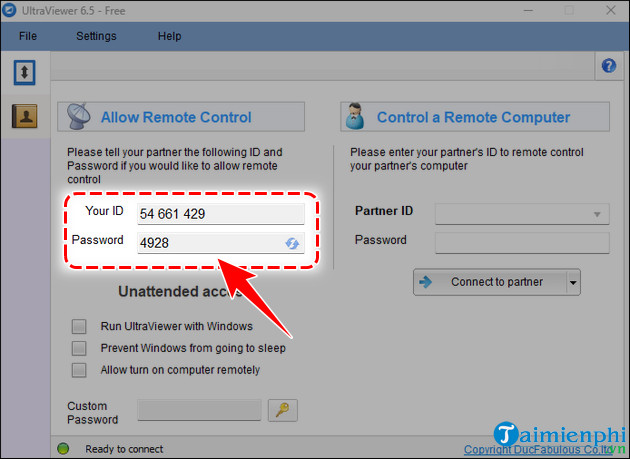
- Ultraviewer interface for Win 11 will be as shown below.

- If the ID and Password are shared , enter the information in the section on the right side of the software, click Connect to partner to view the machine and control it.
- If you want to share control of the computer you are using with other users, send them information at Your ID and Password .
During the process of installing UltraViewer for Win 11, unfortunately the error Cannot Create Service UltraViewer - Error Code 1072 appears. Don't worry, please follow the instructions in the article to fix Cannot Create Service UltraViewer error when installing that Taimienphi mentioned above. Previous article, please fix this situation.
- How to install UltraViewer, remote computer control software.
- Instructions on how to fix the issue of the ID not showing on Ultraviewer.
- How to fix Ultraview not being able to retrieve ID.
- How to fix the common error UltraViewer when connecting to a remote computer
- Simple UltraViewer usage guide for remote computer control.
- How to use Ultraviewer to control remote computers
- 4 common actions users perform when using Ultraviewer
- How to turn off Ultraviewer starts with the computer
- Steps to change Taskbar position on Windows 11
- Download Ghost Windows 11 Pro Full Soft v1.0 Best New Standard 2021
- How to report Windows 11 errors, suggest Windows 11 features for Insider Preview users
- List of MSI motherboards that support Windows 11
- Steps to open Local Security Policy on Windows 10, Windows 11
- How to use Explorer Patcher, a tool to bring Windows 10 Taskbar to Windows 11
- How to bypass TPM 2.0 requirement when installing Windows 11?
- Download Ghost Windows 11 Pro No Soft v1.0 2021
- How to disable Sleep mode on Windows 11
- How to open multiple images side by side for comparison on Windows 11


-
 The simplest way to remotely power on a computer using UltraViewer.
-
How to install the latest version of Ultraviewer for remote computer control.
-
4 common actions users perform when using Ultraviewer
-
Simple UltraViewer usage guide for remote computer control.
-
How to install UltraViewer, remote computer control software.
-
Instructions on how to fix the issue of the ID not showing on Ultraviewer.
 The simplest way to remotely power on a computer using UltraViewer.
 How to install the latest version of Ultraviewer for remote computer control.
 4 common actions users perform when using Ultraviewer
 Simple UltraViewer usage guide for remote computer control.
 How to install UltraViewer, remote computer control software.
 Instructions on how to fix the issue of the ID not showing on Ultraviewer.