Installing Ubuntu in VirtualBox does not need DVD or USB
In the previous tutorial, we presented some basic steps to install Ubuntu in Windows operating system with the option of dual boot using Wubi. And this time, we will focus on using Ubuntu as a virtual machine in VirtualBox. The advantage of this process is that VirtualBox does not require any boot components, besides that VirtualBox and Ubuntu are completely free..
In the previous tutorial, we presented some basic steps to install Ubuntu in Windows operating system with the option of dual boot using Wubi. And this time, we will focus on using Ubuntu as a virtual machine in VirtualBox. The advantage of this process is that VirtualBox does not require any boot components, besides that VirtualBox and Ubuntu are completely free.
Before embarking on the process, please refer to this article to understand the basic implementation, and here we will proceed according to the following steps:
- Install Ubuntu as a virtual machine system
- Install VirtualBox Guest Addition
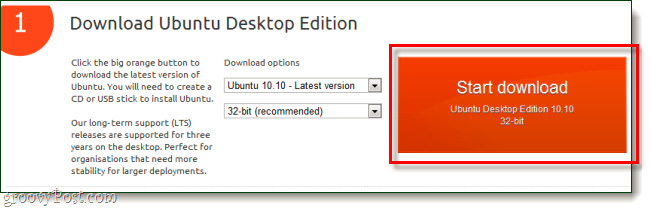
First, you need to download the iso version of the Ubuntu operating system to suit your computer configuration here:
With VirtualBox already installed, start the program and click the New button:

Name the operating system you want to create, select the Linux Operating System and the Ubuntu Version :

After installing the operating system, the system will show details on the main console. Select the component to start and click the Start button:

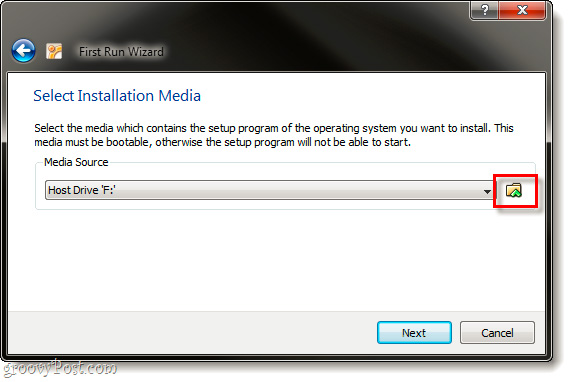
After VirtualBox downloads all the necessary elements, the First Run Wizard notification window will display. At the next screen, the program continues to ask about Media Source , click Browse :
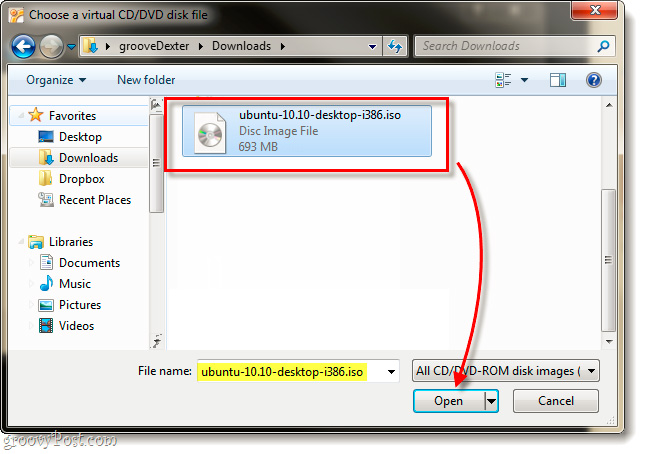
Point to the folder containing Ubuntu 's iso file and download it at the previous step, click on Open :
The window summarizes all the information that will be set up at the last step, checking the last time to make sure there is no mistake. Click Finish :

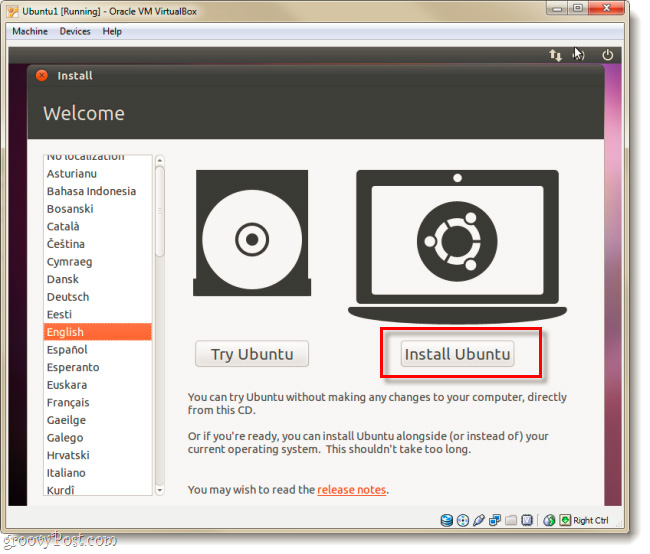
Next, Ubuntu's boot process will start, select the main display language. There are 2 main options for users: Try Ubuntu and Install Ubuntu . Click the Install button to continue:
Check 2 boxes: Download updates while installing and Install this third-party software at the next screen. This process will help the system to be fully installed, but in return, the execution time is longer:

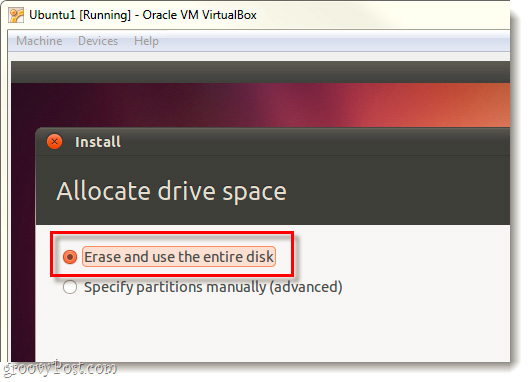
Select Next Erase and use the entire disk:
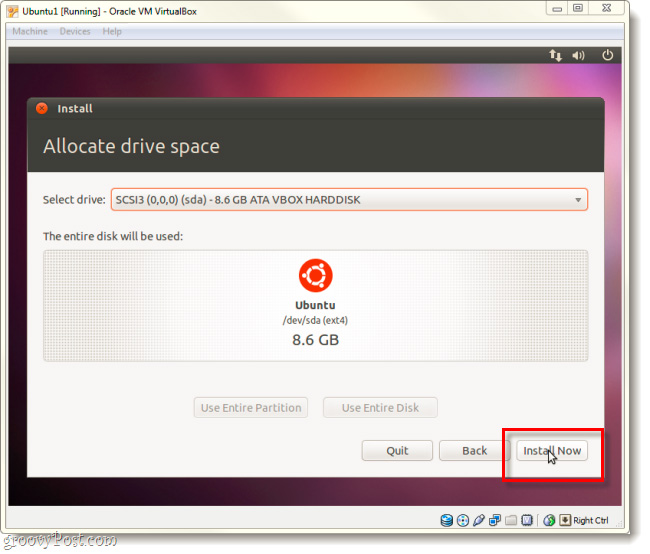
And Install Now in the following step:
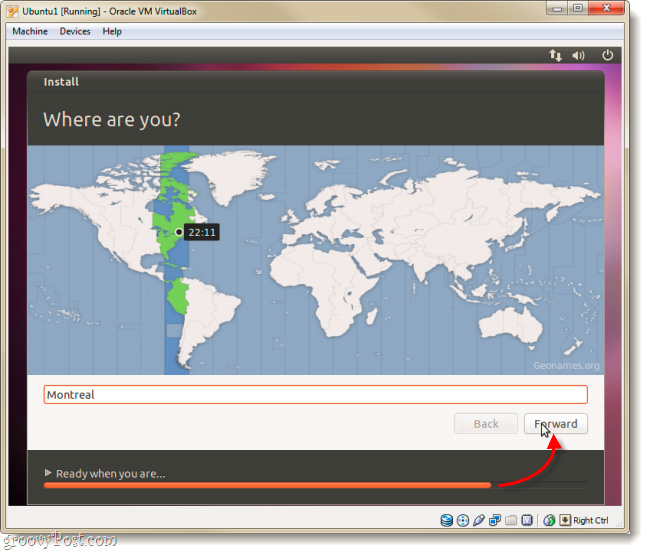
This process will take a long time, please select the corresponding Time Zone in the Install screen. Then press Forward :
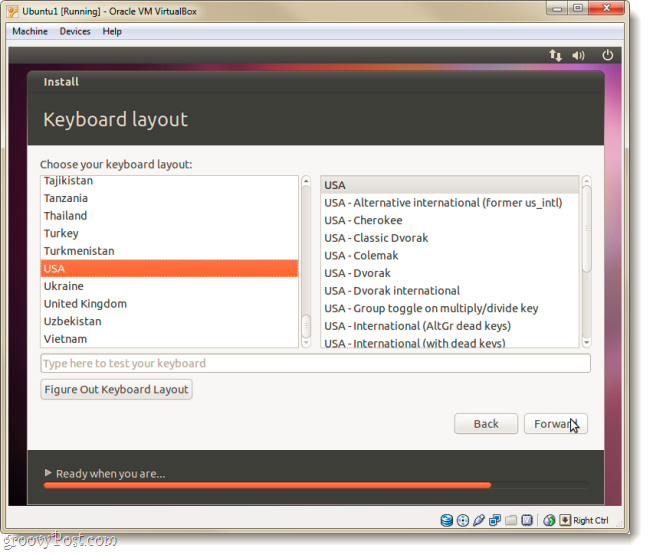
Select next keyboard type and display language:
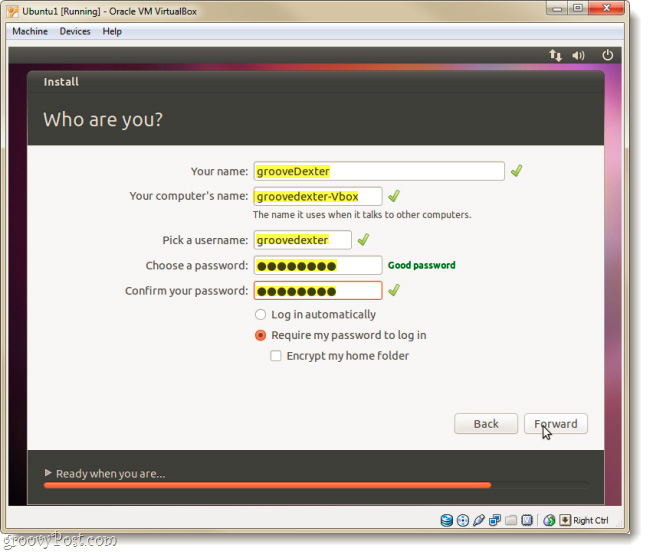
Next, we will need an account to login to Ubuntu . And remember, don't forget the password at this step, otherwise you'll have to repeat all the steps above:
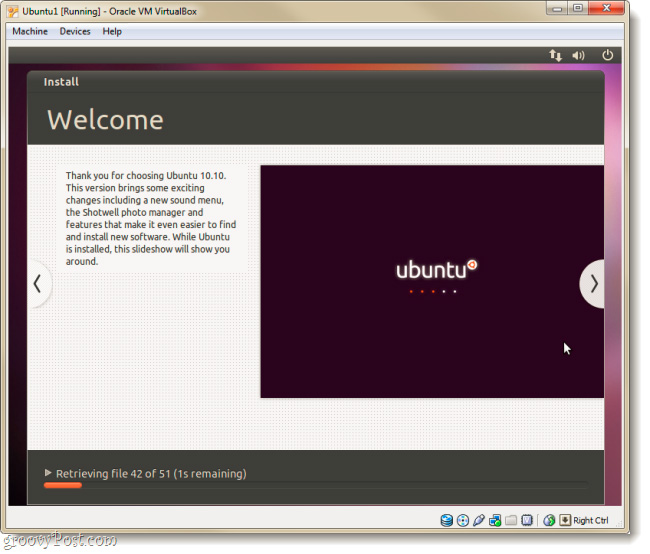
And keep waiting for this process to end:
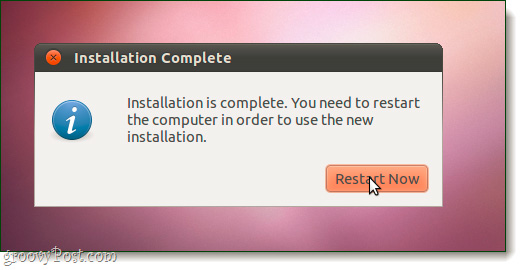
When finished, Ubuntu will ask you to reboot this virtual machine system:
After booting up, Ubuntu is fully installed with components, updated and ready to use. Note that the system will continue to install Ubuntu if the ISO file is still in VirtualBox:

To avoid this problem, we will continue with setting up Virtual Guest Additions
Installing VirtualBox Guest Additions:
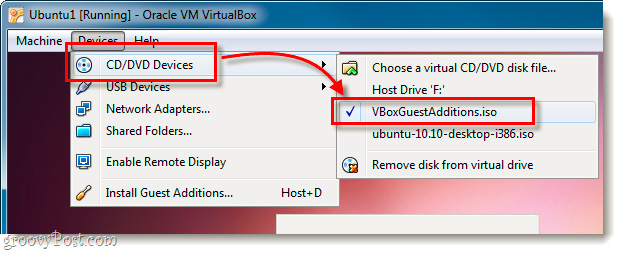
This feature allows Ubuntu to automatically change the resolution when users change the size of the virtual machine working window, integrating the operation of the keyboard and mouse between the virtual machine and user interaction. . At the main monitor screen of the virtual machine, select Devices> CD / DVD Devices menu> VboxGuestAdditions.iso:
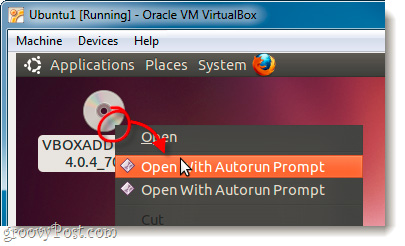
The icon of the installation disc will appear on Ubuntu 's Desktop , right-click and select Open with Autorun Prompt from the menu displayed:
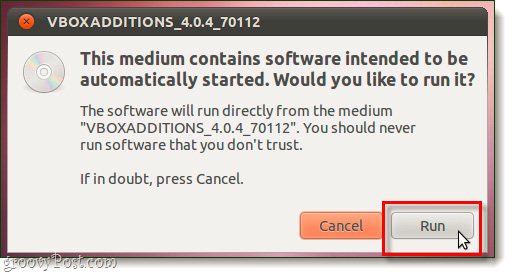
The pop up window displays and asks if the user wants to continue installing, select Run :
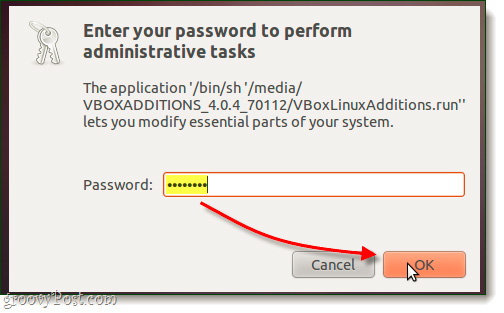
Enter the information of the account you are using:
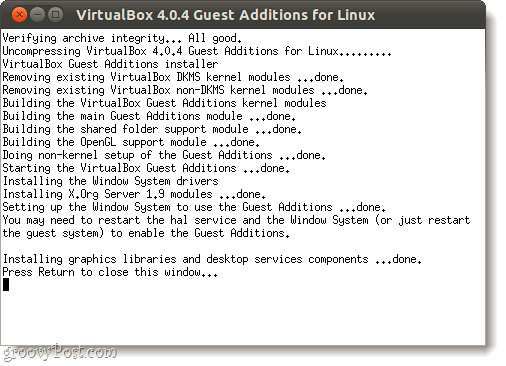
The whole process will be completed within 1-2 minutes:
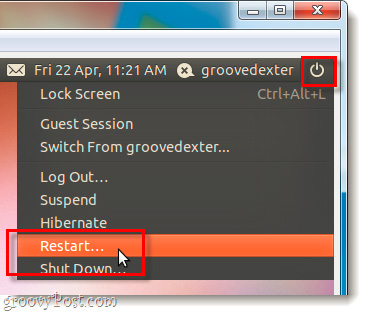
Then restart the virtual machine again:
And now, our Ubuntu system is complete with VirtualBox Guest Additions . Good luck!