Table of Contents
The process for install ubuntu on virtualbox virtual machine is straightforward once you know where to find the right controls. The steps below explain what to do and what to check.
- Instructions for accessing Ubuntu Bash files on Windows
- How to enable automatic system update mode on Ubuntu
- Instructions for installing Google Chrome on Ubuntu operating system
Have you ever tried to install Ubuntu but the computer doesn't have enough space to run? This guide walks you through how to create virtual machines like VirtualBox using another operating system without changing the settings on your current computer. This tutorial will focus on installing VirtualBox and setting up the first virtual machine, showing you how to download, prepare, and install Ubuntu. Please refer to the Instructions on how to install Ubuntu on VirtualBox virtual machine !
Step 1: Download Ubuntu
1. Go to Ubuntu's home page and open the download section.
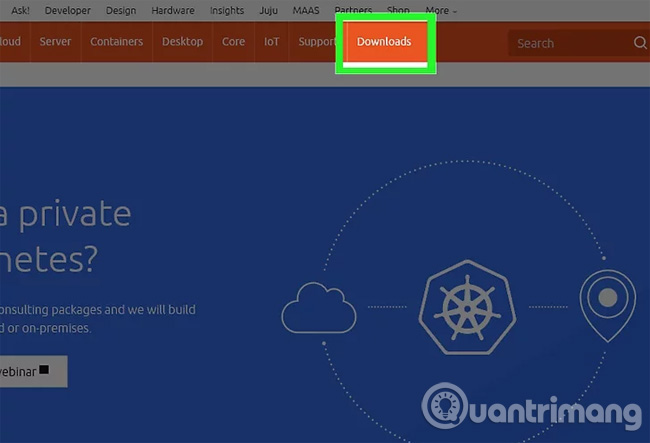
2. Select the appropriate structure from the drop down dialog.

3. Click the ' Begin Download ' button to then download Ubuntu (gnome).

Step 2: Install VirtualBox
1. Download the latest VirtualBox version.

Visit the VirtualBox website and open the download. There are many versions available that are compatible for Windows, Mac and Linux. If you don't know which operating system your computer is running, download the Windows version at the top by clicking on ' X86 / amd64 '.
- Free virtual machine creation software on Windows
- Free virtual machine creation software on Mac OS
- Virtual machine software for Linux
2. Start installation.
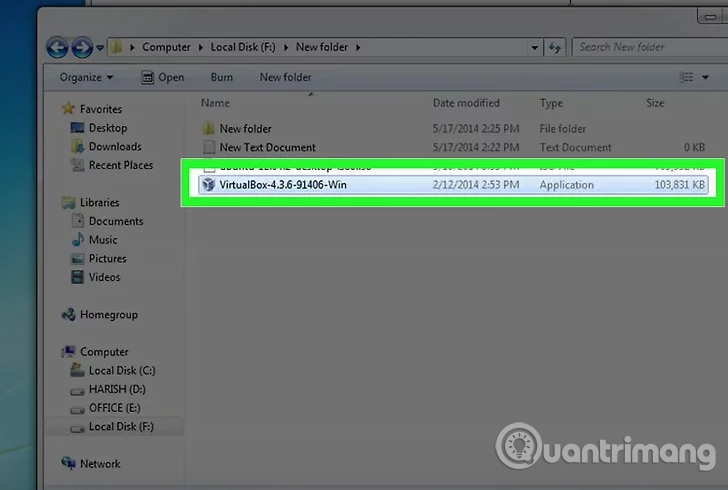
Read and agree to the license agreement. The newer version of the installer (after version 4.3.16 released September 9, 2014) does not display a license agreement when installing.
3. Select ' I accept ' (I agree) then click ' Next' To continue.
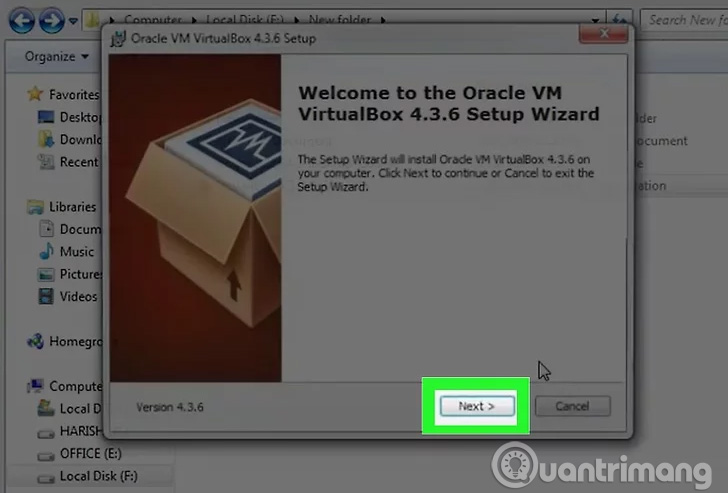
4. Choose installation that supports USB, network or Python.
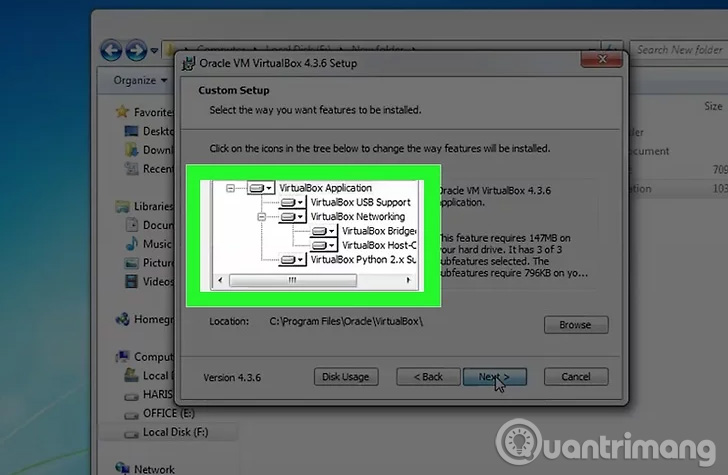
Click the gray icon next to each option and select the red X or ' Entire feature will be unavailable ' (The entire feature will not be available). Click ' Next ' to continue.
- If this is the first time you use a virtual machine, it will eliminate the need to install custom drivers, allowing installation and uninstallation of VirtualBox more easily.
- If you have ever worked with a virtual machine, you can choose these options.
5. Uncheck the Quick Launch Bar Dialog box and click ' Next ' to continue.

6. Click ' Install ' to install VirtualBox.
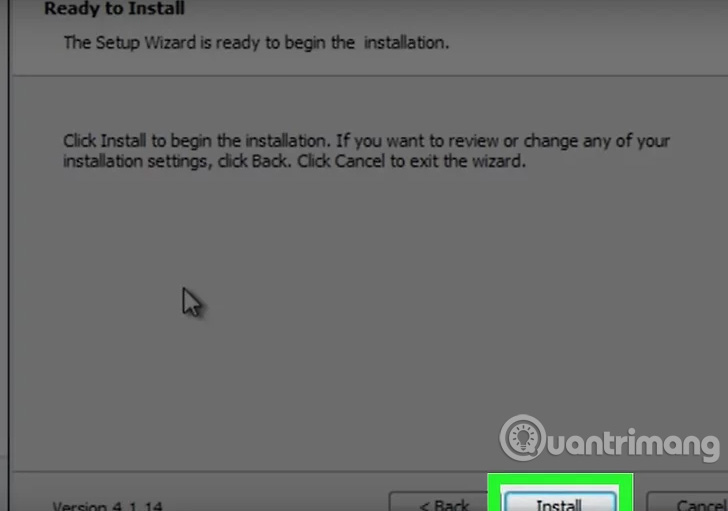
7. click ' Finish ' to open VirtualBox.

Step 3: Create a new virtual machine
1. On VirtualBox, click the ' New ' button to start the wizard to install the virtual machine.
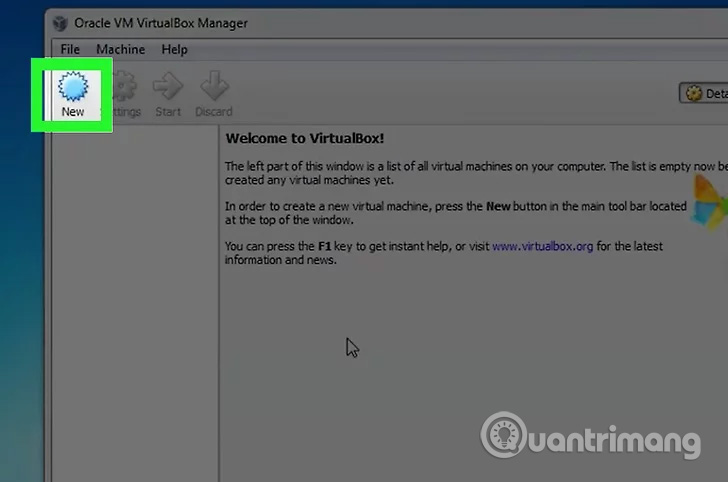
2. Name the virtual machine and select the operating system you are using.
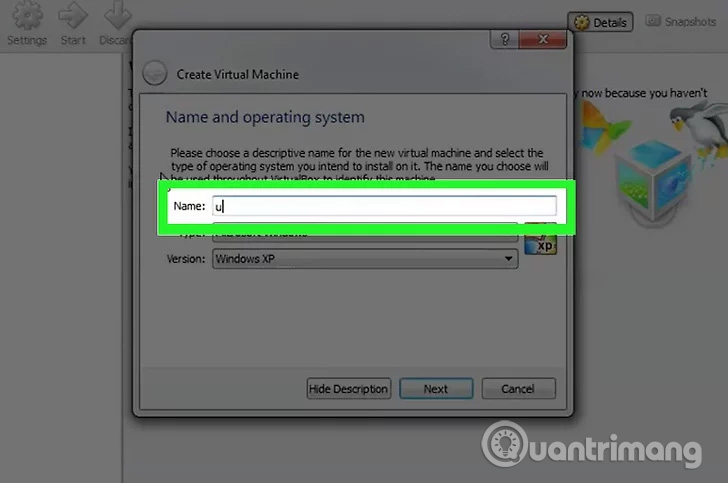
Click ' Next '. In this example, you will install Ubuntu. Type any name in the Name Field (like Ubuntu or Linux). For ' Operating System ', select ' Linux '. The version will automatically default to ' Ubuntu '. click ' Next ' when done.
3. Select the amount of virtual machine memory used and click ' Next '.
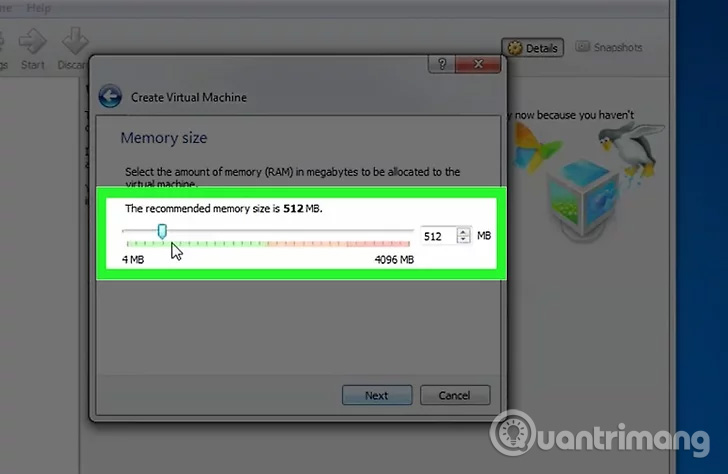
When selecting the operating system in the previous step, VirtualBox will automatically suggest the appropriate memory capacity. If you find this number incorrect, you can drag the slider or enter a new number in the dialog box. click ' Next ' when done.
4. Click ' Next ' to create a new virtual hard drive, then then click 'Next'. This is the opening of the second tutorial to create a new virtual hard drive.
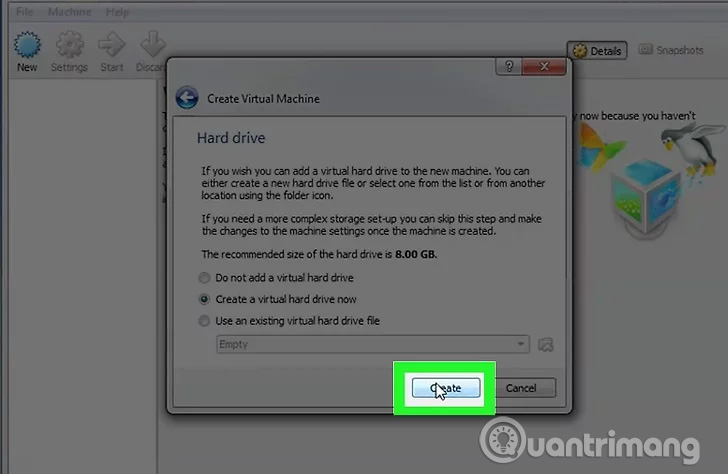
5. Select " Fixed-Size Storage " or " Dynamically Expanding Storage " (depending on your needs).
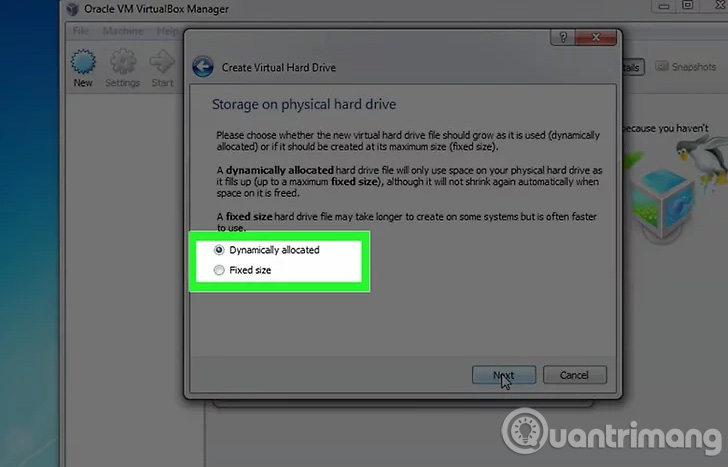
Fixed storage storage is the capacity of virtual hard disk on the operating system server (for example, the virtual hard drive is 8 GB, the operating system hard drive is also 8 GB). Storage capacity can change just the size of Ubuntu on the hard drive, but the capacity will change when adding files until it reaches the limit (for example, a virtual hard drive containing a 1 megabyte file. The virtual hard disk is 1 megabyte, and then you add another 1 megabyte file to the hard drive, which is 2 megabytes in size, this process will then increase until the hard disk capacity limit is reached.
6. Click ' Next ' to accept the default name and virtual hard drive capacity.
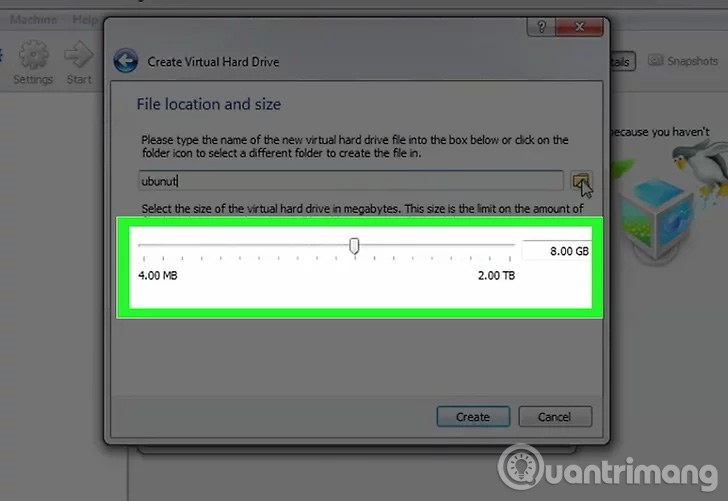
VirtualBox will suggest the appropriate capacity for the virtual hard drive. If you feel this is not appropriate, you can move the slider or type the data into the dialog box. click ' Next ' when done.
7. click ' Finish ' and wait for VirtualBox to create a new virtual hard drive.
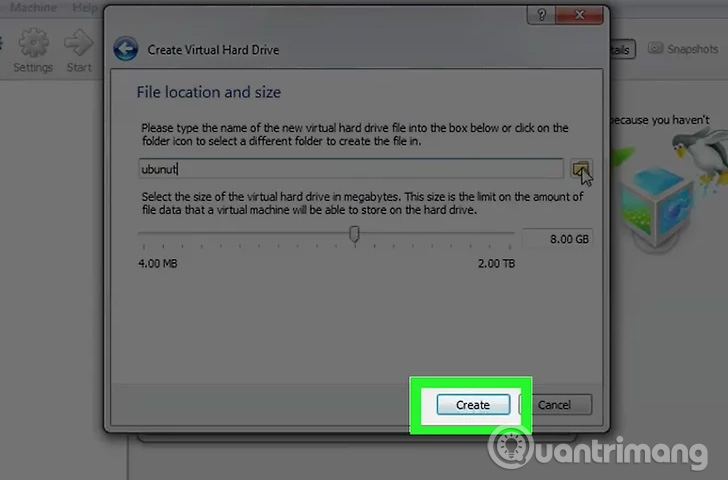
You will see the new virtual machine in the list.
Step 4: Set up CD boot
1. Select a new virtual machine. Once completed, click the ' Settings ' button.
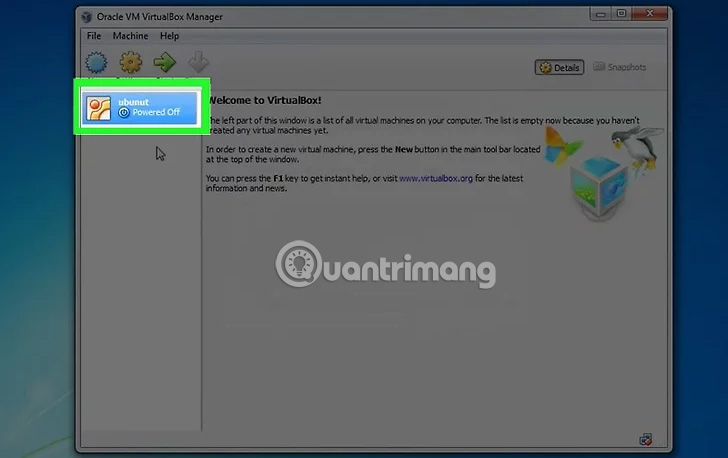
2. click the ' Storage ' tab.
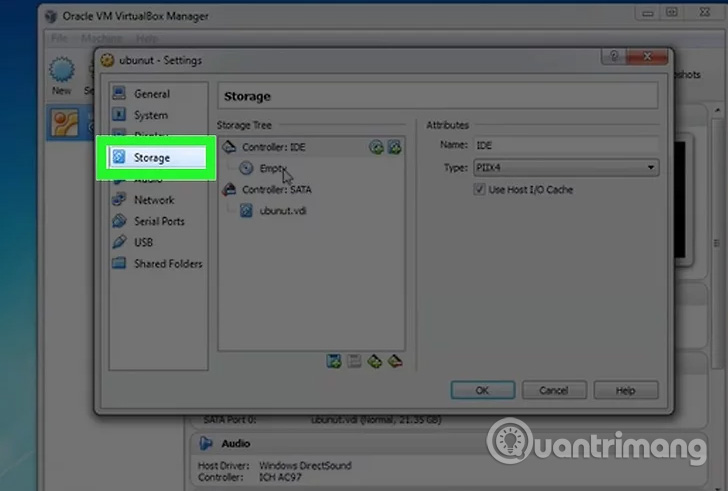
3. click ' CD / DVD icon ' ( CD / DVD icon ) with the " + " mark and select ISO to install.
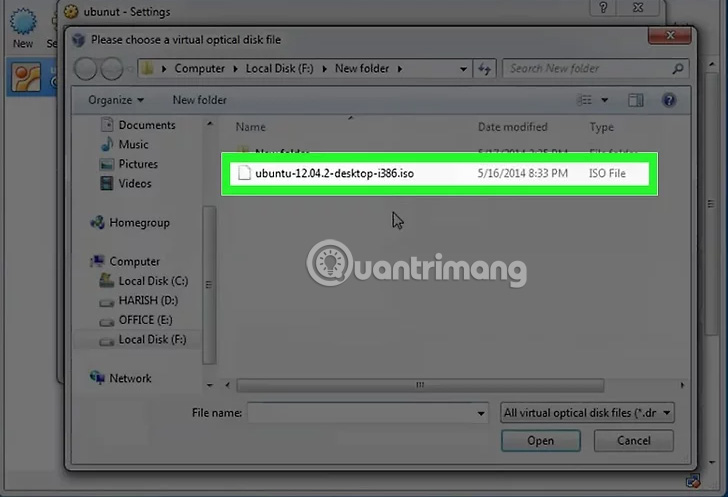
4. Ubuntu ISO will be installed under the control device.
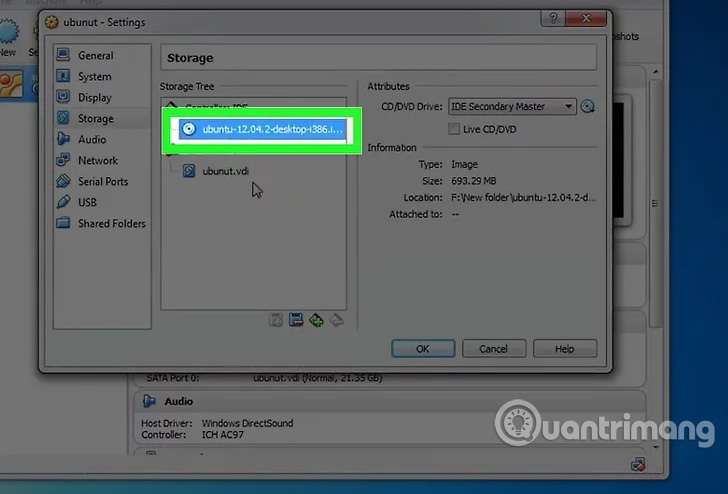
5. click the system tab on the left. Choose the boot order and keep the CD / DVD at the top of the list as a top priority.
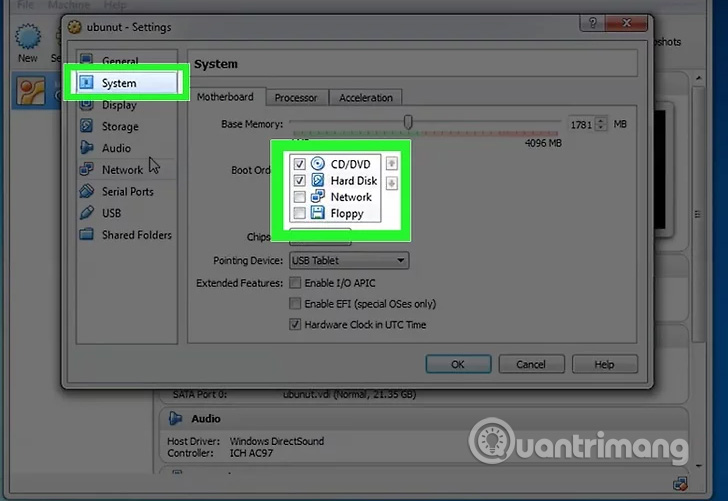
6. Close the installation window and return to the main window. The Ubuntu machine is ready to boot.

Step 5: Install Ubuntu
1. Select the virtual machine. Then click the ' Start ' button.
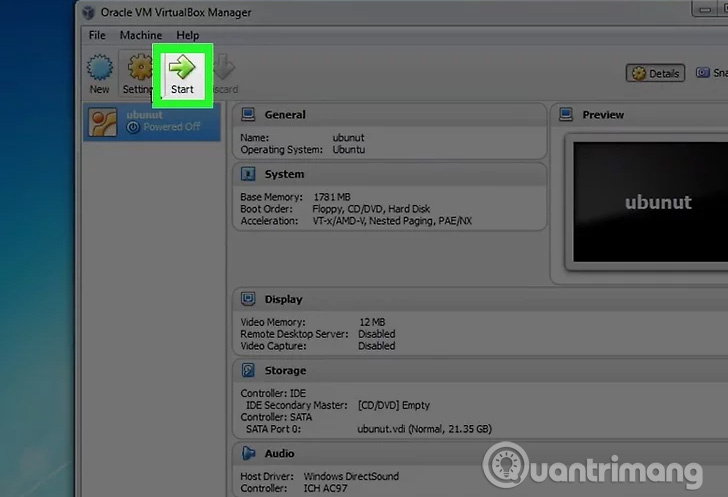
2. Ubuntu virtual machine will boot in a separate window.
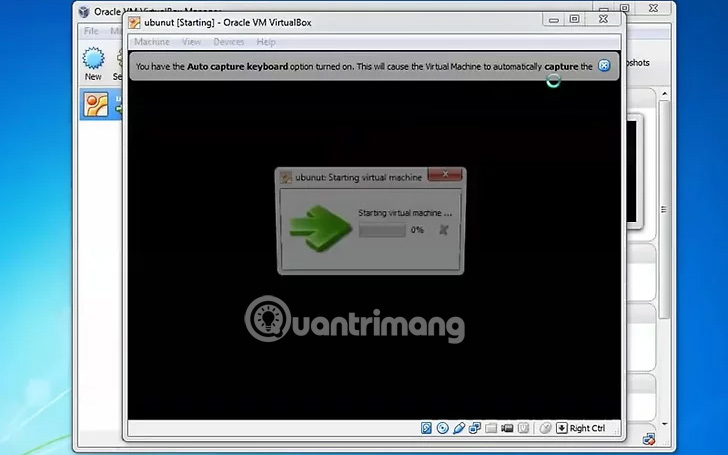
3. The machine will boot from the selected ISO and you will see the language option. Select the language you want to use and press Enter .
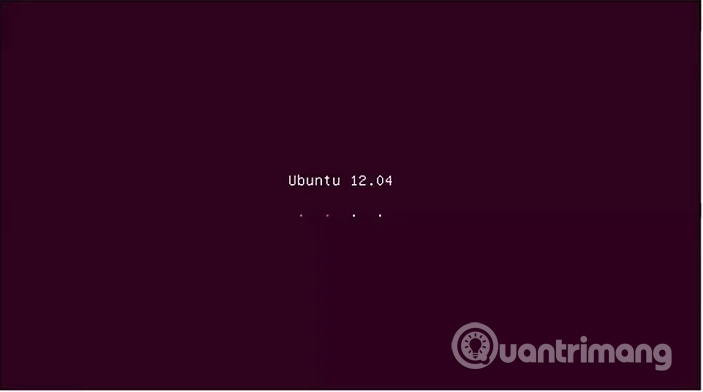
4. " Install Options" Appears in the next window.
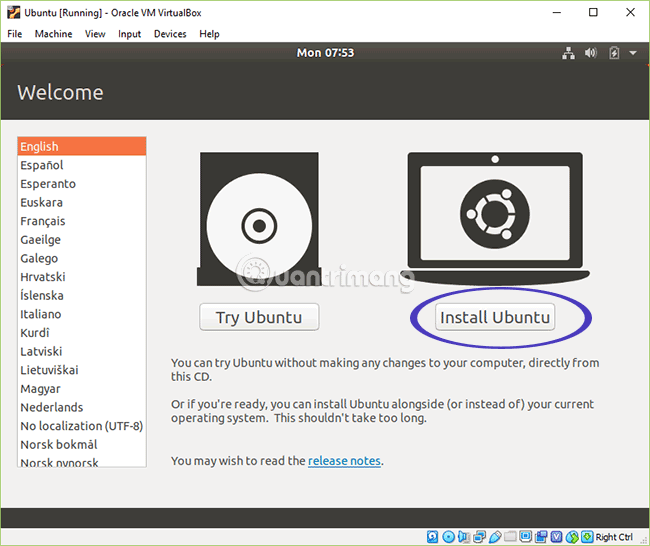
You can choose to try Ubuntu without installing or choose to install ubuntu (Try Ubuntu); Check for disk and memory errors; and choose to boot from the current hard drive. Select INSTALL ubuntu here.
5. After downloading ubuntu, select the language and click " Continue ".

6. On the next screen you can choose to install Normal installation Or install a minimal version with the browser and basic tools ( Minimal installation ). You can choose to update during the Download updates Installation process While installing Ubuntu To update everything during the installation, it takes a bit more time to install, but it will need to be updated after installing. Select the option according to your wishes and click " Continue ".
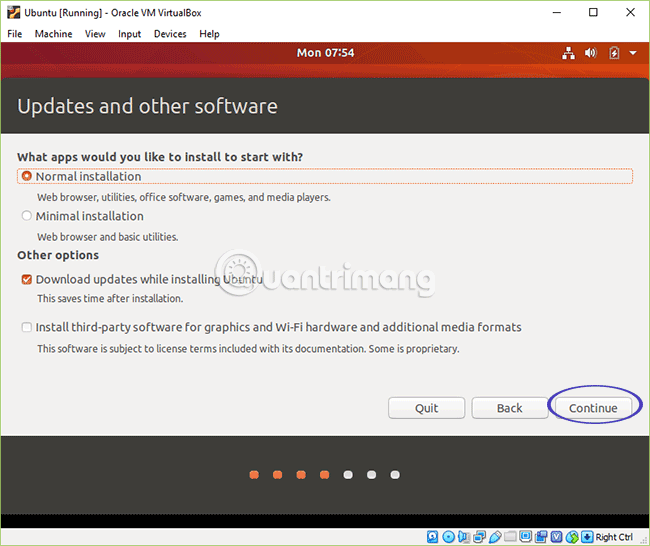
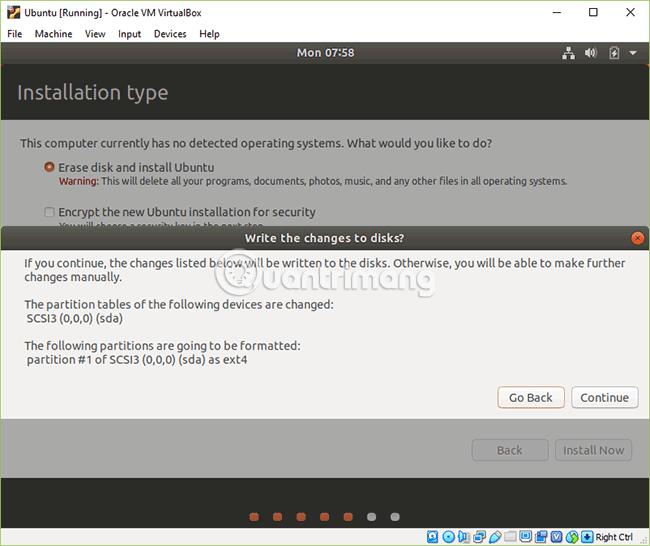
7. The next option will ask you when needed to delete all data and install or create your own partition from the " Something Else " option. You should choose Erase disk and install Ubuntu .

Click Continue In the next screen.
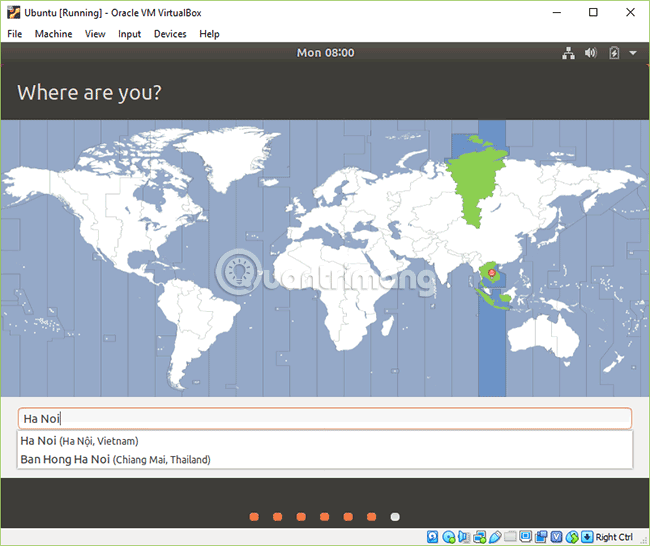
8. Select the time zone in the map or click the name and select and then click ' Continue '.
9. Wait for Ubuntu to install and copy files.

10. Enter the username in the first dialog box.
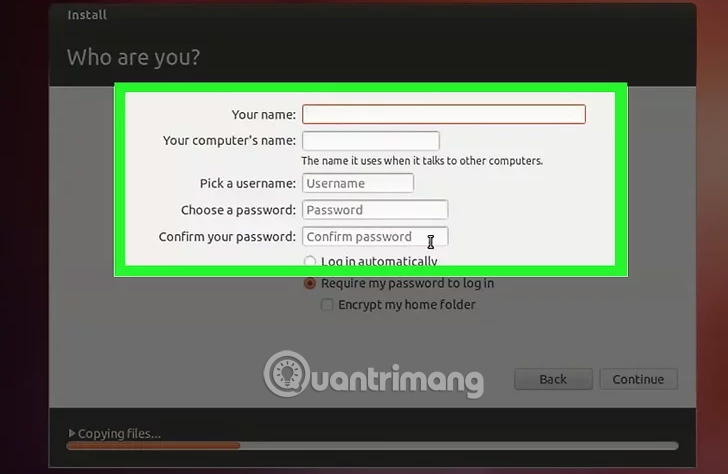
Username and computer name will be filled in automatically. Enter the password and confirm the password, then click " Continue ".
11. Ubuntu will proceed with the installation process.
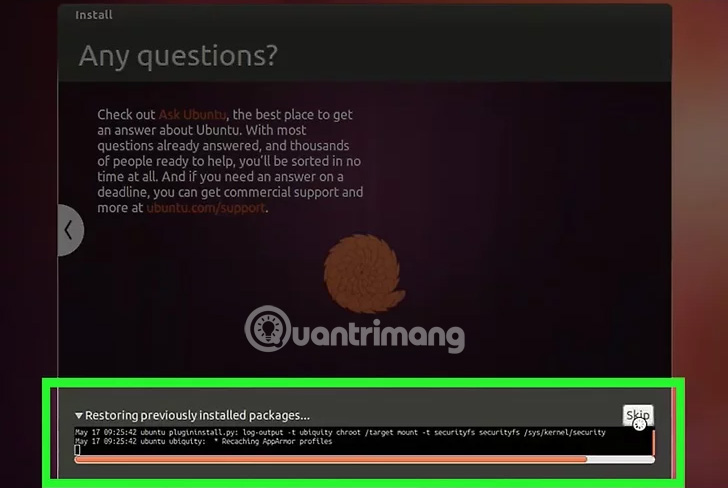
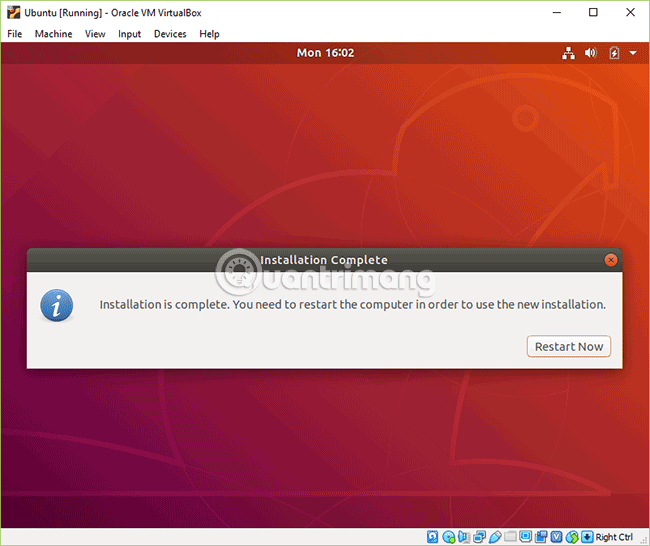
12. After completing the installation, click ' Restart Now ' to finish the installation.
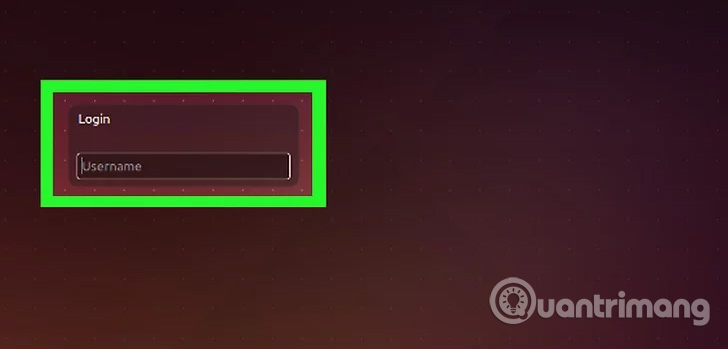
13. The virtual machine will be rebooted and Ubuntu has just been installed downloaded from the hard drive, provided the password to login to the main window of ubuntu.
Step 6: Install Guest Additions
1. After logging into Ubuntu, click the "Devices" tab on Virtualbox. Select " Insert Guest Additions CD Image. ".
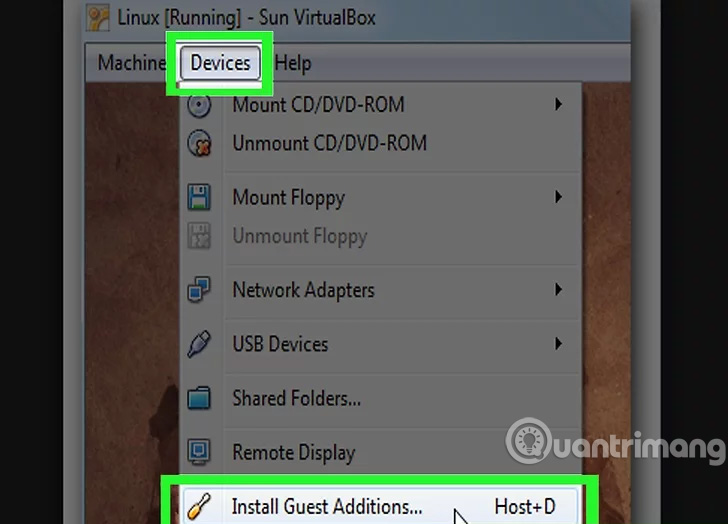
2. When Ubuntu requires installing the program and needs a password, enter the password. click " Install Now ".
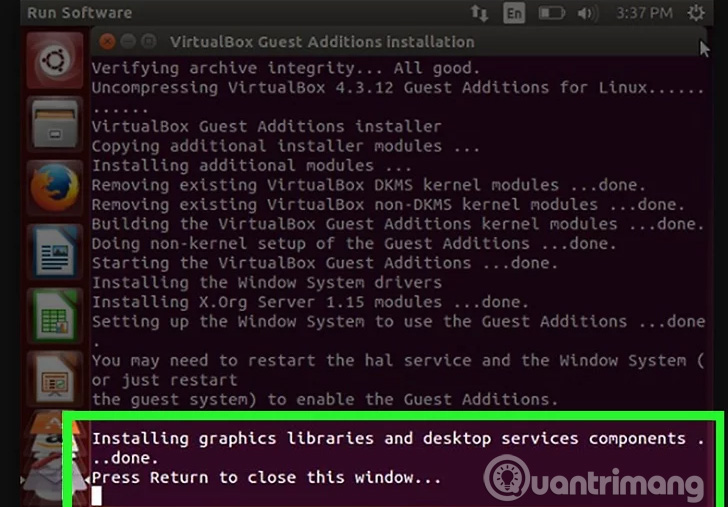
3. Allow the program to start. When done, press Enter .

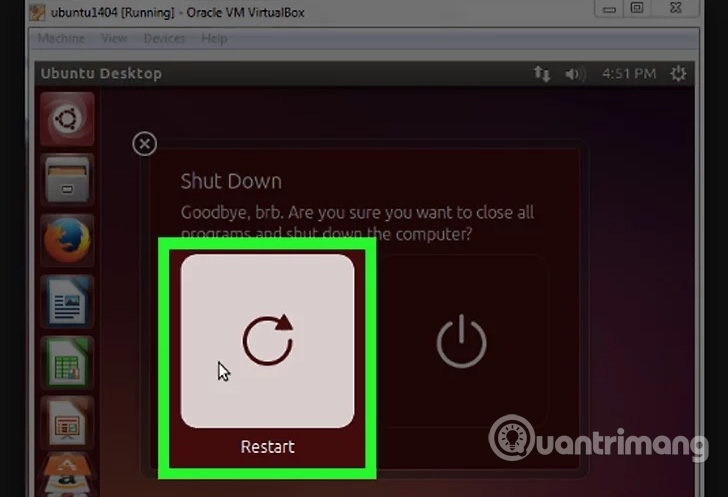
4. Restart the virtual machine, after the machine is turned on, click View > Auto-resize Guest Display Menu and you can now use the Ubuntu virtual machine with the maximum resolution.
Some other images of Ubuntu on Windows 10, installed via VirtualBox:
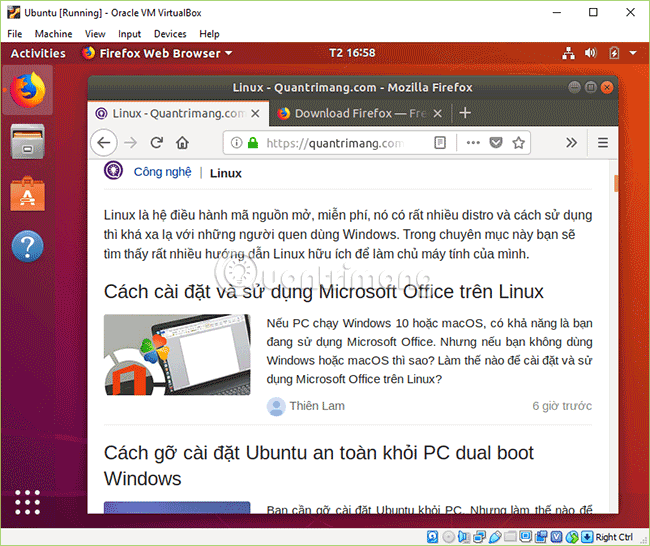 Open. com with Firefox on Ubuntu
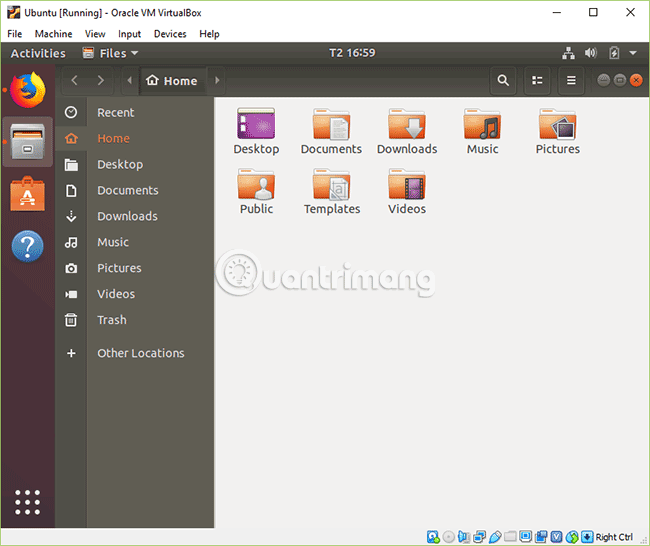 View files and folders in Ubuntu
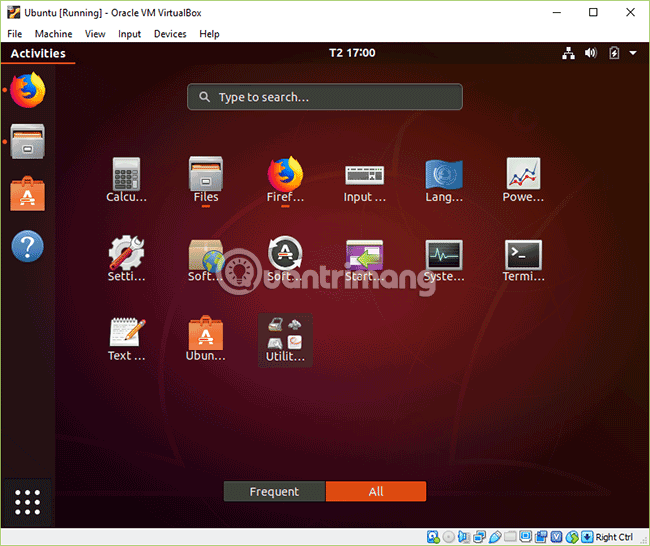 Default applications on Ubuntu
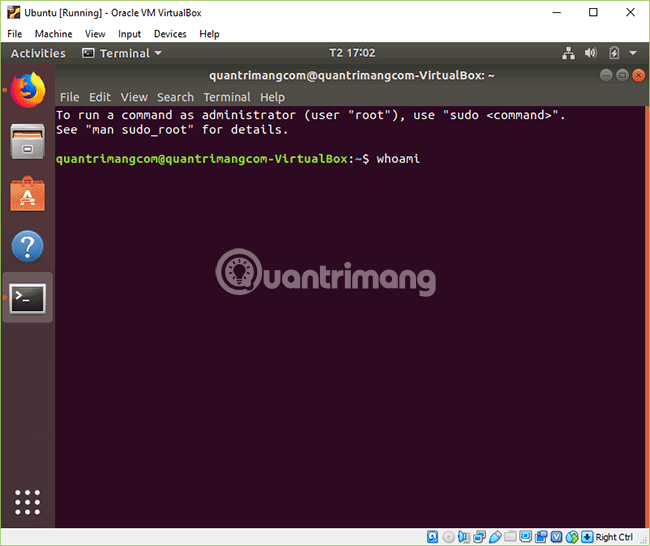 Open the terminal on Ubuntu
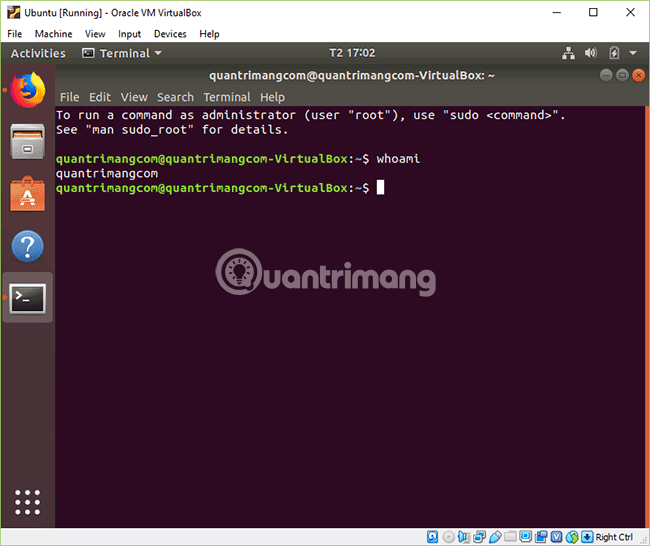 Test the whoami Linux command on Ubuntu
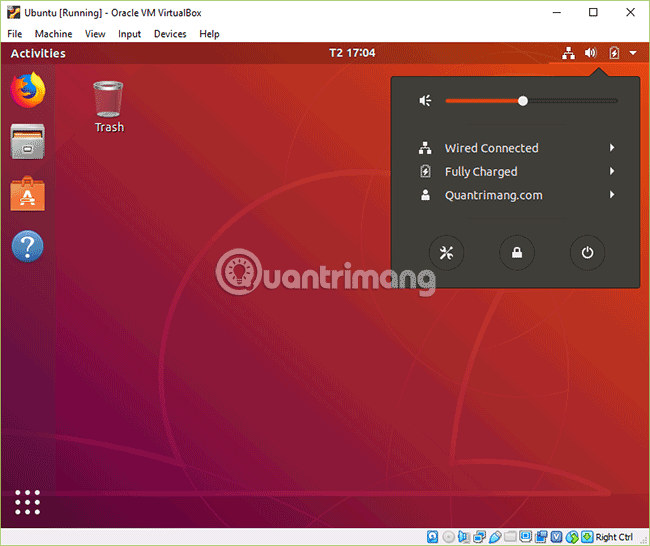 Options on Ubuntu system tray
 Turn off the Ubuntu virtual machine
Refer to some more articles:
- Instructions for uninstalling software on Ubuntu
- VirtualBox and VMware: Which virtual machine software is better?
- Instructions to boot from USB in VirtualBox virtual machine
Having fun!
FAQ
What should I prepare before I install ubuntu on virtualbox virtual machine?
Review the requirements in the guide, confirm that your device or software is compatible, and save important work before changing settings related to install ubuntu on virtualbox virtual machine.
Why might install ubuntu on virtualbox virtual machine not work as expected?
The most common causes are incompatible versions, missing permissions, incorrect settings, or an interrupted internet connection. Recheck each step and restart the app or device when appropriate.
Can beginners follow these install ubuntu on virtualbox virtual machine steps?
Yes. Follow the steps in order, avoid skipping confirmation screens, and compare your interface with the screenshots because labels may differ slightly between versions.
Related Articles
 Installing Ubuntu in Virtualbox Does Not Need DVD or USB6 minutes read
 How to Install Ubuntu Maverick in Mac Virtualbox6 minutes read
 How to Create an Ubuntu Virtual Machine with Virtualbox (Mac)4 minutes read
 Click: How to Install Ubuntu on Virtualbox8 minutes read
 How to Fix Mouse Error and Virtual Machine Keyboard in Virtualbox4 minutes read
 Set Up and Install Windows 8 on Virtualbox3 minutes read
Reader Comments 0
Sign in with email or Google to join the discussion.