Table of Contents
This step-by-step guide explains how to install ubuntu maverick in mac virtualbox. It covers the required setup, the main actions, and the checks that help prevent common problems.
In the following article, TipsMake. Com will guide you how to install and use Ubuntu inside Mac OS X through VirtualBox . The test system used here has the following configuration: 8GB minimum hard drive on Mac OS X operating system, Internet connection, ISO installation file in Ubuntu (you can download here) and Sun's VirtualBox software. Start by creating a new virtual machine inside VirtualBox by clicking the New Button:
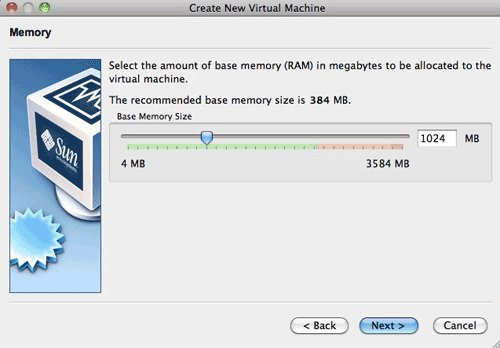
Name this virtual machine, select the operating system on Linux or Ubuntu Operating System With the corresponding version. Select the amount of RAM allocated to the virtual system, although Ubuntu doesn't need too much, but to ensure the operating system is working smoothly, you should choose 1GB:
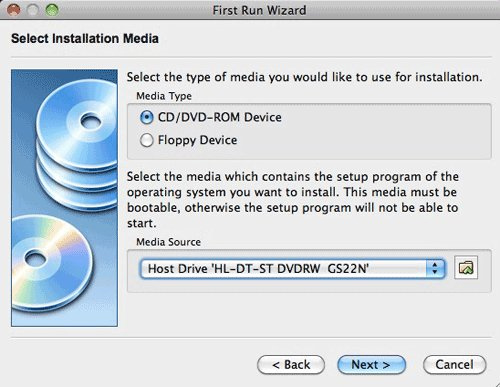
Check the Boot Hard Disk Box in the next window, and select Create new hard disk, Next, select the Continue Button. The next window appears, which you will use to create the virtual hard drive, and then install and use Ubuntu. Select Continue , check Dynamically expanding storage Box and continue Continue , declare capacity to create partition (here we choose 5GB) then Continue and Done. Next, we have to set up this Ubuntu virtual machine to boot from the ISO file we just downloaded in the previous step. Start the virtual machine, you will see the Start by running Wizard Screen , Select Continue To start the process. Go to Select Installation Media Screen , Select Media Type as CD / DVD Rom , in the Media Source Section, press the button with the folder icon on the right:
The next window appears, select the Add Button above the left corner:
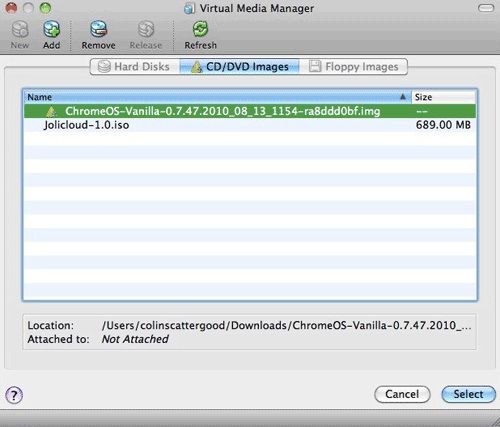
Point the link to the folder containing the ISO Ubuntu file:
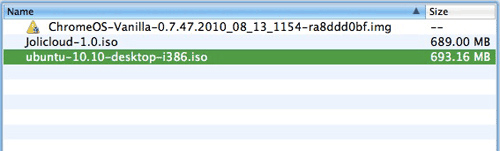
Select Select, you will see the following figure. Select Next :
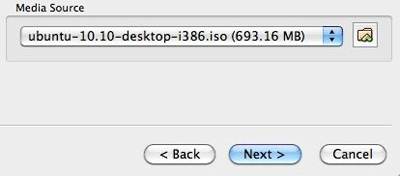
So we have completed the basic configuration. Now move on to the next step - install Ubuntu. This process will take about 30 minutes as usual. The main screen when properly set up is as follows:
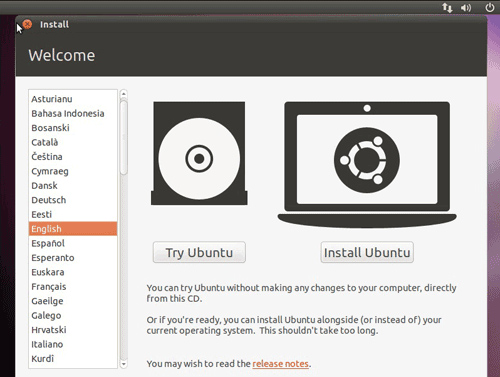
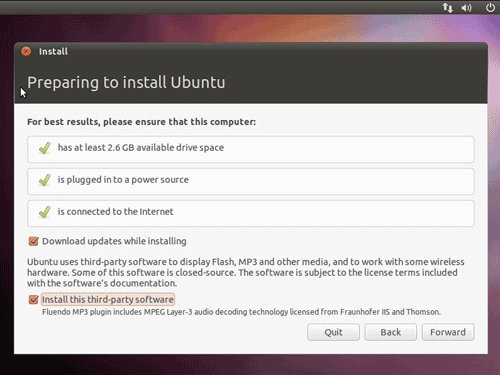
Select the display language and select the Install Ubuntu Button . When you move to the next screen, select Download updates while installing And Install this third-party software. Select this feature to apply the latest updates as well as accompanying support apps:
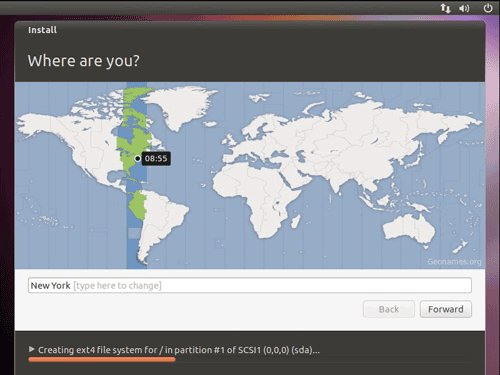
Some other setting options such as time zone at the window Where are you? For example in Vietnam we will choose GMT + 7, Next, press Forward :
At the step of creating and setting up the account, you declare the computer name, user name and password:
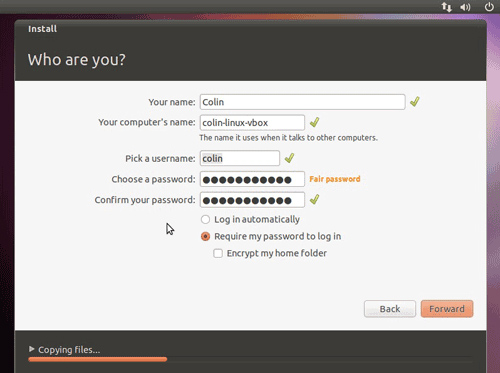
Such basic parameters initialization is complete, and now the installation process really starts, fast or slow depending on the machine configuration and part of the Internet connection speed:
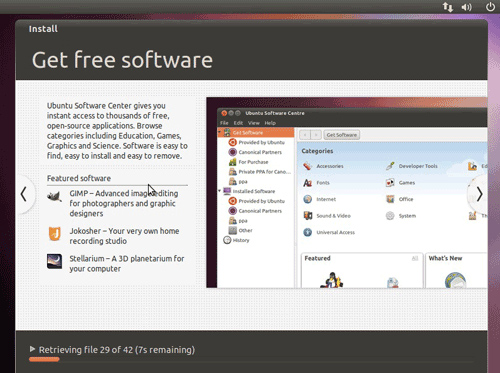
When finished, restart the virtual machine when the Ubuntu system requires. And this is the result of the above process:

Above are the basic steps to install, set up and use Ubuntu inside Mac OS X with VirtualBox, the steps are straightforward and similar to VirtualBox on Windows. Good luck!
FAQ
What should I check before following these steps?
Confirm device and software compatibility, save important data, and make sure you have the required permissions, files, and account access.
Why might the process not work?
Common causes include outdated software, missing permissions, incompatible hardware, an unstable connection, or completing a step in the wrong order.
Can I undo the changes if necessary?
That depends on the tool or setting. Use built-in restore options when available, keep a backup, and record the original configuration first.
Related Articles
 Installing Ubuntu in Virtualbox Does Not Need DVD or USB6 minutes read
 How to Install Ubuntu on Virtualbox Virtual Machine11 minutes read
 Virtualbox - Virtualbox Download and Installation Guide.5 minutes read
 Ways to Install Ubuntu on Windows, Run in Parallel or Run14 minutes read
 Can't Watch YouTube Videos in Full Screen Mode in Ubuntu Maverick2 minutes read
 How to Fix Ubuntu Freezing in Virtualbox5 minutes read
Reader Comments 0
Sign in with email or Google to join the discussion.