Install Android on your computer, run Android in parallel with Windows with Virtualbox
There are many ways to experience the Android operating system on a computer, such as using Android emulator software. The advantage of using Android emulator software is fast (just need to install software), there are many options, no complicated setup, quite easy to use. The downside of the Android emulator software is that it is not really stable, there are errors, app crashes, installation errors, and no games installed. If you have used the Android emulator application, support running Android on your computer but still have no solution that makes you satisfied, try to install Android on your computer using VirtualBox that we guide here see .
In this article, I will introduce you to two ways to install Android with VirtualBox, one is to use the Android version from the Android-x86 page, an older one, using Google Code's LiveAndroid.
- To run Android applications on Windows computers, read this article
Run Android on computer with VirtualBox
Prepare to install Android on your computer:
- VirtualBox: Download and install VirtualBox at: https://www.virtualbox.org/wiki/Downloads, if you do not already have this software on your device. VirtualBox is available for both Linux, Windows and macOS.
- The Android x86 ISO: You need to get the Android x86 ISO for the Android version you want to try. In this article we use Android 6.0 (Marshmallow), you can now try Android Nougat 7.0. Here is the download link: http://www.android-x86.org/.
Before starting, I also recommend that you make sure the virtualization options are enabled in your computer's BIOS. If not, you will encounter many difficulties later when things don't work as expected.
Once you have those things, you're ready to start.
Create virtual machines for Android on VirtualBox
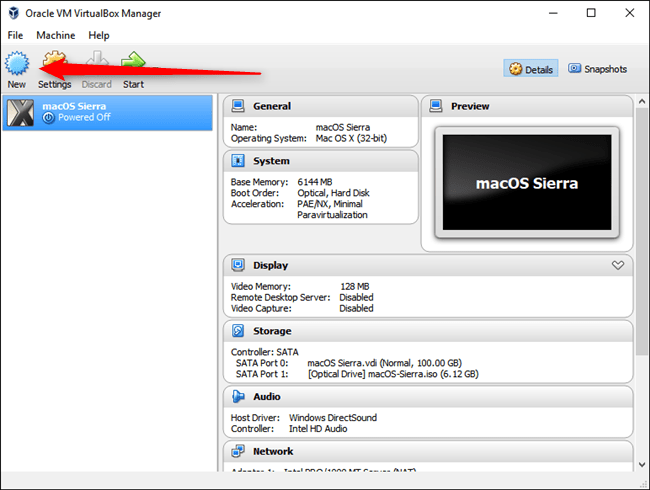
Open VirtualBox, click New to create a new virtual machine:
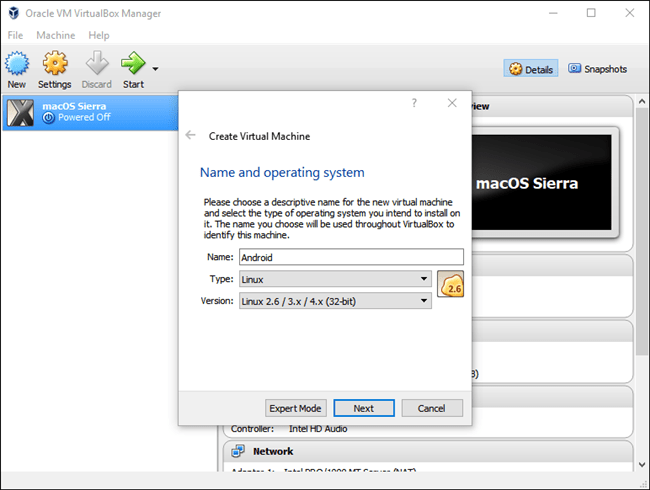
Name the virtual machine whatever you want. Here I set it to Android , in the Type of Linux select, Version select Linux 2.6 / 3.x / 4.x (32-Bit) . Click Next .
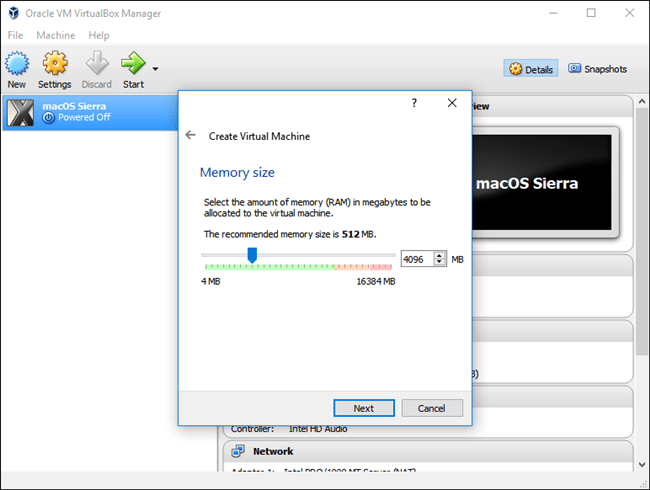
For RAM, I give it 2048MB, especially if you are using a 32-bit version of Android (because more is not used up). If you are using a 64-bit version, you can select as many MB as you want, then click Next .
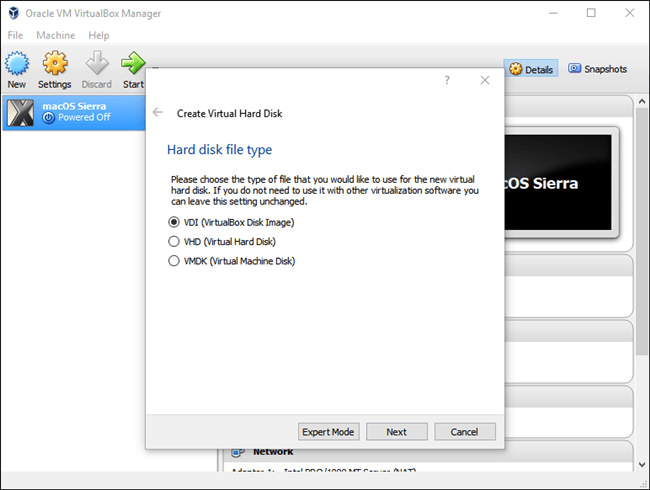
Click Create to start creating your virtual machine. For Hard disk file type please select VDI .
If the drive size is Dynamically Allocated, then the hard drive on the virtual machine may increase as needed.
In the next step, you can choose the storage size you want to place on the virtual machine - even if it automatically resizes, it will not be allowed to exceed the size you have limited. Selecting any size will work best for your system. Here I choose 8GB.
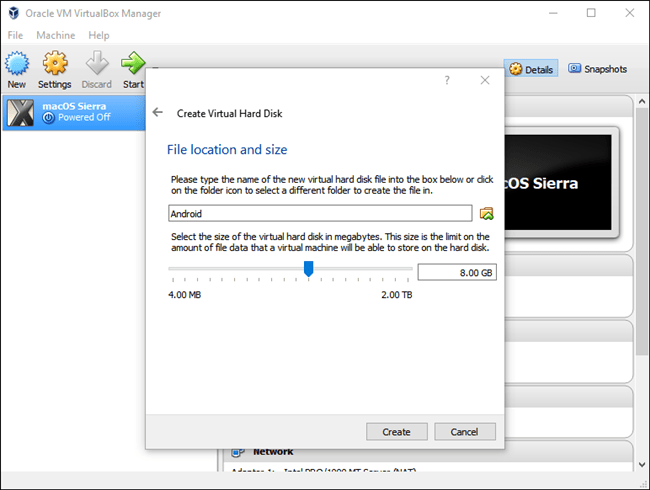
Finally, click the Create button.
Boom! Your new virtual machine is ready to use.
How to install Android on a virtual machine?
After setting up the virtual machine, select it and click on the top Start button:
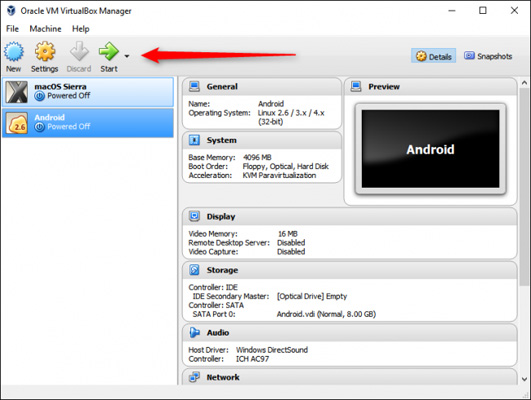
When the machine boots, select the Android ISO file that you downloaded. VirtualBox will allow you to select the file immediately after pressing the Start button, if not, click Devices> Optical Drives> Choose Disk Image, select the ISO file you need, then use Machine> Reset to restart the virtual machine.
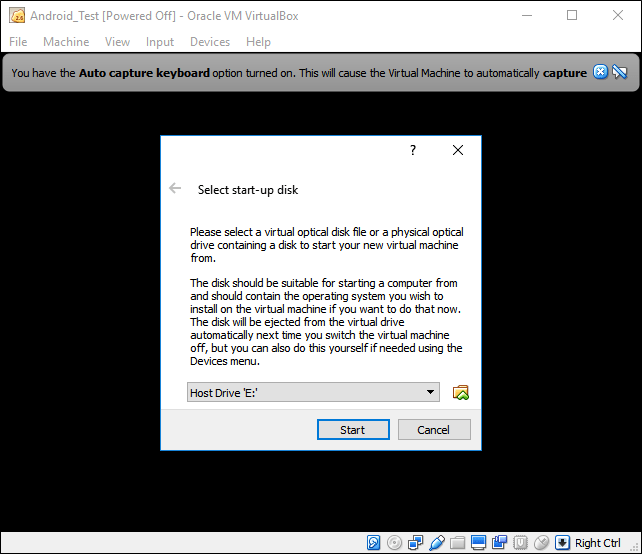
NOTE: When you click on the VirtualBox window, it automatically takes up the mouse and keyboard. To release the mouse and keyboard, simply press the right Ctrl key on the keyboard.
When the virtual machine loads the ISO, use the arrow keys on the keyboard to scroll down to Installation and press Enter . This will launch the Android installer.
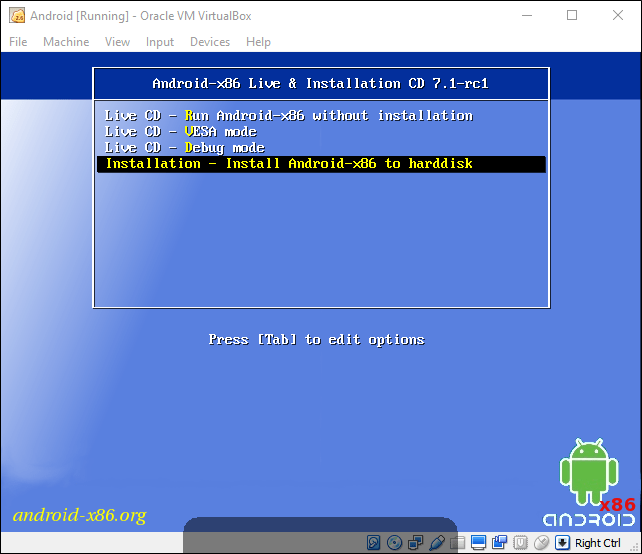
On the next screen, select Create / Modify partitions . On the GPT screen, just select No.
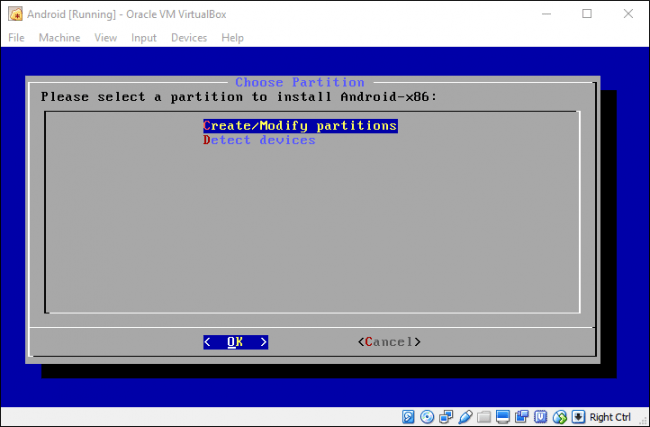
On the next screen, select New :
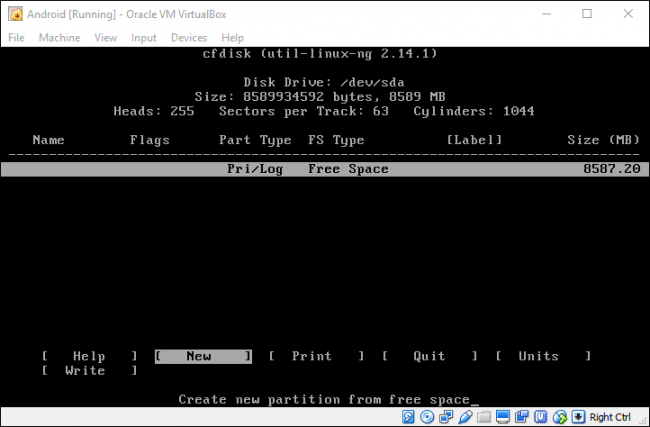
Selecting Primary will allow it to use the entire virtual hard disk space that you have previously selected. In this case, is 8GB. This will be selected by default.
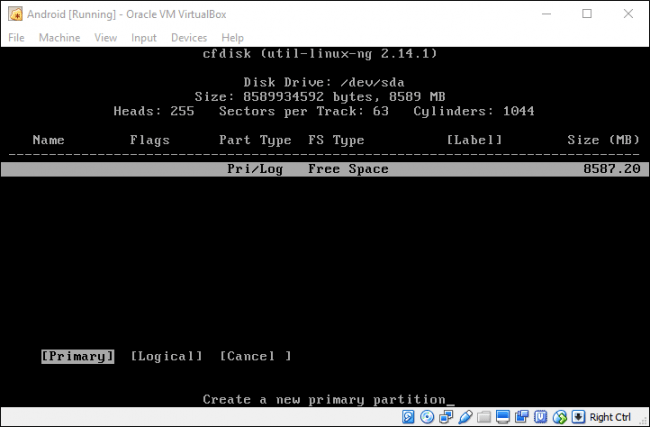
Press Enter on the Bootable option to make the partition bootable, then select Write . Press Enter .
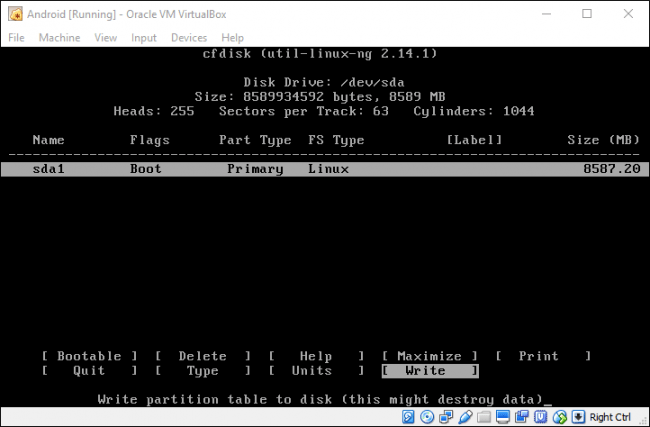
You will need to enter "yes" and press Enter on the following screen to verify that you want to write the partition table to the drive.
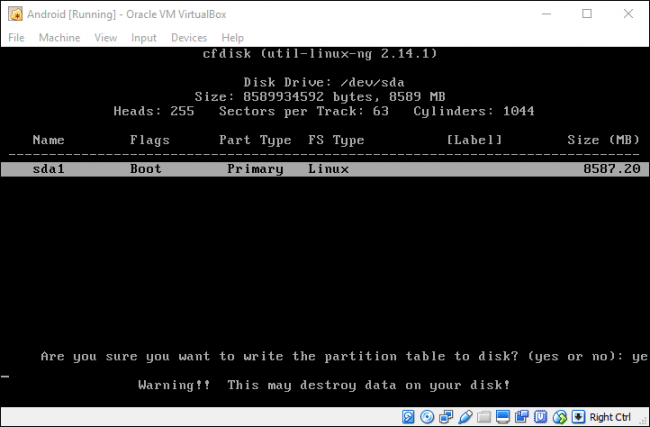
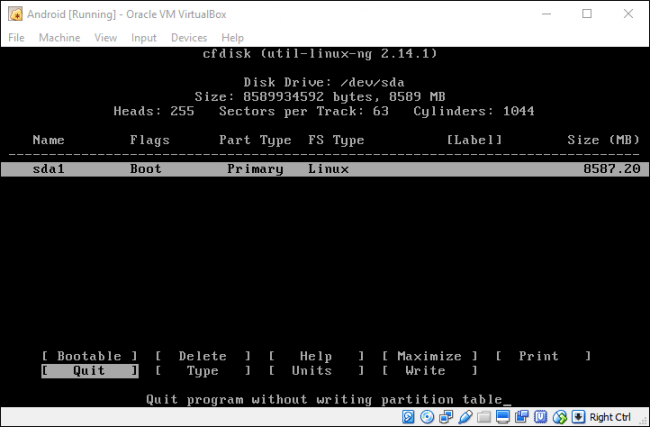
When finished, select Quit , press Enter :
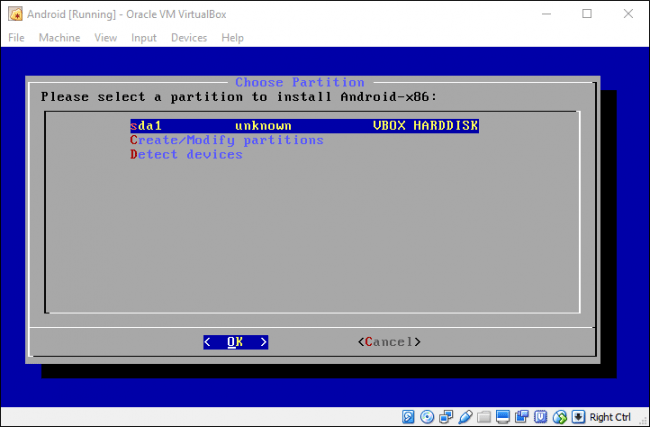
Select the partition you just created to install Android and press Enter .
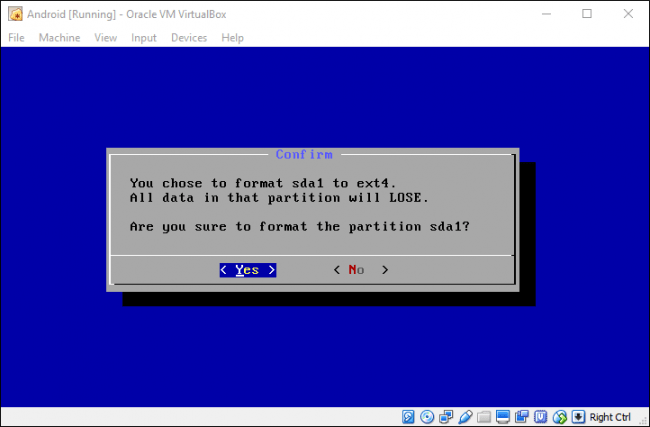
Select "ext4" to format the partition. Select Yes and press Enter on the next screen to confirm.
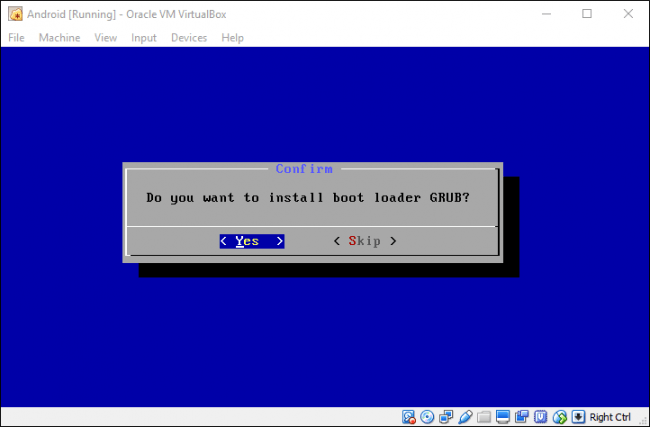
Select Yes to install the GRUB bootloader.
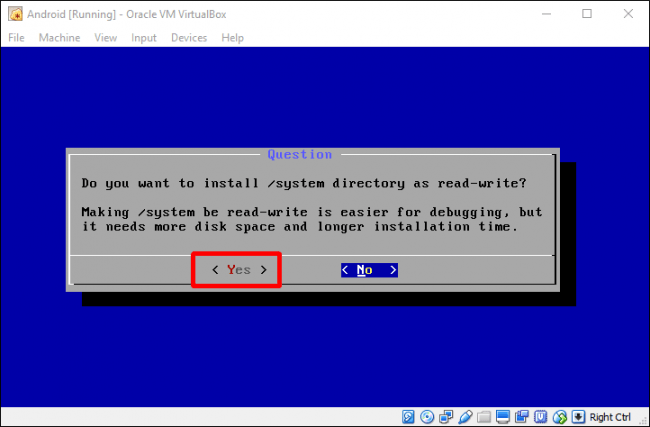
Select "Yes" to create a recordable / system directory.
When everything is complete, you can choose to reboot to Android or reset. Let's do one of the two things here, but don't forget to unmount the previous ISO file. If not, it will immediately boot into the installer!
Use Android on VirtualBox
From here, the setup process is quite familiar and the operation is the same as on the Android device, except for one exception: you won't need to turn on Wi-Fi. The virtual machine will use the computer's network connection.
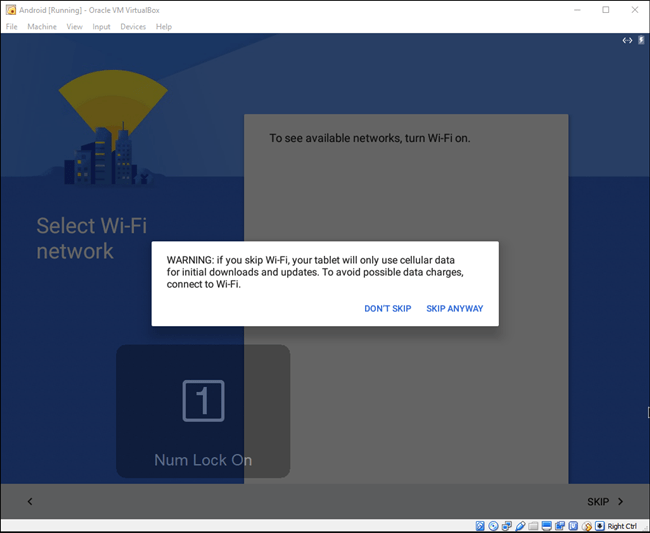
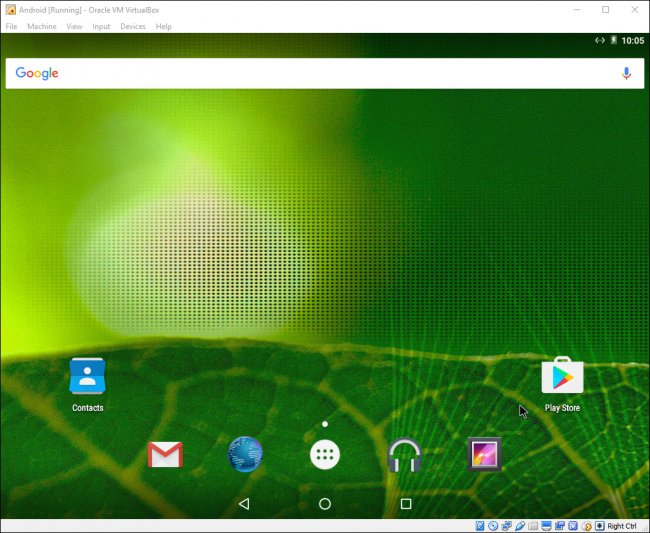
Just log in to your Google account to finish the setup process and everything is ready to experience.
Install Android on your computer with Google Code LiveAndroid
(Note: This is done in 2010, does not guarantee everything will work well at the present time, you should consider before following).
Download Android
To download the necessary files to your computer, you need to visit the Google Code page here. Note, on the Google Code page, that the ISO file is divided into two parts, when downloading is complete you need to join them. The size of the file you need to download is 173MB.
Prepare VirtualBox
With those downloads, Windows, Linux and Mac users can download all versions of VirtualBox to the system according to the link of section 1. Follow the website's instructions to install, and launch the program. When all is done successfully, you will see the screen appear below:
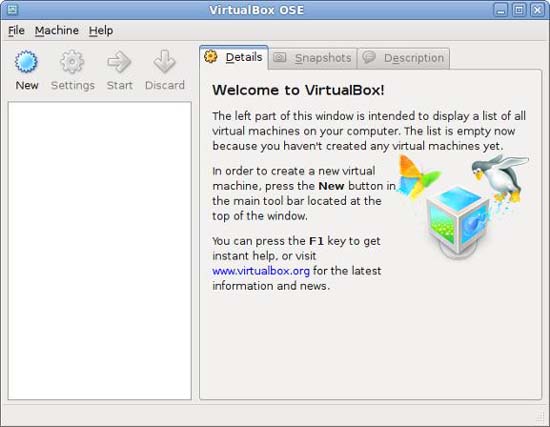
Select New in the upper left corner of the window, then click Next , you will see the first configuration screen, where you can enter the information as shown in the image below.
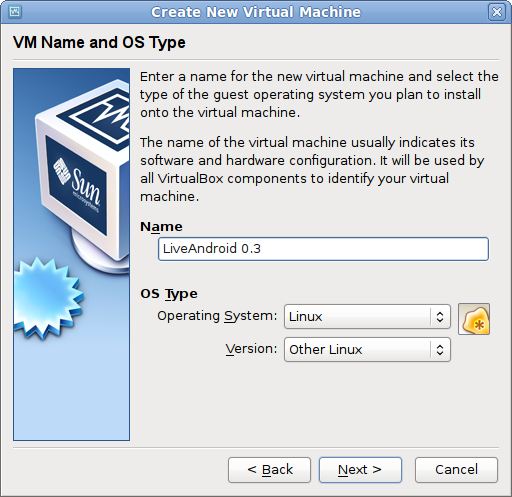
The Name field can be a name that you want to set.
The next step on the following page is to set Base Memory Size . Leave the default options. On the following page, you will see an option to boot the hard drive. We will only run from the image, so the hard drive image is not needed, and please remove the check box next to Boot Hard Disk .

VirtualBox can display a warning message about the phenomenon of not having a hard drive, but this does not affect what we want to do. Ignore this warning and click Finish on the last page. This will bring you back to the main screen, but this time it will display LiveAndroid 0.3 in the left pane.
Start LiveAndroid
Before clicking Start , you need to be aware that VirtualBox starts from the LiveAndroid file. If it has finished downloading, click the Settings button in VirtualBox. Choose CD / DVD Rom on the left. With the configuration screen open, select the checkbox next to Mount CD / DVD Drive and ISO Image File . You can click on the folder icon to select the downloaded ISO file, as shown in the image below.
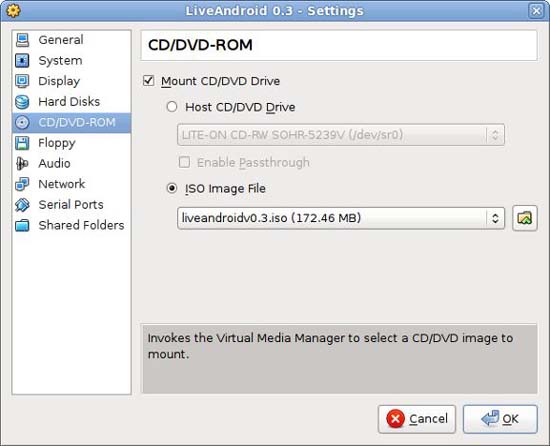
When finished, click OK and you will be returned to the main screen, but this time it will display liveandroidv0.3.iso in the CD / DVD ROM section in the right pane.
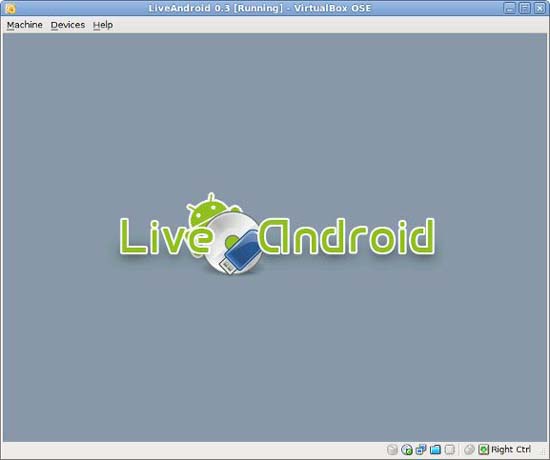
If everything goes smoothly, you can press Start and launch your internal Android operating system.
You should read it
- ★ Install Android on your computer with Phoenix OS
- ★ Instructions for playing Android games on PC with LDPlayer
- ★ How to install and run the Android N 7.0 emulator on Windows PC
- ★ How to install Android on a Windows computer without software emulation
- ★ MEmu software - Add options to play Android games on your computer