Table of Contents
This guide provides a practical overview of 3 the Easiest Way to Add Text to Photos, including its main features, benefits, limitations, and important considerations.
Method 1: Add text to the image with Paint
This is the traditional method, always thought of first for those who use Windows. In parallel Because of its fast, easy, available in computers, Paint's biggest drawback is that it is difficult to create beautiful effects for letters. Besides, the text cannot be edited after it is officially inserted into the image (Undo can only be performed again from the beginning).
To add text to the image with Paint, you do the following:
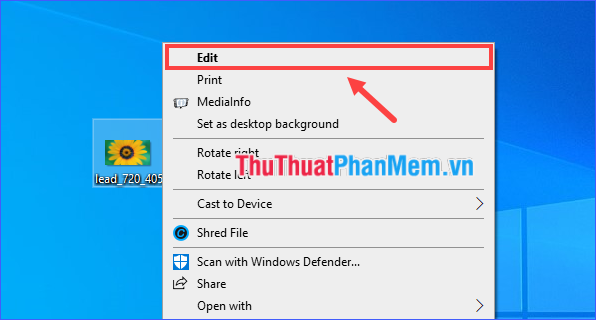
Step 1: Right-click on the image file and select Edit . The image will open in Paint.
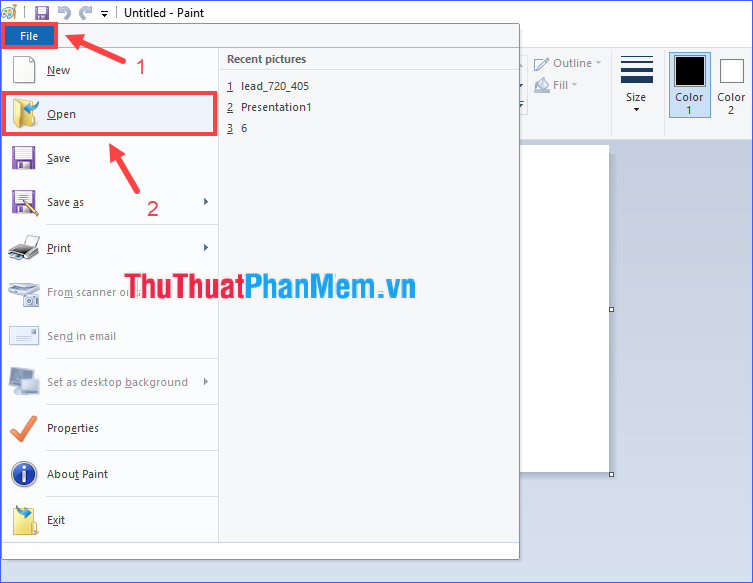
Or you can also open Paint first and then click on File > Open to open the image.
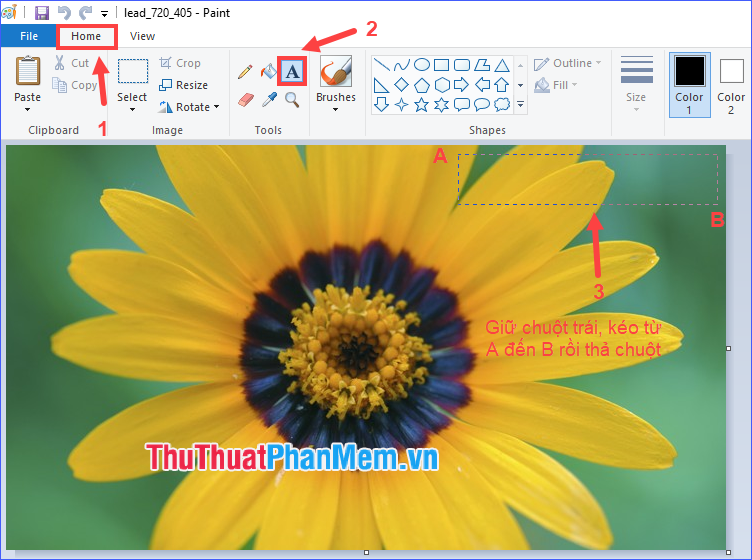
Step 2: In the Home tab, click the Text icon in A.
Step 3: Customize the style for text (font, size, bold, italic, font color, background color. ) and enter the text you want to write in the frame (can also write first and then customize later).
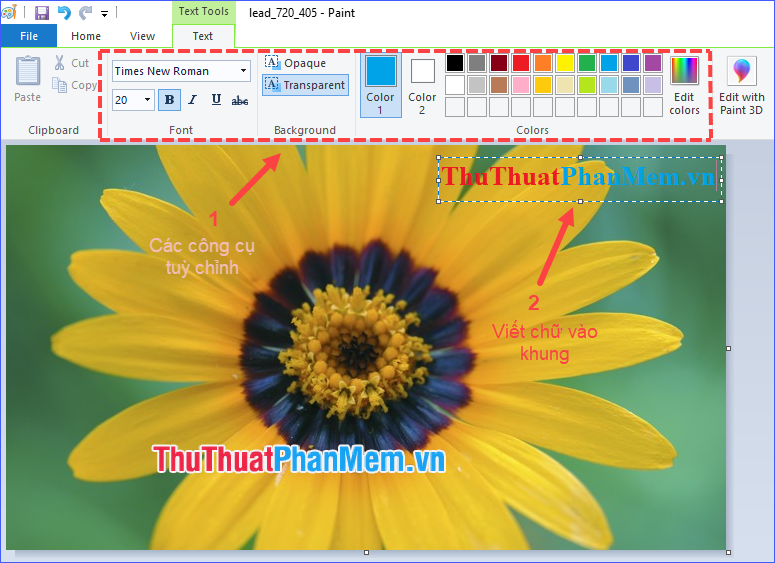
After feeling satisfied with the text you have just created, click on any point on the image outside the writing area to officially insert that text into the image (before, please review carefully because you will not be able to. edit again for text after inserting).
You can create more text areas on the image.
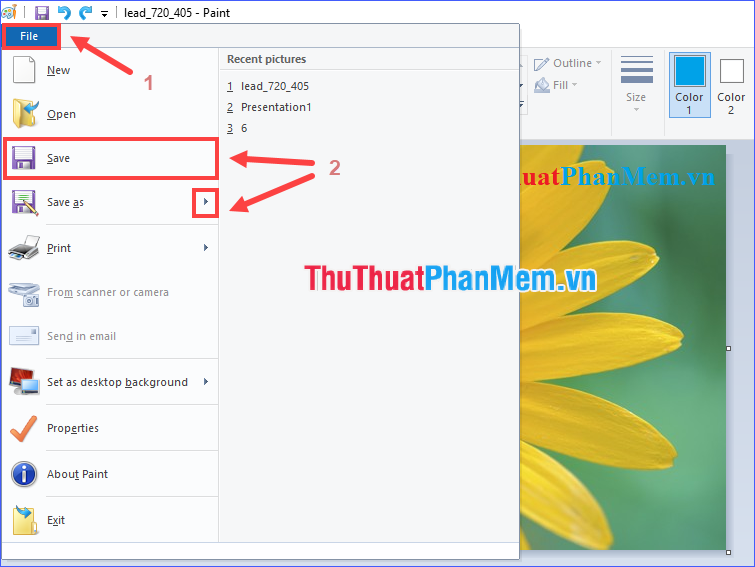
Step 4: Click File > Save to save the image after adding text (or File > Save As if you do not want to overwrite the original image file).
Method 2: Add text to a picture in PowerPoint
This way seems a bit strange, right? PowerPoint is essentially a specialized software for creating and editing slide shows, but you can completely export the results as images, and not only that, but can also insert text with a lot of Nice effects too. Below, I would like to instruct you to add text to pictures in PowerPoint 2016.
Step 1: Open PowerPoint. The first thing is to adjust the size of the slide so that it is equal to the image size.
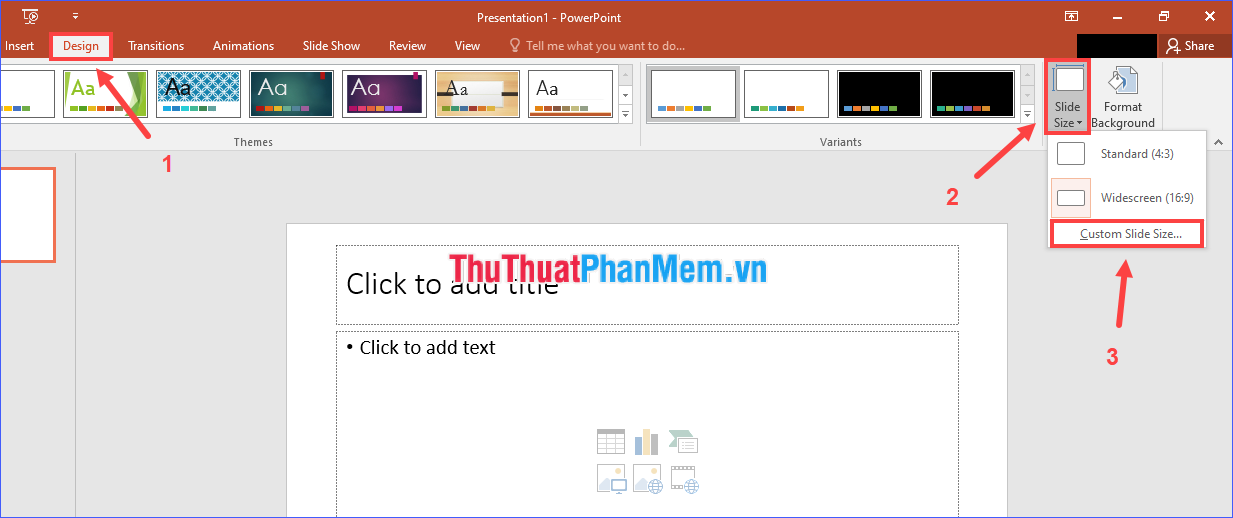
- Click Design > Slide Size > Custom Slide Size.. .
- Enter a new size for the slide in the Width and Height boxes so that it is equal to the size of the image. Then click OK .
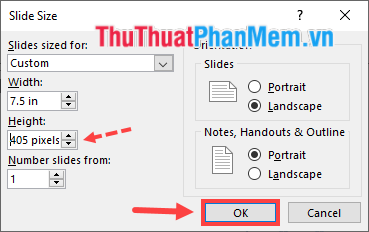
* Note : The image size is in pixels, while PowerPoint uses the default unit as inches. When importing into PowerPoint, you must enter "pixels" after the numeric values (as shown below), then the software will automatically convert to inches.
Step 2: Insert photos into the slide.
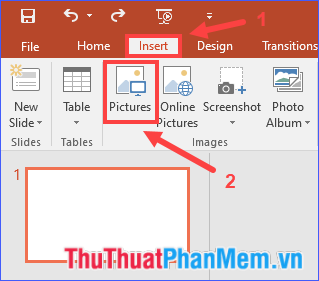
- Click Insert > Pictures , then select to open the image file to add text.
- Click on the image and then expand to fit the slide frame.
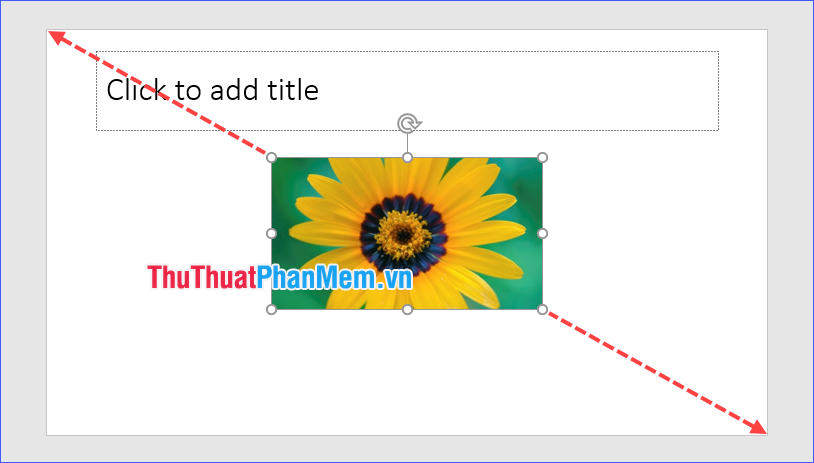
Step 3: In the Insert tab, click Text Box . Hover the mouse over the image, drag and drop to create a writing area.
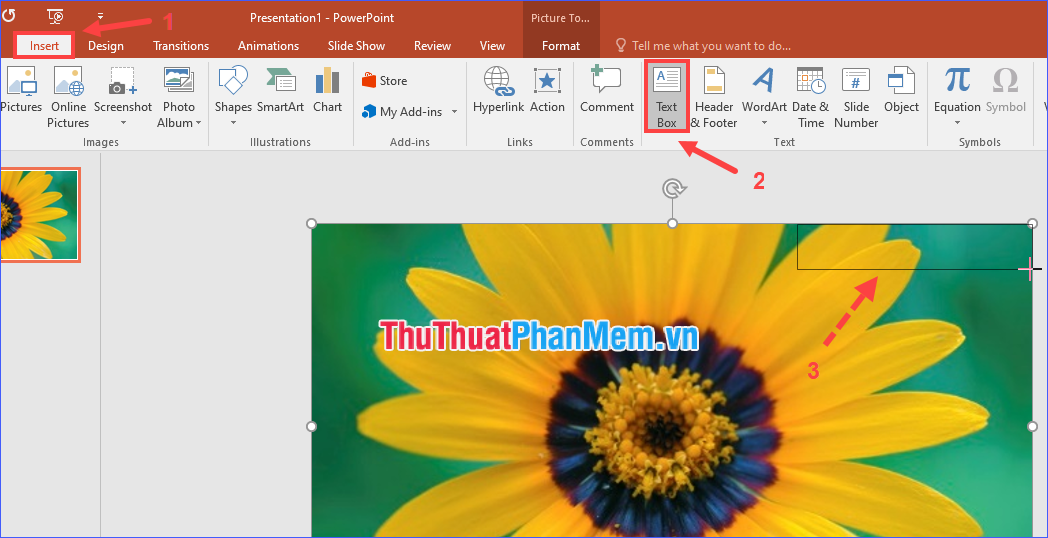
Step 4: Write the text in the area just created and custom style for text.
- In the Home tab, you can customize font, size, bold, italic, align, color, direction. for text.

- In the Format tab, you can make more advanced edits to the text and background of the writing area, such as borders, transparency, spread colors, shadows, reflections, 3-D effects, etc.
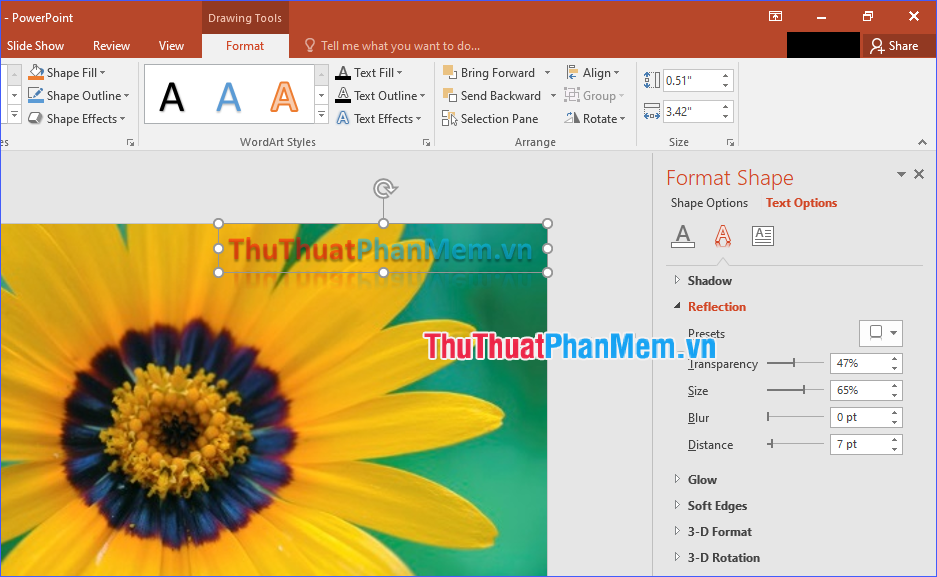
Step 5: Save the results.
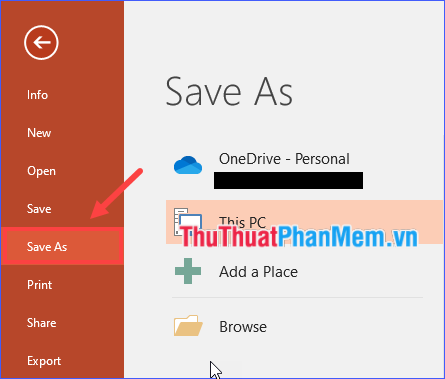
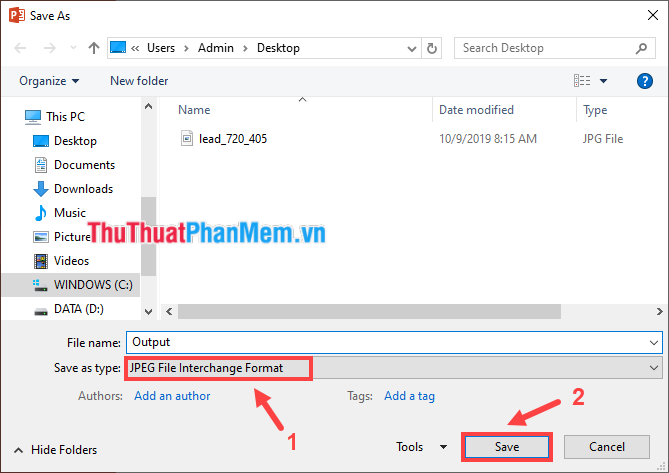
- When you feel like it, click on File > Save As . Choose a directory to save the resulting file, give the file a name, and choose an output format that is an image (JPEG or PNG). Then click Save .
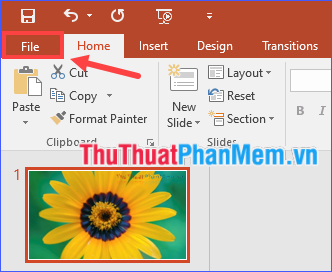
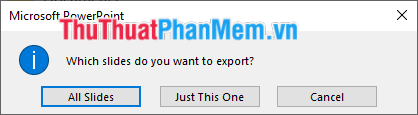
- The question Which slides do you want to export appears? , you can choose Just This One or All Slides (if you work with multiple photos at a time, each image is a slide).
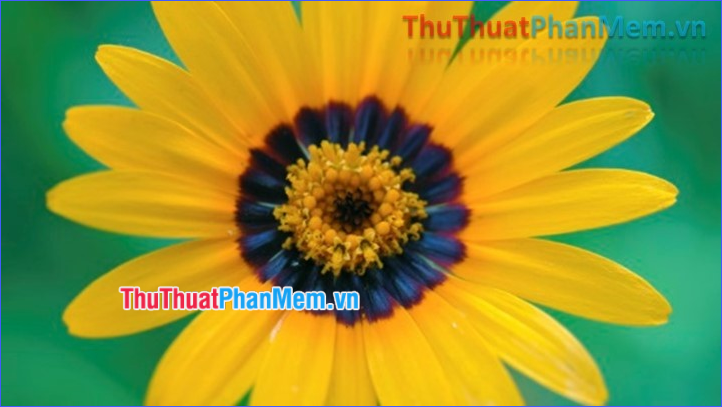
And this is the picture after it has been added. Blur, shadow and reflection effects are very nice, right?
Unlike Paint, using PowerPoint you can customize the style of the text at any time, because the writing area is separate from the image (unless you delete it).
Method 3: Add text to photos using online tools
Today, almost anything can be done online. Photo editing, too. There are many web applications that allow photo editing, and of course including adding text. In this tutorial, I use the page https://pixlr. com/express/.
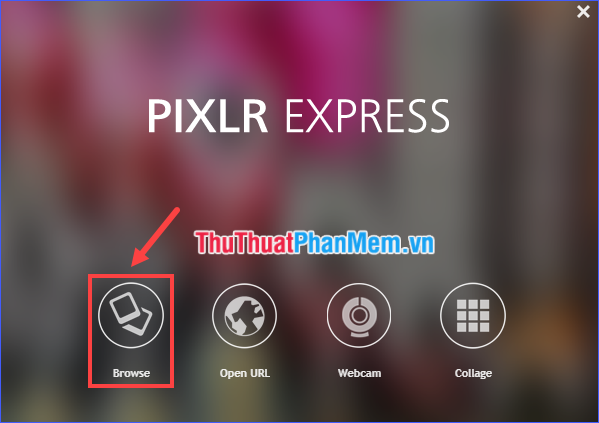
Step 1: Visit the website above. Click Browse and open the image to add text.
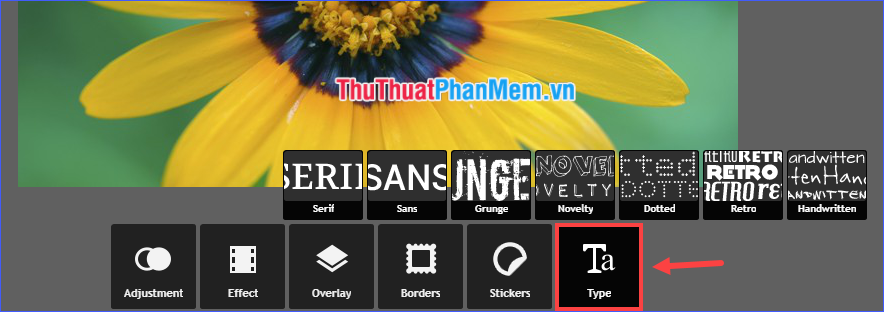
Step 2: Click on Type and select one of the font groups above.
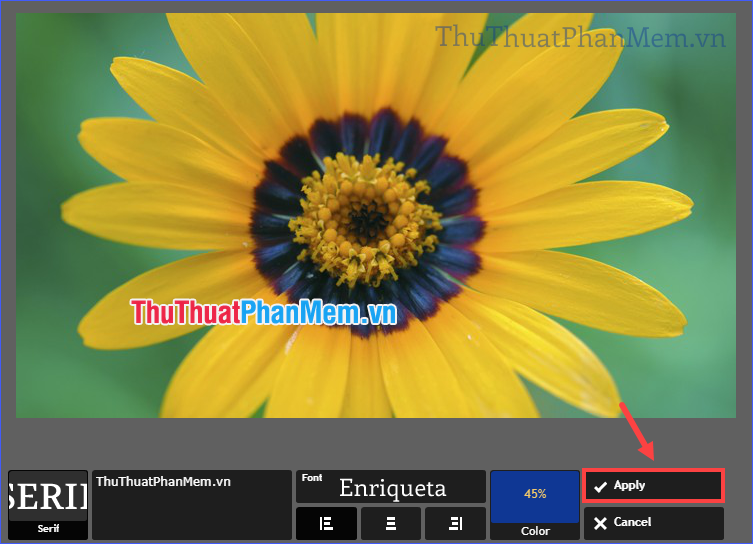
Step 3: Enter the text and customize the style for the text. This application supports custom font, size, color, transparency, direction and alignment. After editing is complete, click on Apply .
* Note : Like Paint, once Apply you will not be able to customize the text, only Undo to redo from the beginning.
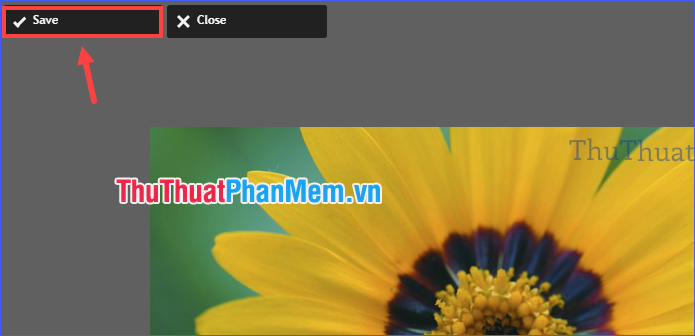
Step 4: Click Save to save.
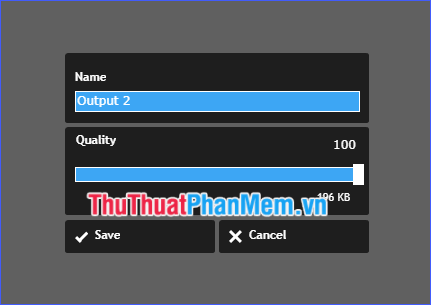
Step 5: Name and choose the quality for the resulting file (drag the Quality bar to 100 if you want the image quality to be kept at the best level). Finally, click Save and select the folder to download.
Above I have instructed 3 simple, easiest ways to add text to photos. Perhaps many of you will wonder why not use more professional graphics software such as Photoshop for example. However, as the title, here I want to talk about the easiest way, every computer can do it. Not everyone has Photoshop available on the machine, besides Photoshop is a pretty heavy software, takes a long time to download and install, and not really convenient if just making a few small changes.
I wish you success following the instructions above!
FAQ
What should I know about 3 the Easiest Way to Add Text to Photos?
Focus on the key features, requirements, limitations, and practical use cases explained in this guide.
How do I get the best results with 3 the Easiest Way to Add Text to Photos?
Follow the recommended steps, use current software or information, confirm compatibility, and review settings before major changes.
Are there any risks or limitations?
Potential limitations depend on compatibility, data quality, cost, privacy, support, and how the product or method is used.
Related Articles
 How to Insert Text into Photos4 minutes read
 Top 6 Top Tools to Erase Text on Photos Today: Top Picks and Buying Guide10 minutes read
 Instructions for Inserting Text into Photos in Photoshop5 minutes read
 Synthesize Applications to Write Text on Photos on the Phone: Phonto12 minutes read
 How to Remove Text from an Image Using Photoshop - Using the Text Removal Tool8 minutes read
 7 Best Apps for Adding Text to Photos7 minutes read
Reader Comments 0
Sign in with email or Google to join the discussion.