How to Wrap Text in Word
Part 1 of 3:
Adding an Image
-
 Click on the area where you want your image. Once you do, a flashing vertical line appears right where you want the image placed.
- A mouse is useful for working with images in Word, because you have more control of the size and shape when you can click and drag the image.
-
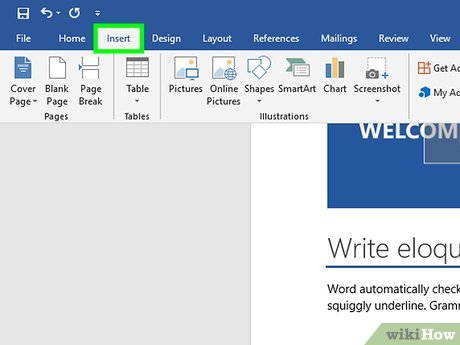
 Click Insert. This appears in the menu at the top of the page and pulls up a menu of different options.
 -
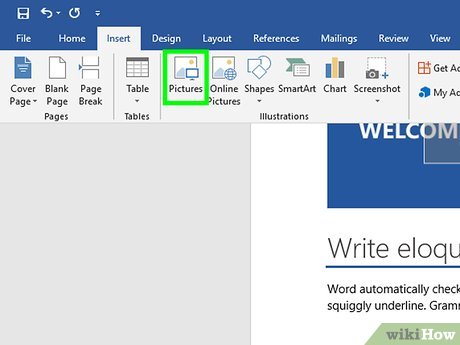
 Select Pictures.This will allow you to insert any jpg, pdf or other type of image that you have on your computer (or drives) into the document.
 -
 Select Photo Browser. This will let you choose from the photo program on your computer.
- Choose Picture From File if your image is on your desktop or in another folder.[1]
-
 Select your image. Once you've opened the dialog box for inserting an image, navigate to the folder where your image is saved and click on it once to select it for insertion into the document.
 -
 Click Insert. This appears as a button at the bottom of the dialog box. Once done, your image is in the location you selected with your cursor.
 -
 View your image. Keep in mind that Word's default setting is to put the image 'in line.' This means it will treat it as if it is a large letter or a tall line of text.
- Text wrapping will allow the text to wrap around the image, go over the image or beside the image.
Part 2 of 3:
Wrapping Text Around an Image
-
 Click on the picture with your cursor. This action will bring up the Picture Formatting menu in the ribbon at the top of Word.
- Clicking outside of the image will take the picture formatting menu away and bring you back to the text formatting menu.[2]
-
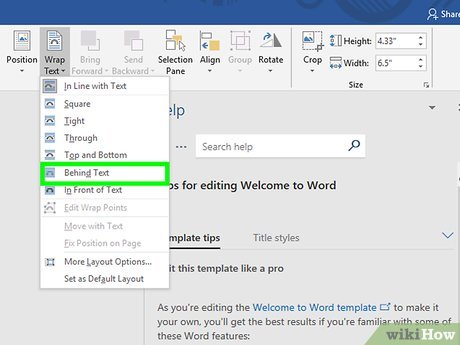
 Select Wrap Text. It may be inside the Arrange grouping or in the Advanced Layout tab, Drawing Tools tab or SmartArt Tools tab, depending on the version of Word you are running.
 -
 Click the Wrap Text button. This appears in the top-right corner of your image when you click on it and will pull up a drop-down menu listing different text wrapping options.
 -
 Select a text wrapping option. Word has different text wrapping options, which you can pick according to your needs:
- Choose Square if your image is square and you want to wrap the text around the square border of your image.
- Choose Top and Bottom if you want the image to stay on its own line, but be between text on the top and bottom.
- Choose Tight to wrap text around a round or irregularly shaped image.
- Choose Through to customize the areas that the text will wrap. This is best if you want the text to be incorporated with your image in some way, or not follow the borders of the image file. This is an advanced setting, because you will pull or drag image points in and out of their original borders.
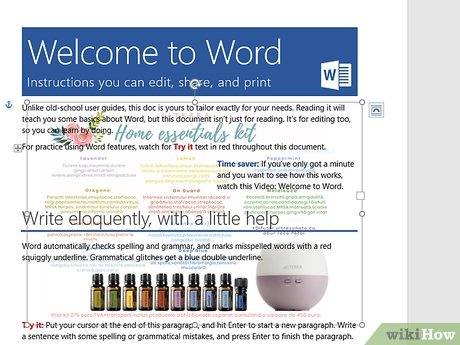
- Choose Behind Text to use the image as a watermark behind the text.
- Choose In Front of Text to display the image over the text. You may want to change the color, or it can make the text illegible.
-
 Re-position the image. After you have selected your text wrapping option, you can click and drag your image to re-position it on the page. The program will allow you to place it where you want it now, with the text flowing around it.
 -
 Experiment with different types of text wrapping. Each image and project requires different types of text wrapping. Browse through options when you add a new image to make sure your wrap text is properly formatted.
Part 3 of 3:
Removing Wrap Text
-
 Click on the text box with your wrap text. This will pull up the markers for expanding and/or moving the text box along with making your text editable.
 -
 Highlight all but the first letter of your wrap text. It's important to leave the first letter un-highlighted because you'll need to press the Backspace key, which could end up deleting the image you inserted above the wrap text.
 -
 Press the ← Backspace key. This will delete the text you highlighted from the text box. Make sure to delete the first letter after the rest of the text, since this will reset your wrap text settings.
Share by
Samuel Daniel
Update 05 March 2020


