Table of Contents
To check uptime in Windows 10, open Task Manager with Ctrl + Shift + Esc, then select Performance > CPU and look for Up time. The counter measures time since Windows last started its current system session. It does not measure how long you’ve actively used the PC.
Check uptime in Task Manager
- Press Ctrl + Shift + Esc or right-click the taskbar and choose Task Manager.
- Select More details if you see the compact view.
- Open Performance, select CPU, and read the days, hours, minutes, and seconds displayed under Up time.
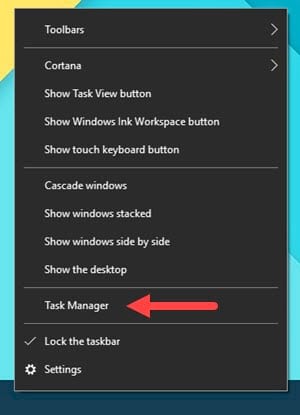
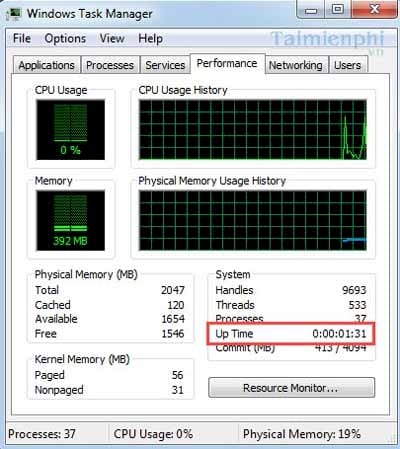
The layout differs on older versions, as the next screenshot shows. See the Task Manager guide for help with the Performance view.

Get uptime or the last boot time with PowerShell
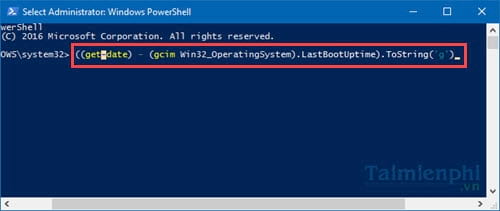
Open Windows PowerShell and subtract the last boot time from the current time:
$boot = (Get-CimInstance Win32_OperatingSystem).LastBootUpTime
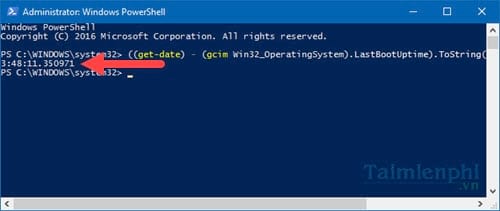
New-TimeSpan -Start $boot -End (Get-Date)
To show the timestamp itself, run $boot in the same session. If you use PowerShell 7, Get-Uptime returns elapsed time, and Get-Uptime -Since returns the boot time. Use the corrected property name above in place of any older screenshot commands.

Find the boot time in Command Prompt
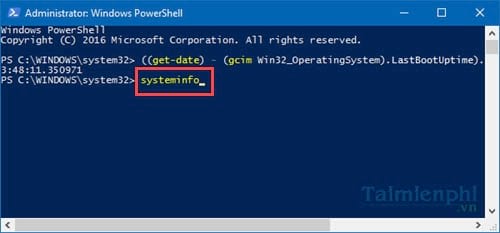
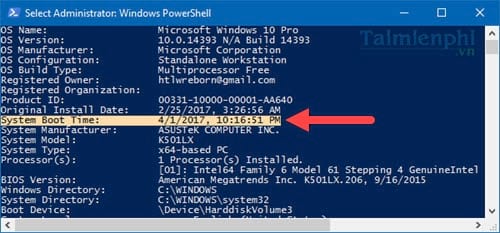
Run systeminfo and look for System Boot Time. Windows may translate the label depending on your display language. This entry is a date and time. Subtract it from the current time if you need elapsed uptime.
Why uptime can stay high after Shut down
With Fast Startup enabled, Windows can save its kernel session during a normal shutdown and resume it the next time you turn on the PC. Choose Start > Power > Restart when you need a fresh boot, then check the counter again after signing in. For troubleshooting slow boots, see how to measure and reduce startup load.






Reader Comments 0
Sign in with email or Google to join the discussion.