Table of Contents
This updated guide explains how to Change the Group by View of a Folder in Windows 10 through clear steps, practical examples, and important checks that help prevent common errors.
In addition to sorting, you can also group files by attributes. As with sorting, grouping won't significantly change the way files are displayed. This only divides the files into different parts. So if you have a directory filled with text documents, you might want to group them by type to see which apps are used to create them. Or, if you're processing photos, you can group them by date to separate photos by the time they were taken.
This tutorial will show you how to change the Group by view for a folder in File Explorer on Windows 10.
Note : The folders included in the library will share the same Group by view.
If you may need to delete the group delineation in the directory or library, select Group by> (None) .
Change the Group by Folder View from the File Explorer Ribbon
1. In File Explorer ( Win + E ), open the folder you may need to change the Group by view of its contents.
2. Click the View tab ( Alt + V ).
3. Click Group by on the ribbon and click the details (eg Name ) you may need to group the items in.
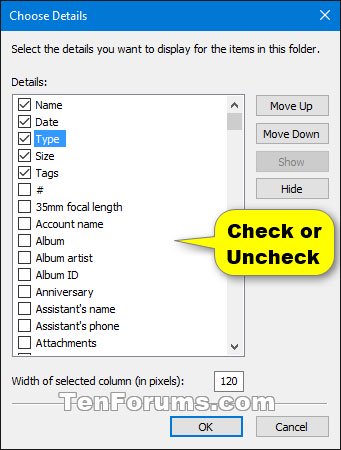
Note : You can also click Choose columns to select more or delete sorting details and add or remove as columns when in detailed layout view.
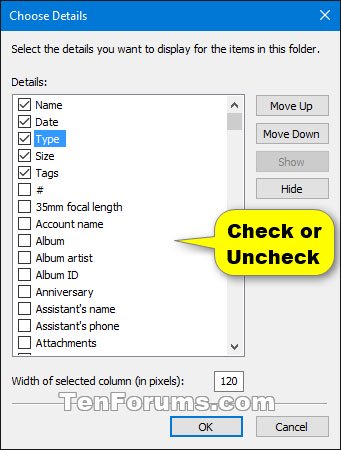 Click Group by on the ribbon
4. Select the group of objects in this folder in ascending (default) or descending order with selected details (eg Name ) from step 3.
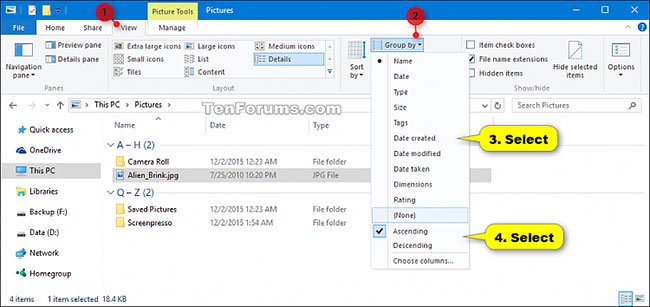 Select groups of objects in this folder in ascending or descending order
Change Group by View from Context Menu
1. In File Explorer ( Win + E ), open the folder you may need to change the Group by view of the content.
2. Right-click or hold and hold an empty area in the folder, click Group by and click the details (eg Name ) you may need to group the items in this folder to.
Note : You can also click More. so you can choose to add or remove group details and add or remove as columns when in detailed layout view.
 Right-click or hold and hold an empty area in the folder, click Group by
3. Select the group of objects in the folder in ascending (default) or descending order with selected details (eg Name) from step 2.
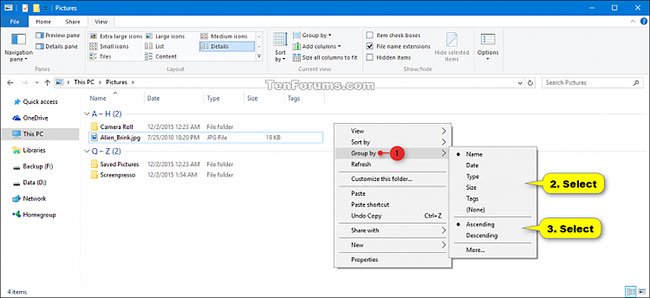 You can group in ascending or descending order
FAQ
What is the easiest way to Change the Group by View of a Folder in Windows 10?
Start with the requirements in this guide, then follow each step in order. Check the result after every major change so problems are easier to identify.
Can beginners follow these instructions?
Yes. The process is organized into practical steps, and you can repeat any step before moving forward.
What should I check if the method does not work?
Confirm your software or device version, permissions, settings, file format, and internet connection when the task depends on online services.
Related Articles
 Change Directory Template in Windows 106 minutes read
 3 Ways to Reset Folder View Settings to Default in Windows 116 minutes read
 How to Change the Download Folder Windows Update in Windows 105 minutes read
 How to Reset the Default Folder View Settings in Windows 104 minutes read
 How to Changing Folder Icons on Windows3 minutes read
 Change Any File or Folder Name in Windows9 minutes read
Reader Comments 0
Sign in with email or Google to join the discussion.