Table of Contents
Using USB to Lock or Unlock Windows Computer, Have You Tried It is easier to understand when the core ideas are paired with practical examples. The sections below explain the topic clearly, highlight useful steps, and point out details that can prevent common errors.
Every time you want to unlock your computer, you must enter the password into it. If you have to enter your password multiple times in a day, it makes you feel uncomfortable and spend your time. And if you want to find another solution to unlock your computer more easily, the USB Raptor is the first choice for you.
USB Raptor is a free tool that helps users to lock and unlock the computer using a USB drive as a key (without the user having to enter a password).
Use USB Raptor to lock or unlock Windows computer:
Step 1:
First download the USB Raptor to your computer, then proceed to extract the Zip file.
Download the USB Raptor to your device and use it here.
Step 2:
After extracting the Zip file, click the USB Raptor file icon to start installing the program.
Step 3:
Now the screen of the USB Raptor window appears as shown below.

Step 4:
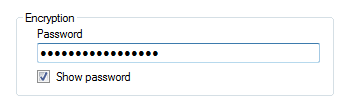
Here you find the Encryption section, then enter the password you want to use to activate the USB Raptor.
Step 5:
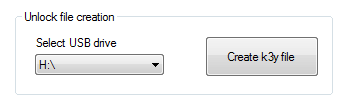
Under Unlock file creation, select the USB drive you want to use to lock or unlock the Windows computer, then click Create k3y file.
Step 6:
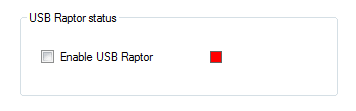
At USB Raptor status, type the option to select Enable USB Raptor .
Step 7:
After the USB Raptor is activated on your computer, you should now see the red icon under the USB Raptor section that will turn green as shown below:
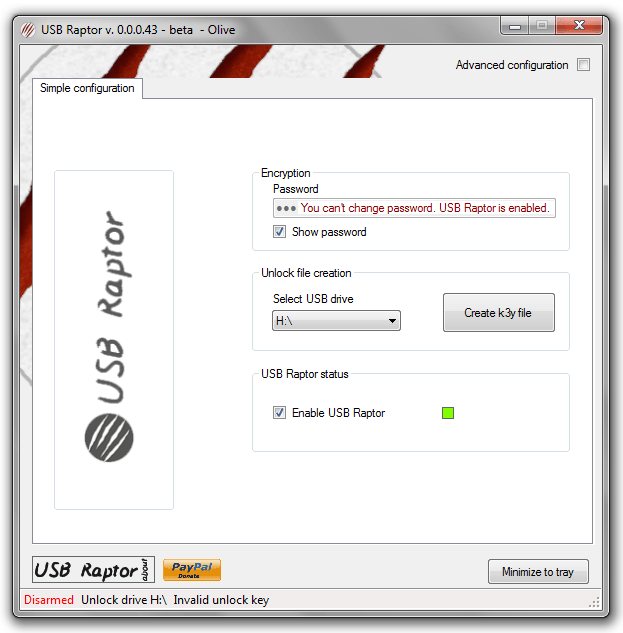
There is also a message saying 'USB Raptor is Armed!, If you remove the system will be locked USB drive'.
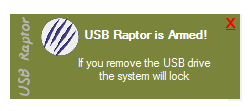
From now on when you want to unlock your Windows computer, you simply plug the USB into your computer. Or if you want to unlock the computer, unplug the USB drive.
Note:
USB Raptor application is compatible on all Windows operating system versions (Windows 7, Windows 8, Windows 8.1 and Windows 10).
Refer to some of the following articles:
- Protect your Google account with USB "security key"
- Summary of some ways to fix USB Device Not Recognized on Windows 7, 8 and 10
- Want to know if your computer supports USB 3.0, read this article
Good luck!
FAQ
What should you know about use USB Raptor to lock or unlock Windows computer: Step 1?
First download the USB Raptor to your computer, then proceed to extract the Zip file.
What should you know about step 2?
After extracting the Zip file, click the USB Raptor file icon to start installing the program.
What should you know about step 3?
Now the screen of the USB Raptor window appears as shown below.
Related Articles
 How to Lock / Unlock the Taskbar in Windows 103 minutes read
 3 Software to Turn USB into Computer Unlock Tool5 minutes read
 How to Lock the Keyboard, Unlock the Windows Laptop Keyboard4 minutes read
 How to Make a Call Right on the iPhone Lock Screen4 minutes read
 Instructions for Enabling 'Slide to Unlock' Feature on iOS 104 minutes read
 4 Ways to Automatically Lock Your Windows 11 Computer: Explained5 minutes read
Reader Comments 0
Sign in with email or Google to join the discussion.