How to use Photoshop CS5 - Part 22: Introducing the Fill Content Aware feature
QuanTriMang - In the next installment of the Photoshop tutorial series, we will take a look and learn more about one of the new features: Content-Aware Fill. Compared to Content-Aware Healing, their function is almost the same, the only difference is how to use it effectively and in accordance with the context. Based on the working mechanism and analyzing the main content of the image, to provide a plan to remove excess details in the selection. If only talking about theory, it is difficult to imagine the difference of Spot Healing Brush and Content-Aware Fill , so start working on it.

Sample images used in this test
If you want to remove the image of the column in the usual way, then use the Clone Stamp Tool, select the area of the template next to it and replace the corresponding parts. But see what Adobe Photoshop CS5's Content-Aware Fill can do. First, press Ctrl + J (Windows) or Command + J (Mac) to make a copy of the currently selected image.

To make it easier to distinguish between these classes, let's change the name so that it's easy to remember. As the example here is content-aware fill:

To use Content-Aware Fill , we have to create a first selection around the main detail to be removed or replaced. As here, select Polygonal Lasso Tool in the list:

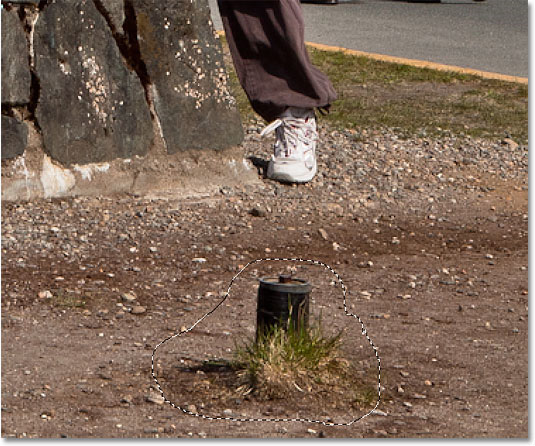
Draw around the main detail, here is the column:

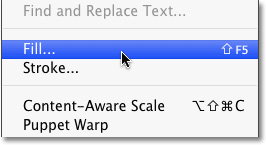
Then, select Edit> Fill menu :

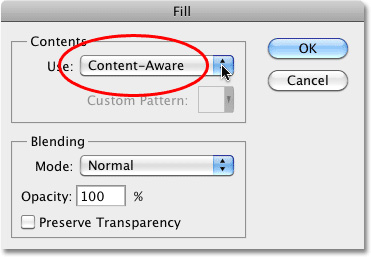
Select Content-Aware in the Use section, click OK :

If in Adobe Photoshop CS4 or earlier versions, all you can do with the selection is the fill color or template available, but with this Content-Aware feature, Photoshop was able to check and classify details in the image, comparing in and out of the selection, and finally 'turning' them into a single block, no more details are considered redundant. For example, here, after clicking OK, the photo will become as follows:

You can see, very simple and easy, we almost do not have to spend any effort but still ensure the efficiency as desired. But if you pay close attention, there are still some details that are slightly mixed, resulting in the process of repeating the seamless patterns. Fixing these details is not too complicated with familiar tools like Healing Brush or Clone Stamp Tool.
At this step, we will continue with a little detail, which is the grass image at the bottom of the photo. This time, use Lasso Tool:

And apply Content-Aware one more time:

If the result is not really good, press Ctrl + Z (Windows) or Command + Z (Mac), then re - apply Content-Aware Fill again. Because each use, the filter will bring different effects. Please proceed many times until the details in the picture look really natural and harmonious. Good luck!