How to batch resize photos with XnConvert
XnConvert, another image processing application, can turn the whole process of resizing, converting and compressing images into one with just two clicks. Let's find out how to do it via the following article!
Table of Contents
Why edit each photo individually when you can easily resize multiple images with free tools, such as gThumb, Phatch and Converseen? XnConvert, another image processing application, can turn the whole process of resizing, converting and compressing images into one with just two clicks. Let's find out how to do it via the following article!
Download and install XnConvert
XnConvert is a series of image editing tools that are like a brother to the popular XnView image viewer.
Download the best package for your distribution. The article is doing this with Kubuntu on a relatively modern PC, so for example, you will choose the 64-bit DEB package.
- Download XnConvert
Use your preferred method to install the package you have downloaded. For example, right click on the downloaded file and select 'Open with QApt Package Installer' .
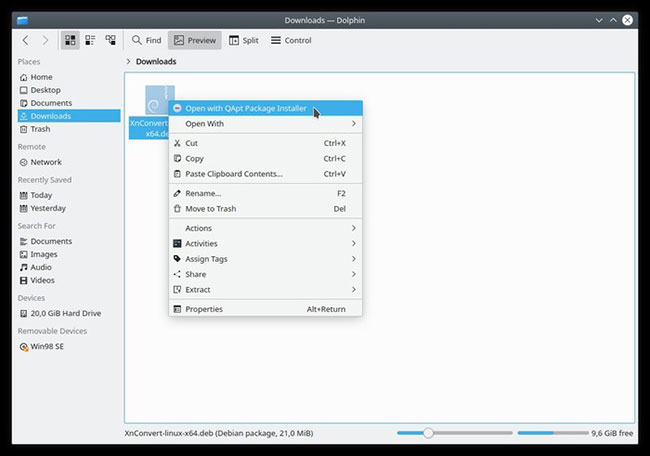
Proceed to install the program and when finished, run it.
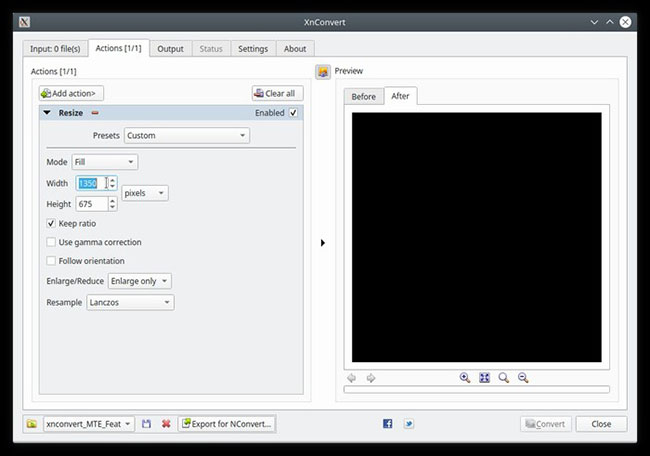
Set the resizing
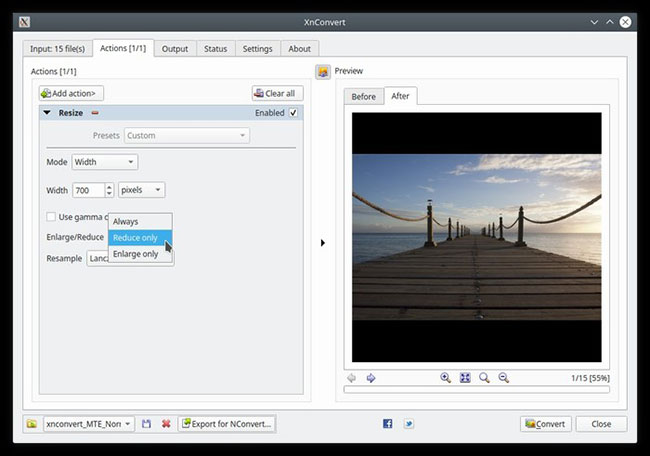
Skip the first 'Input' tab and switch to the 'Actions' tab.
Since the goal is to simplify resizing and batch compressing images, add the Resize action to the active script with one click on Add action> Image> Resize .
If you want, you can add more actions, but the article will keep everything simple and use only one action.
Click the drop-down menu next to 'Mode' and change its settings from 'Fit' to 'Width'.
'Width' indicates that we want to resize the image so that they all have a maximum width defined. Their height may vary depending on the image.
Change the parameter 'Enlarge / Reduce' from 'Always' to 'Reduce only'. In this way, XnConvert will minimize any images larger than the set width, but will not enlarge (or upscale) small images, keeping them at their original resolution.
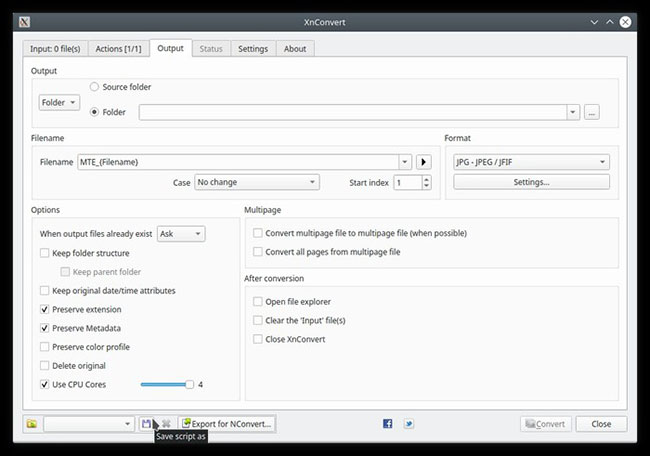
Output setting
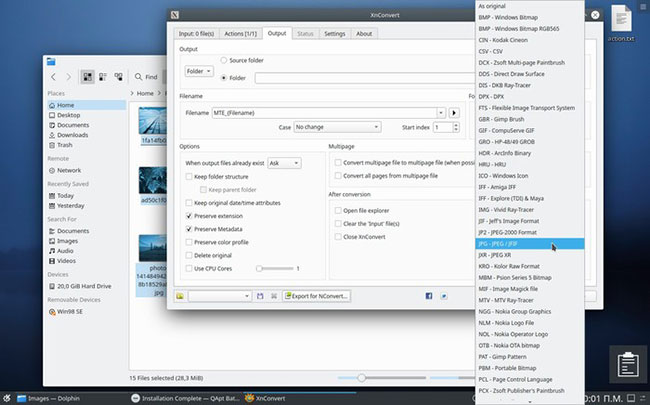
Scroll to the 'Output' tab and note how the program allows you to export the converted images into zip files, emails, Flickr albums, etc. These may be useful in the future. However, for now, leave it at 'Folder' .
If desired, you can adjust the naming of the images created in the 'Filename' field . Note that the pattern '{filename}' holds the original name of each file.
Your images can be in a variety of formats, but for the web, JPEG is the best option. To convert all images to this format, click the drop-down menu below 'Format' , with the default value 'As original' and change it to JPG - JPEG / JFIF format .
Each format comes with its own settings, accessible from the 'Settings' button right on the drop-down menu.
In the case of JPEG files, the most important parameter is the compression ratio / quality. You can modify it from the slider at the top of the settings window. The more you move it to the right, the better the quality, but the less the compression.
By default, XnConvert does not use much CPU core. To do that and speed up, enable 'Use CPU Cores' at the bottom left and use the sidebar to set the number of cores.
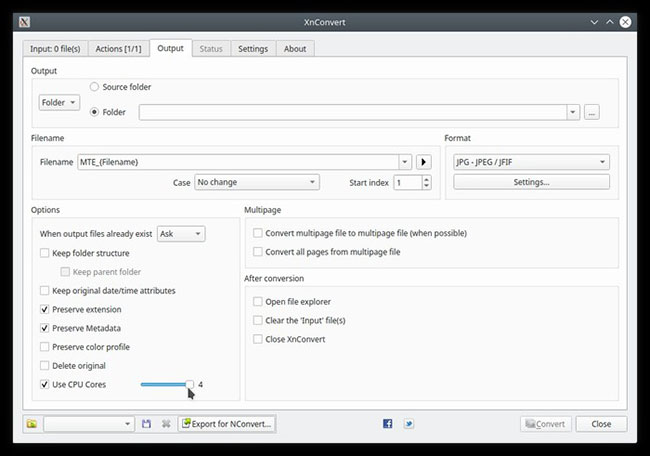
Note that this is not compatible with multi-page files and install 'Ask' in 'When output files already exist' . To use multiple cores, disable multi-page support and set the option 'When output files already exist' to 'Replace' , 'Skip' or 'Rename' .
Save different scripts
With everything set up the way you want, it's time to save all of those settings in one configuration, so it's easy to use again in the future.
To do that, click the small button at the bottom left with the disk icon.
Select the folder where it will be saved and provide the file name for the script in the pop-up window.
Since the site here uses different dimensions for the featured images, the article will create a second script for that.
The example is satisfied with the options available and wants only different widths and heights, so we will return to the 'Actions' tab and modify the options for this scenario.
The mode is changed to 'Fill' so that the image expands to the specified width and height, there is no black border and any image that exceeds those dimensions is automatically cropped.
Then, enter the desired width and height, making sure the 'Keep ratio' option is enabled to help prevent the image from becoming distorted.
As before, the example saved it as a second profile, with a different name, for future use.
Was this article helpful?
Your feedback helps us improve.
Related Articles
 The fastest way to batch resize photos with Microsoft's Power Toy software3 minutes read
 How to batch resize photos in Photoshop4 minutes read
 Bulk photo stamp with XnConvert3 minutes read
 How to resize photos on iPhone mass4 minutes read
 Guide to resize a batch of photos on Mac using Automator3 minutes read
 How to resize photos in Photoshop3 minutes read
Reader Comments 0
Sign in with email or Google to join the discussion.