Table of Contents
This guide explains how to use Group to Hide, Show Rows and Columns in Excel 2007, 2010, 2013, with clear steps, practical tips, and important checks before you begin.
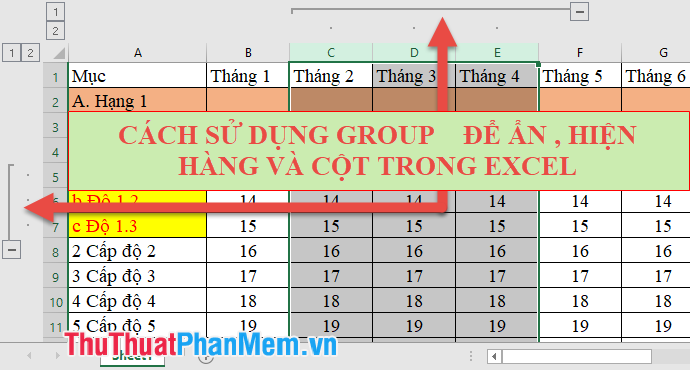
To hide, show rows by using group is much more convenient than using other features like hide.
Use Group hidden, show
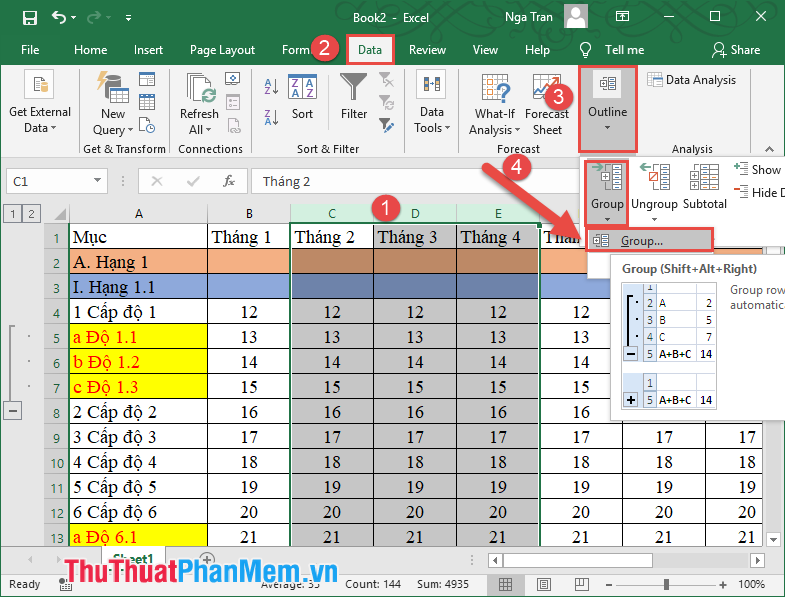
You only need to select the number of rows to hide -> go to Data tab -> Outline -> Group -> Group :

Only a small operation so you can use the Group feature to hide the rows. When the operation is successful on the left, a level 1 and 2 will appear and a minus sign will appear, starting from the selected row to the last row. In the minus sign, the rows are displayed:

If you want to hide the rows, click the minus sign -> minus signs to turn into plus signs and the hidden rows:

Use hidden Group, show columns
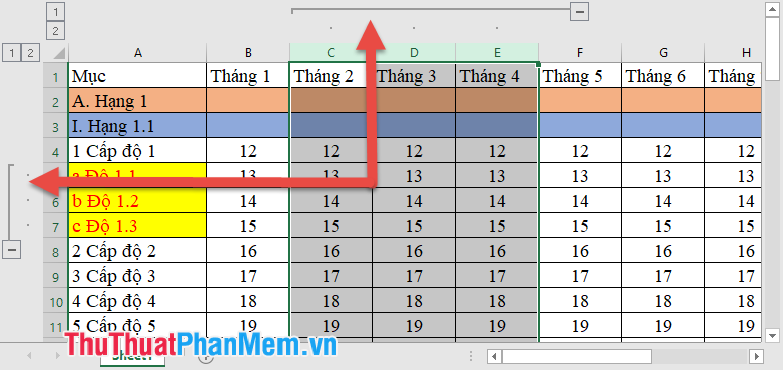
Similarly to hide columns by Group, you perform the same operation that only changes in step 1 instead of selecting the rows you select the columns to hide:
The symbol after successfully hiding the column is similar to hiding the rows:
- If you want to remove the row or column group feature, you just need to select the rows or columns that made the group feature to hide -> go to the Data tab -> Outline -> UnGroup -> UnGroup :

Create row and column hierarchies
- With the Group feature to hide, show rows or columns you can use this feature to decentralize the level of rows and columns like table of contents in Word
- The example has a spreadsheet with the following hierarchy:
+ There are two major items A and B
+ In Section A, there are Rank 1 and Grade 2
+ In Tier 1 and Grade 1 have levels 1, 2.
+ In levels 1 and 2 there may be items a, b, c, d.
To decentralize the rows you make grouping of goods from inside out.
Step 1: Create a hierarchy of items a, b, c, d are subsections of items 1, 2, 3.
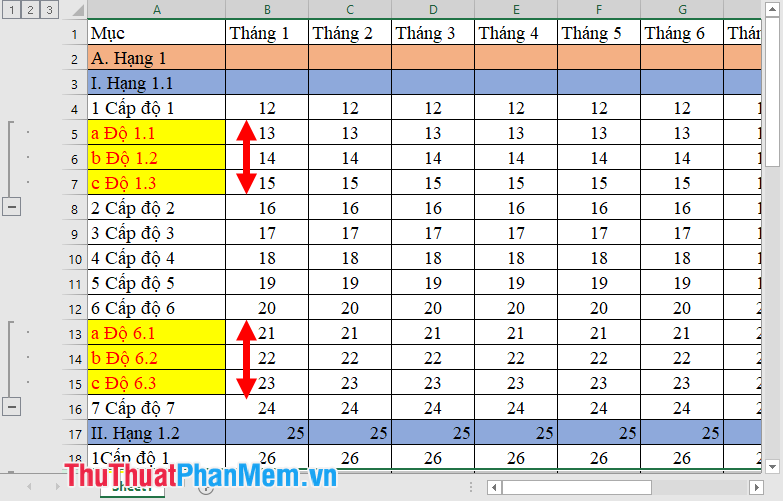
Step 2: Create an item hierarchy greater than 1, ie, create a Group for items 1, 2, 3.
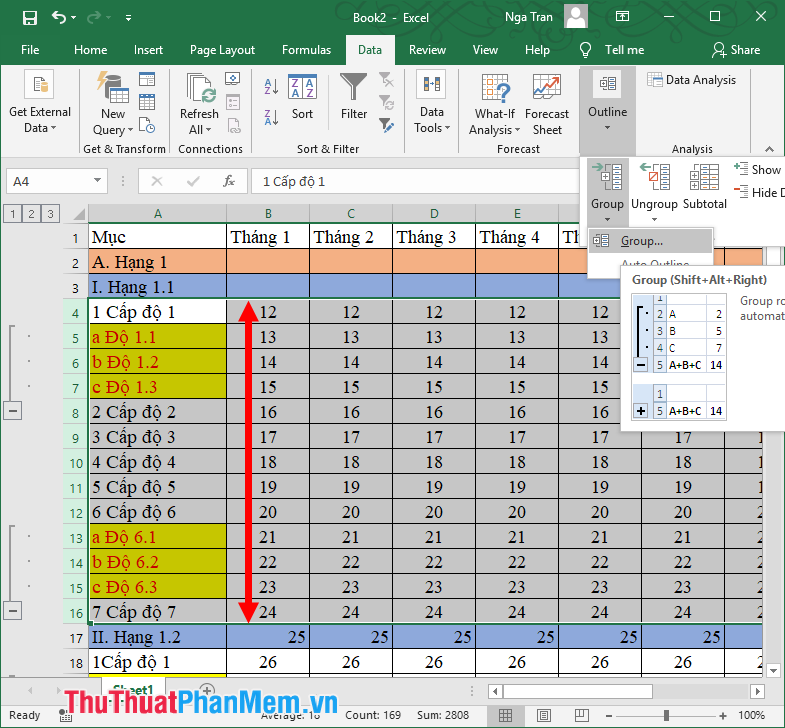
Step 3: Create a Group for a group of grades 1 and 2.
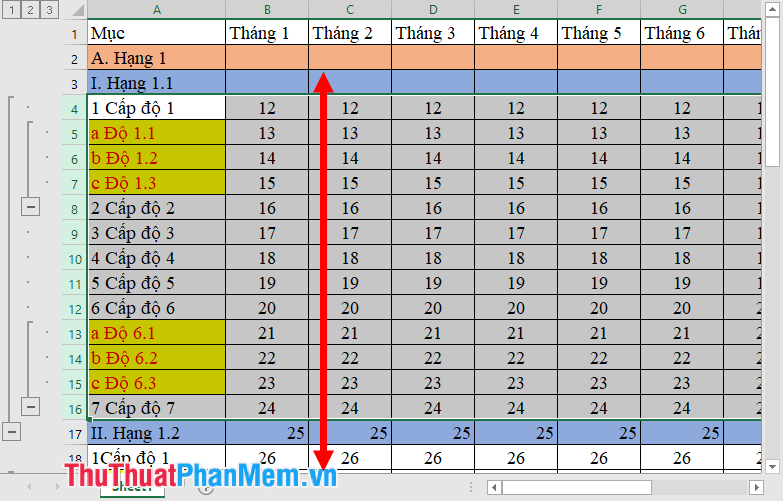
Similarly you create Group for the remaining levels.
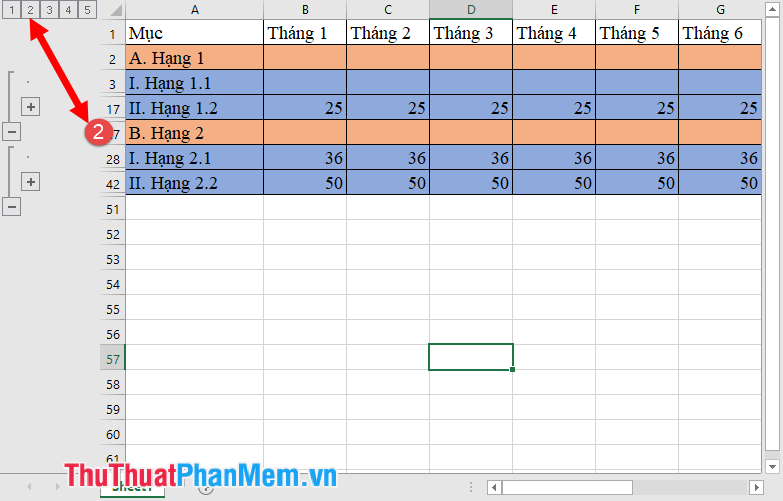
The result after creating the numeric value item above corresponds to the hierarchy. When clicking on the value of level 1 -> Number of rows 1 level displays other levels or other rows will be hidden, only items A, B are displayed:

When clicking on level 2 the previous level items are larger than it and level 2 is displayed, the levels with greater value are hidden:
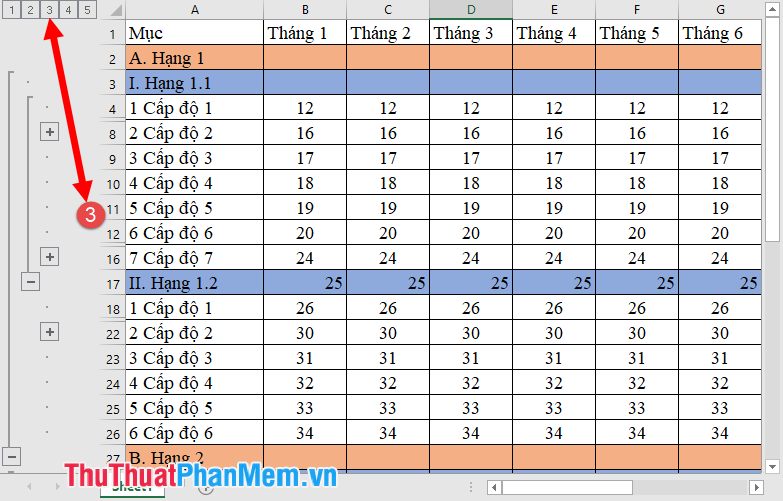
Similarly when selecting level 3:
At group level 4 the contents are displayed in more detail to each item a, b, c, d:
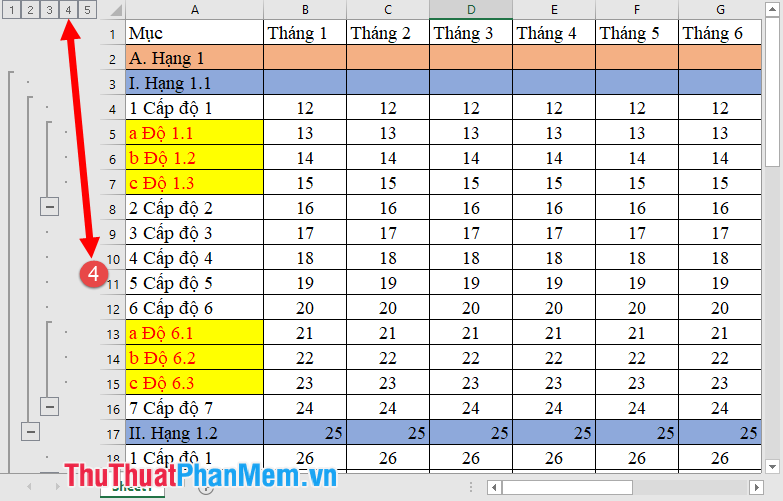
So using the Group hidden feature shows rows or columns in Excel helps you work faster and easier. With the Group feature hidden columns to help you create hierarchies for worksheets with a large number of rows, this gives you an overview and science of your spreadsheet. Good luck!
FAQ
What should I know about Group to Hide, Show Rows and Columns in Excel 2007, 2010, 2013?
Focus on the key features, requirements, limitations, and practical use cases explained in this guide.
How do I get the best results with Group to Hide, Show Rows and Columns in Excel 2007, 2010, 2013?
Follow the recommended steps, use current software or information, confirm compatibility, and review settings before major changes.
Are there any risks or limitations?
Potential limitations depend on compatibility, data quality, cost, privacy, support, and how the product or method is used.
Related Articles
 How to Convert Columns into Rows and Rows into Columns in Excel3 minutes read
 How to Temporarily Hide Rows and Columns in Excel 20134 minutes read
 How to Hide and Show the Rows and Columns in Excel Is5 minutes read
 How to Hide Columns and Hide Rows in Excel 2016, 2013, 20103 minutes read
 Keyboard Shortcuts to Quickly Hide and Show Rows and Columns3 minutes read
 Hide and Display Columns and Rows in Excel3 minutes read
Reader Comments 0
Sign in with email or Google to join the discussion.