Table of Contents
This updated guide examines How to Use Box Notes and organizes the essential facts, background, and practical takeaways in clear American English.
Part 1
Creating Box Notes
 Go to the destination folder. Navigate through your Box folders directory until you reach the sub-folder where you want to store your new Box note.
 Create a new Box note. Creating a new Box note can be done by clicking on the 'New' button found on the page header menu and then selecting 'New Box Note.'
 Name the new Box note. A pop-up screen will appear for 'Create a Box Note.' Type in the name of your new Box note in the Name field. You can also type in a short description in the Description field.
- Click on the 'Okay' button when you're done.
 Work on your Box note. You will be brought to Box Notes editor where you can start writing your notes.
 Don't worry about saving your work. Just focus on writing your notes without the need to worry about hitting a 'Save' button. There's no 'Save' button anyway. Your work is automatically saved, and your Box Notes file will be saved in the folder you set in step 1, with a file extension '.boxnote'.
Part 2
Editing Box Notes
 Locate your Box note. Navigate through your Box folders until you find the Box note you'd like to edit.
- Note that Box Notes have a file extension '.boxnote'.
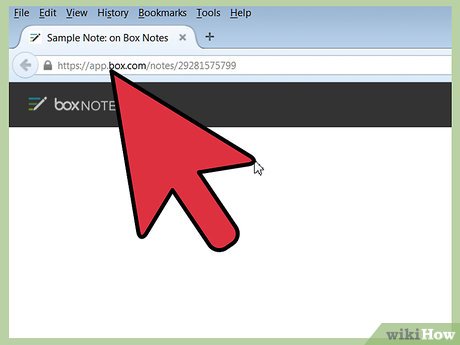 Open the Box note. Once you've found it, click on it and it will be opened in the Box Notes editor, still inside your web browser under a new tab or window.
 Edit the Box note. Work on your note just like before when you created it. No need to save as it's still being automatically saved.
 Format the texts. If you'd like to add some text formatting on your Box note, use the formatting tools found on the toolbar located at the top. The icons and the functionalities for these work similarly with other text and document editors, like MS Word.
- You can apply formats by selecting the text you'd like to change or by selecting them before typing in the new style format.
- You can format the text size, text color, font style, alignment, and bullets or numbering.
Part 3
Inserting an Image in a Box Note
 Locate the image file. Navigate through your Box folders until you find the image you'd like to insert in your Box note.
 Create a share link. Once you've found it, hover over it to see a link icon with a 'Share' text towards the right side of the file. Click on this link icon or 'Share' text. A share link will be created and displayed right below the file.
 Copy the share link. Highlight the share link and copy the whole thing. You can press Ctrl + C on your keyboard to do so. The share link will be copied to your clipboard.
 Locate your Box note. Navigate through your Box folders until you find the Box note you'd like to add an image to.
- Note that Box Notes have a file extension '.boxnote'.
 Open the Box note. Once you've found it, click on it and it will be opened in the Box Notes editor, still inside your web browser under a new tab or window.
 Add the image to the Box note. From the toolbar located at the top, locate the right-most icon of an image. Click on it, and a pop-up text field will appear where you should paste the share link for the image (this is the share link you got from step 3).
- You can only add images available from your Box folders.
- Press the Enter key from your keyboard.
 View the inserted image. The image will be inserted where you indicated on the Box note. You can see it right away after it loads.
- As always, there is no need to explicitly save as your changes are automatically saved.
Part 4
Adding Links and Comments in a Box Note
 Locate your Box note. Navigate through your Box folders until you find the Box note you'd like to edit.
- Note that Box Notes have a file extension '.boxnote'.
 Open the Box note. Once you've found it, click on it and it will be opened in the Box Notes editor, still inside your web browser under a new tab or window.
 Highlight the text. Locate the text—whether word, phrase, sentence, or paragraph—and highlight it by selecting them.
 Insert hyperlink. After the text has been highlighted, a two-icon element will appear near the text. Click on the link icon on the right. It will ask you for the URL or link to where the text will link up to. Type or paste it in the field, and press the Enter key from your keyboard. The hyperlink will be inserted.
 Add comments. If you'd like to add a comment on a text, much like how you do when reviewing on MS Word, highlight the text. A two-icon element will appear near the text. Click on the review icon on the left. Type in your comment, and click the 'Add Annotation' button right below the text field.
- The annotated text will be highlighted, and your comments will appear when you hover over it.
Part 5
Sharing Box Notes
 Locate your Box note. Navigate through your Box folders until you find the Box note you'd like to share.
- Note that Box Notes have a file extension '.boxnote'.
 Create a share link. Once you've found it, hover over it to see a link icon with a 'Share' text towards the right side of the file. Click on this link icon or 'Share' text. A share link will be created and displayed right below the file.
 Copy the share link. Highlight the share link and copy the whole thing. You can press Ctrl + C on your keyboard to do so. The share link will be copied to your clipboard.
 Share the share link. Use your e-mail client, IM app, or even your social media accounts to send the share link across your recipients. They will be able to access your Box Note using this share link.
FAQ
What is How to Use Box Notes about?
It provides a structured overview of box, explains the main context, and highlights practical takeaways for readers.
Why does this topic matter?
Understanding the main concepts helps readers evaluate the issue, avoid common mistakes, and make better-informed decisions.
How should readers use this information?
Use the guidance as a practical starting point, confirm details that may have changed, and follow current product, safety, or security recommendations.
Related Articles
 How to Pin Notes on Apple Notes - Mark Important Notes4 minutes read
 How to Transfer Notes from Evernote to Mac's Notes3 minutes read
 How to Set Password for Notes Application on iOS 115 minutes read
 How to Save Notes as Photos with Marked.cc3 minutes read
 How to Share Folders in Notes App on iOS3 minutes read
 How to Set Notes Notes Password on iPhone6 minutes read
Reader Comments 0
Sign in with email or Google to join the discussion.