How to Restore Samsung Notes on Samsung Galaxy
Samsung Notes allows Galaxy users to write and store notes easily in a connected Samsung Cloud account (this can come in handy when certain notes are deleted. Today's TipsMake will guide you on how to recover them.) Notes are deleted on Samsung Notes using Samsung's built-in backup program or a data recovery program compatible with Samsung devices (if the former doesn't work)..
Using Samsung Backup and Restore

You need to make sure that your Samsung Notes are backed up. Before accessing the restore data menu, check to make sure that your Samsung Notes files are backed up to your Samsung Cloud account.
To proceed, you need to go to the Backup and restore option in the Cloud and accounts section of the Settings menu and select Backup data. . After selecting the data to save (Samsung Notes document), click Backup.

Open the Settings app. You can access it from within the app drawer.

Select Cloud and accounts . A menu for backup and restore options will open.

Click Restore data . After backing up your data, you need to return to the main Backup and restore menu and select this option under the Back up data section.

Select the data you want to recover. Since Samsung Notes are documents, you can simply select the document as the data type to restore from a Samsung Cloud backup.
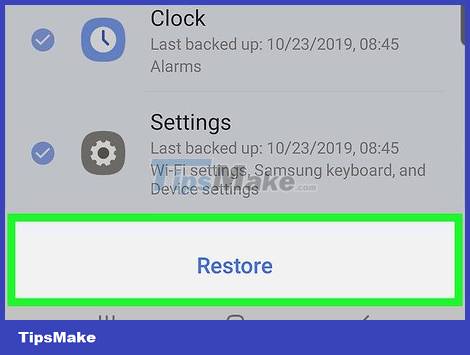
Select RESTORE . The transfer of data stored in the Samsung Cloud account to the Samsung Galaxy will begin.
Note: Samsung Backup and Restore doesn't always save and download Samsung Notes back to your phone, so you may need to install the latest version of Samsung Notes for Galaxy from the Google Play Store to restore the full content. dung.
Using EaseUS MobiSaver
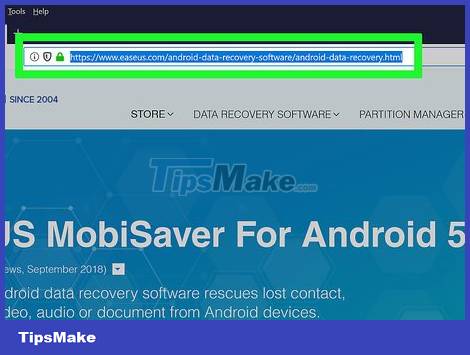
Open your computer's web browser and visit the EaseUS website. Here you can download the free version of EaseUS data recovery software to start the recovery process.
EaseUS MobiSaver is not always able to recover data from Android device factory reset, so you should try the free version of the software first.
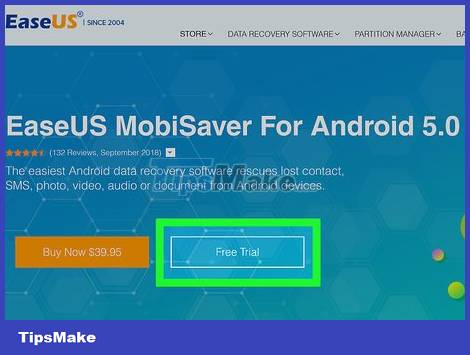
Click Free Download . The free version of EaseUS MobiSaver will begin to be downloaded and installed on your computer.
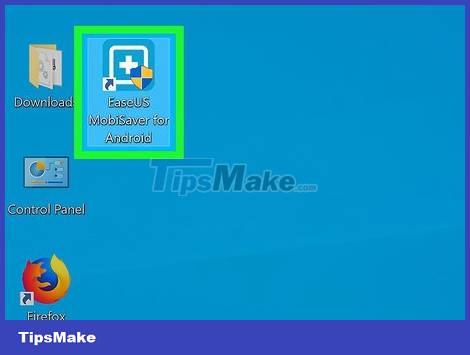
Open EaseUS MobiSaver. Just click on the icon of the program with a white cross on a light blue background.
Enable USB debugging on Samsung Galaxy. You need to connect your Galaxy to your computer via USB so that the EaseUS Data Recovery Wizard can scan the data on the device.
- Open the Settings app.
- Scroll down and select About phone.
- Click Software information.
- Scroll down and tap Build number 7 times.
- Enable Developer Options.
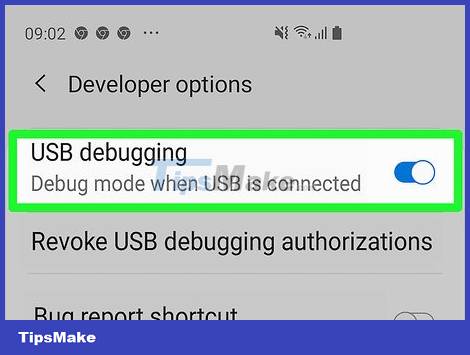
- Go back to the Settings menu and select Developer options.
- Scroll down and turn the USB debugging switch to the On position.
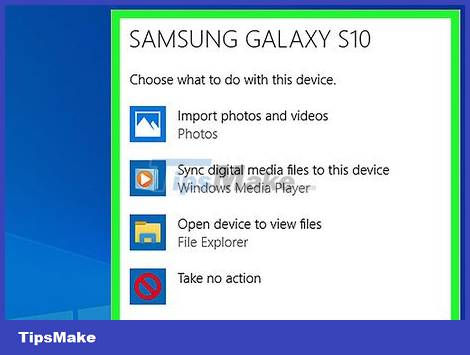
Connect your Samsung Galaxy to the computer. Once USB debugging has been enabled, you can connect the two devices via a USB cable and wait for EaseUS to detect the device.
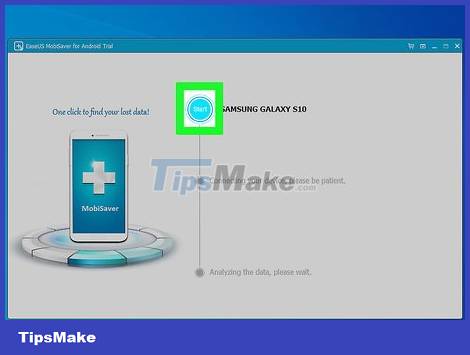
Scan for lost data on Galaxy. Once the devices are connected, EaseUS will automatically start the data scanning process on the phone.
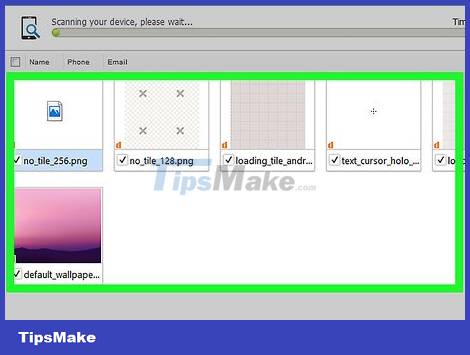
Select the data you want to recover. After scanning, a screen with different files that can be recovered will appear. A blue checkmark will appear next to the files you choose to restore.
Samsung Notes documents usually show up with the .sdoc extension when found.
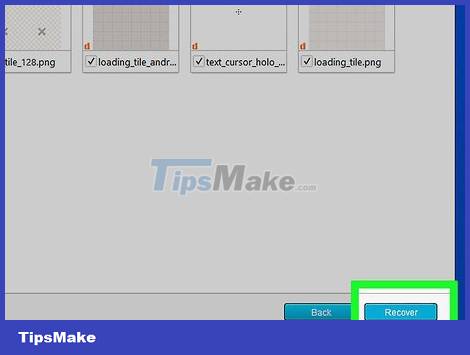
Click Recover . Once the files are found from the scan, this option will show up in the lower right corner of the pop-up menu. You need to click on it to recover data.
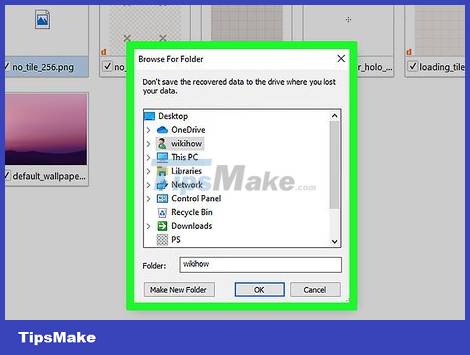
Choose where to save the recovered files. After data recovery, you can save any file to a safe location on your computer and transfer it to your phone via a USB connection.