How to turn off Reserved Storage to free up Windows space
In case you need to free up urgent storage space, you can temporarily turn off Reserved Storage Windows, according to the article below..
Windows has a Reserved Storage feature that automatically creates a certain amount of space to use to install updates without any problems. Microsoft has announced that Windows will set aside at least 7GB of space as reserved storage, regardless of how much disk space you have. In case you need to free up storage urgently, you can temporarily turn off Reserved Storage Windows , according to the article below.
Instructions to turn off Reserved Storage on Windows
Step 1:
First you need to open Windows PowerShell with Admin rights . Then we will enter the command below and press Enter to execute.
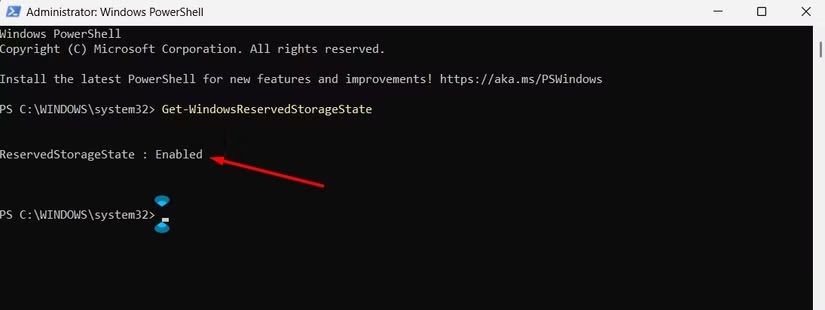
Get-WindowsReservedStorageState
Step 2:
If you see the message Reserved Storage is Enabled, it means you can disable reserved storage. To disable Reserved Storage, continue typing the following command and press Enter.
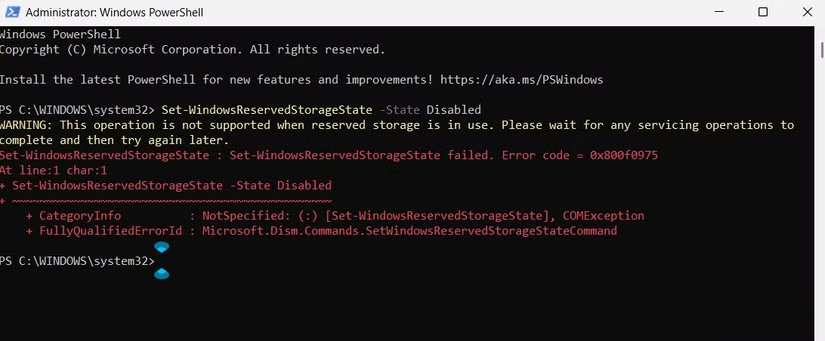
Set-WindowsReservedStorageState -State Disabled
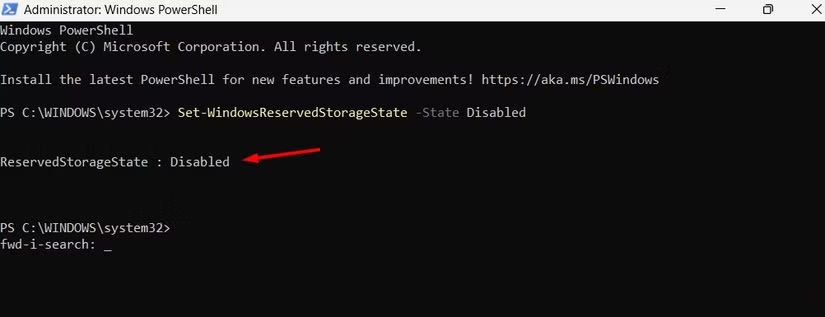
Windows will now quickly free up reserved storage space on the drive where the operating system is installed. This operation is not supported when reserved storage is in use message will appear, meaning that a Windows update has been downloaded and needs to be installed. So, install the update before turning off reserved storage.
Step 3:
Once you have the space to handle your work, you need to re-enable Reserved Storage . Enter the command below to restart Reserved Storage.
Set-WindowsReservedStorageState -State Enabled
Essentially, reserved storage is an important Windows setting that you can turn off to free up space on your computer. However, you should only use this method if you really need more storage space on your device and can't find any files to delete to free up space.