How to create a new pool and storage space in Windows 10
Storage Spaces help protect data from disk errors and expand storage over time as you add drives to your PC. This tutorial will show you how to use Storage Spaces to create a new pool and storage space in Windows 10.
Table of Contents
Storage Spaces help protect data from disk errors and expand storage over time as you add drives to your PC. There are 3 types of storage space: simple, mirror and parity.
Note : You must be logged in as an administrator to create a new pool and storage space.
How to create a new pool and storage space in Windows 10
Step 1:
Add or connect the drives you want to group with Storage Spaces.
These drives can be internal hard drives, external hard drives, or SSDs. You can use many different types of drives with Storage Spaces, including USB, SATA and SAS drives.
The number of drives needed will depend on whether you want to create a storage space simple, mirror or parity.
Step 2:
Open Settings, click the System icon , click Storage on the left and click the Manage Storage Spaces link on the right.
You can also open Control Panel (icon view) and click the Storage Spaces icon .
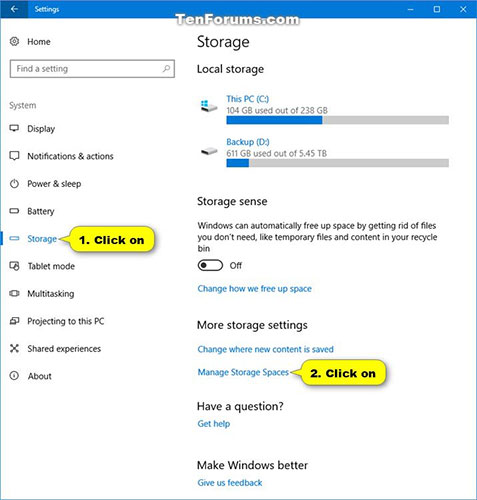 Click the Manage Storage Spaces link on the right
Step 3:
Click the Create a new pool and storage space link .
Step 4:
Click Yes if prompted by UAC.
Step 5:
Select the drives you want to add to the new storage space to create a storage pool, then select Create pool.
Windows will permanently delete all partitions and files on the selected formatted drives.
Be sure to back up everything you don't want to lose to another drive first.
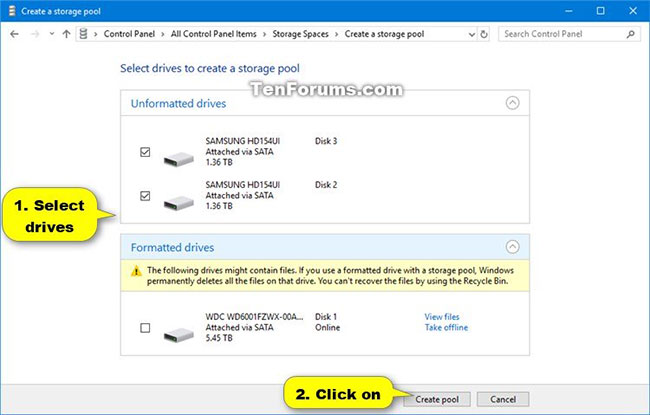 Select Create pool
Step 6:
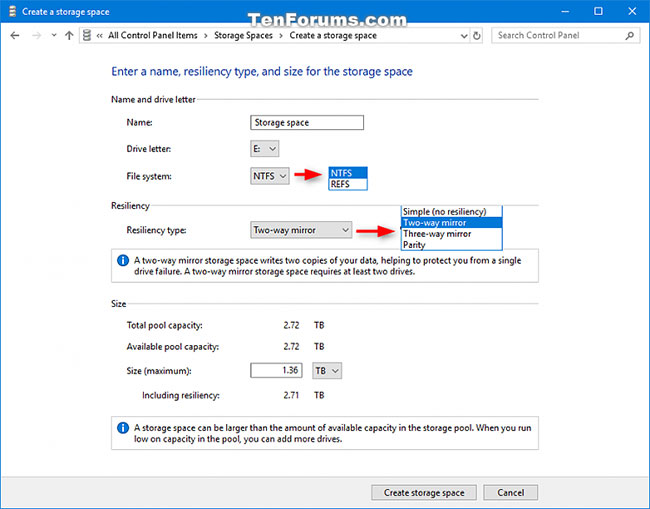
Enter the name (for example, " Storage space ") you want for this storage space.
Step 7:
Select the drive letter (eg " E ") you want for this storage space.
Step 8:
Select the file system you want for this storage space.
REFS will only be available if it has been enabled earlier. Refer to: Enable / disable ReFS (Resilient File System) on Windows 10 for more details.
Step 9:
Choose Simple, Two-way mirror, Three-way mirror or Parity that you want for this storage space.
Step 10:
Enter the maximum amount you want this storage space to be able to reach and click Create storage space .
 Select Create pool
Step 11:
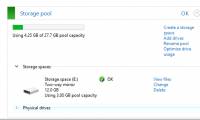
Storage pool and storage space will be created.
Physical drives are the drives you selected in step 5 above.
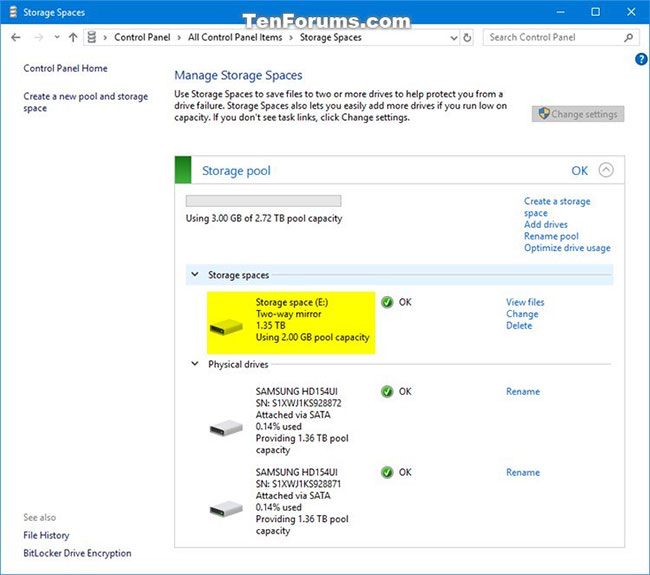 Storage pool and storage space will be created
Step 12:
This storage space (virtual drive) will now show as a drive (for example, "E") in This PC for users to use as any other drive on the PC.
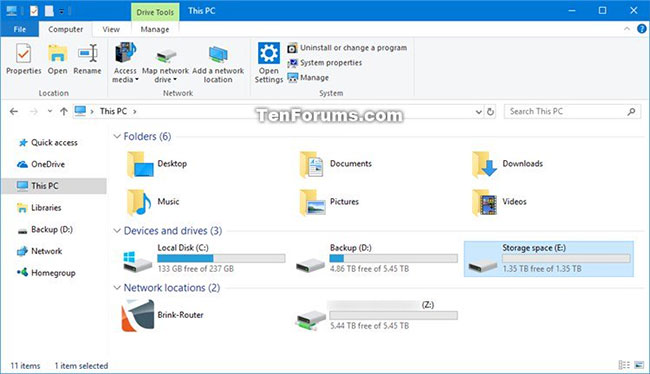 This storage space will now display as a drive in This PC
Was this article helpful?
Your feedback helps us improve.
Related Articles
 Change Storage Space in Storage Pool on Windows 102 minutes read
 How to delete a drive from the Storage Pool in Storage Spaces on Windows 104 minutes read
 How to use Storage sense Windows to free up disk space3 minutes read
 Experience in choosing to buy safe mini family swimming pools for babies6 minutes read
 Microsoft confirms the problem of accessing Storage Spaces in Windows 10 May 2020 Update3 minutes read
 How to see what is taking up a lot of storage space on Windows 103 minutes read
Reader Comments 0
Sign in with email or Google to join the discussion.