Table of Contents
This practical guide walks through how to turn off reserve memory in Windows 10, explains the main requirements, and highlights common issues that may appear along the way.
What is Reserved Storage?
Since the beginning of 2019, Microsoft has made some changes to the way Windows 10 manages disk space and released Reserved Storage. Reserved Storage is a portion of space occupied by Windows 10 to prepare you for updates, apps, temporary files, and system cache. Without memory to spare, when you have used up disk space, the system will have difficulty managing system files. This can lead to Windows applications not working properly.
Reserved storage will automatically be supported on Windows 10 computers from version 1903. The feature will automatically run in the background.
How much space does Reserved Storage take up?
The capacity of Reserved Storage will be on average 7GB. However, the amount of space taken up can change over time based on how you use your PC.
For example, temporary files that take up free space now on your device may consume space from the reserved storage in the future.
In addition, reserved memory can also be increased by two factors including: optional features and installed language packs.
How to view Reserved Storage size
Follow these steps to check your reserved memory size:
Step 1: Press Windows + I key combination to open Settings. On the main screen, select System.
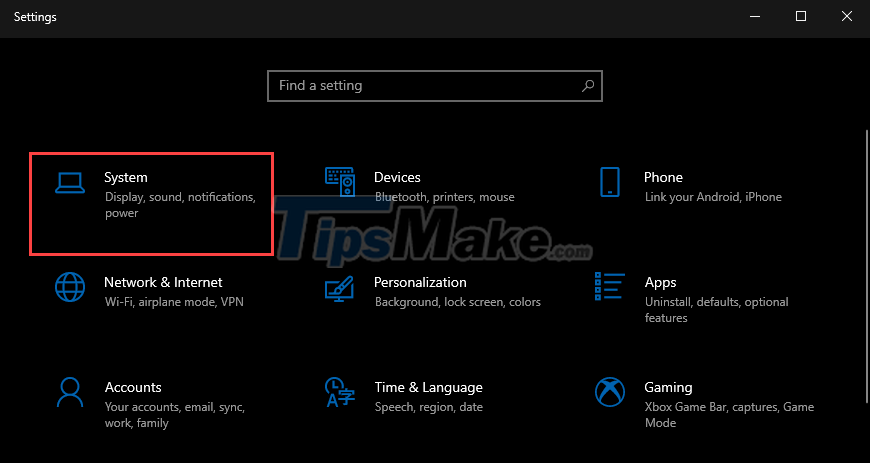
Step 2: Select Storage in the left menu >> Show more categories.
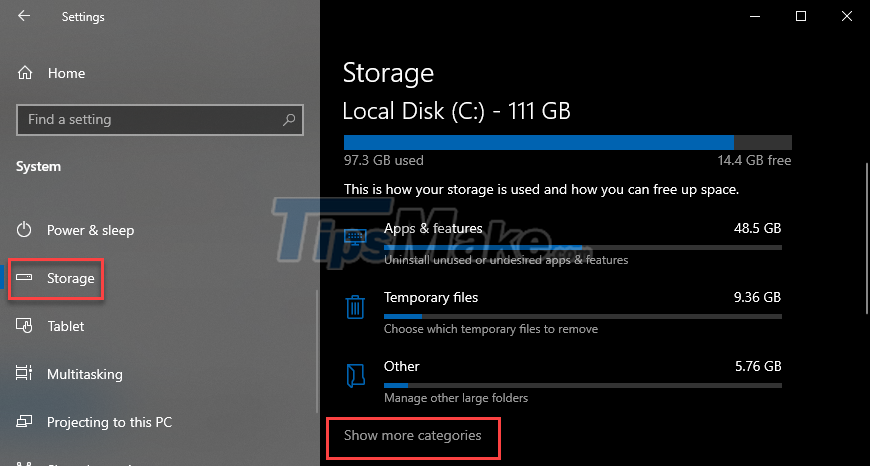
Step 3: Open System & reservations.
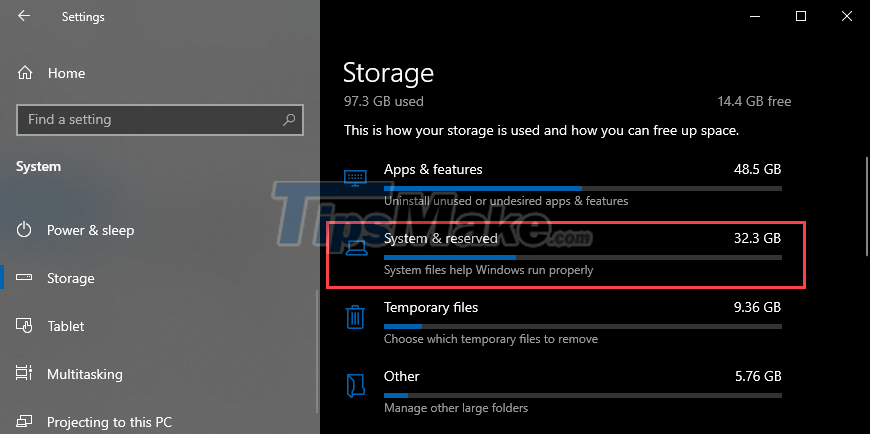
Step 4: Now you can see the size of your Reserved Storage.
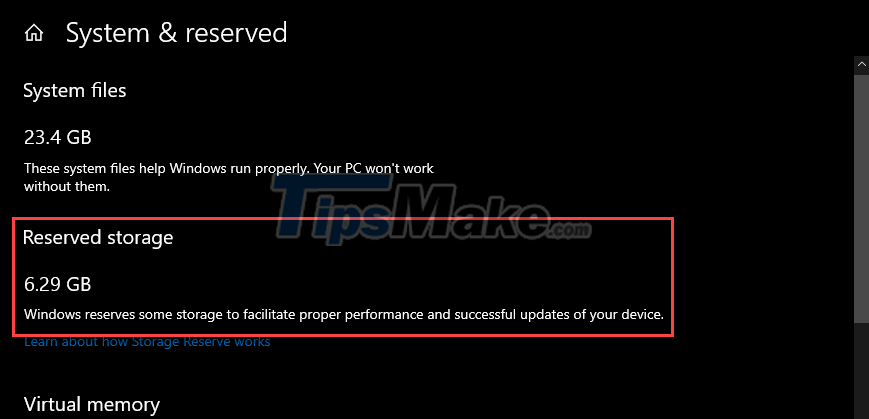
How to disable Windows 10 Reserved Storage using CMD
Reserved memory is actually a useful component that you shouldn't turn off. If you use up all the hard drive space, the operating system will not have enough free space to operate the system files, leading to some instability problems.
However, if you think you're not going to use up all the space and want to save 7GB for something else, you can completely turn off Storage.
You enter cmd in the search box, then open Command Prompt under Administrator (Run as administrator).
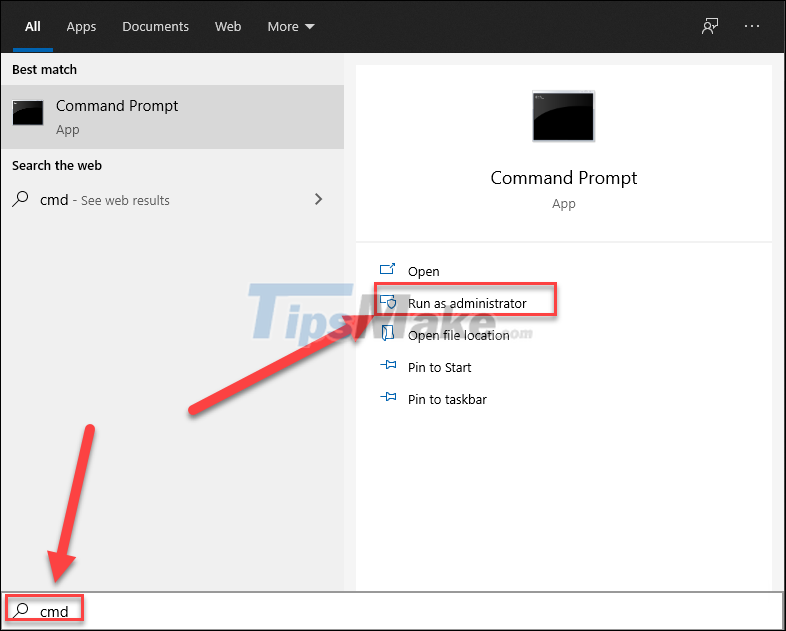
You enter the following command and press Enter to check the status of Reserved Storage.
dism /Online /Get-ReservedStorageState
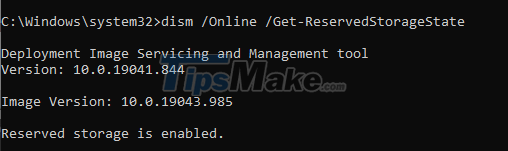
As you can see above, Reserved Storage is in the 'enabled' state. So enter the following command to turn it off.
dism /Online /Set-ReservedStorageState /State:Disabled

Please note that after the reserve memory is turned off, this amount of space will not be lost immediately. You need to wait a while before reclaiming the free space.
In the future, if you ever want to re-enable Reserved Storage, simply enter the following command:
dism /Online /Set-ReservedStorageState /State:Enabled
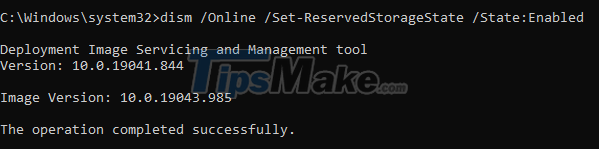
Conclude
And that's how you check, enable/disable the memory reserve. If you still have a lot of problems in managing your drive, please refer to the article How to clean up your computer fastest. Good luck!
Key Takeaways
Use the information above as a practical reference for how to turn off reserve memory in Windows 10. Review each step carefully, confirm any requirements, and choose the option that best fits your situation.
FAQ
What does this guide explain about Turn Off Reserve Memory in Windows 10?
It explains the main concepts, practical considerations, and useful steps related to turn off reserve memory in Windows 10 without requiring advanced knowledge.
Who can benefit from learning about Turn Off Reserve Memory in Windows 10?
This information is useful for readers who want a clear overview, practical guidance, and reliable steps related to turn off reserve memory in Windows 10.
What should I check before applying this information?
Review the requirements, confirm that your device, software, or situation matches the instructions, and back up important data before making major changes.
Related Articles
 Remove 'Reserve System' Partition in Windows 71 minutes read
 How to Turn the Memory Card into Internal Memory on Android 6.05 minutes read
 Microsoft Launches 'Savior' Windows 365 Reserve4 minutes read
 How to Turn Off Update Windows 10 Thoroughly3 minutes read
 How to Fix Windows 10 Memory Leak7 minutes read
 7 Ways to Fix Memory Integrity Feature Grayed Out on Windows 11: Best Options9 minutes read
Reader Comments 0
Sign in with email or Google to join the discussion.