Change Storage Space in Storage Pool on Windows 10
You can use Storage Spaces to group two or more drives together in a storage pool and then use that pool's capacity to create virtual drives called storage space. archive).
Storage Spaces help protect data from hard drive errors and expand memory over time, when you add a drive to your PC. You can use Storage Spaces to group two or more drives together in a storage pool and then use that pool's capacity to create virtual drives called storage space. archive).
These storage spaces usually store two copies of data, so if one of your drives fails, you still have an intact copy of the data. If you run out of space, just add more drives to the storage pool.
This tutorial will show you how to change the name, drive letter, and size of the storage space in the storage pool on Windows 10.
Note : You must be logged in as an administrator to change storage space.
Here's how:
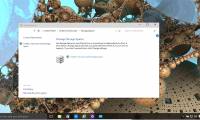
1. Open Settings , click the System icon, then select Storage on the left and click the Manage Storage Spaces link on the right.
Alternatively, you can also open the Control Panel (icon view) and click on the Storage Spaces icon .

2. Click the Change settings button, select Yes if prompted by UAC and click the Change link for storage space in the storage pool you want to change.

3. Change the name (if you want) for this storage space.
4. Change drive letter (if you want) for this storage space.
5. Change the maximum capacity (if you want) for this storage space.
6. When done, click the Change storage space button at the bottom to apply your changes.

Was this article helpful?
Your feedback helps us improve.
Related Articles
 How to create a new pool and storage space in Windows 103 minutes read
 How to delete a drive from the Storage Pool in Storage Spaces on Windows 104 minutes read
 How to use Storage sense Windows to free up disk space3 minutes read
 Experience in choosing to buy safe mini family swimming pools for babies6 minutes read
 Microsoft confirms the problem of accessing Storage Spaces in Windows 10 May 2020 Update3 minutes read
 How to see what is taking up a lot of storage space on Windows 103 minutes read
Reader Comments 0
Sign in with email or Google to join the discussion.