How to split and partition hard drive with EaseUS Partition Master software
As you know, we often divide hard drives into different partitions to make it easier to manage our data. To split the drive we can use the Disk management feature available in windows or use software such as the MiniTool Partition Wizard. However, in this article, TipsMake.com will guide you to split the hard drive using Easeus Partition Master software, which is quite famous and easy to use, please refer.

If you have not installed the software, you can access the address below to download and install:
https://www.easeus.com/partition-manager/
You download and double-click the file to download, the software is very easy to install, just next few steps are done.

After installation, launch the software and the following is the main interface of the software:

In the main interface of the software the physical hard drive will be manifested as the Disk 0, Disk 1, Disk 2.vv. In each Disk is divided into different partitions.
To divide the hard drive you do the following:
Step 1 : Right-click the partition you want to split and choose Resize / Move

Step 2: A new window appears, use the mouse to drag the black dot on the capacity bar to create more free space for the new partition, the old partition size will decrease.
For the example below we will create a new region with a capacity of 100Gb. Select it all, click OK.

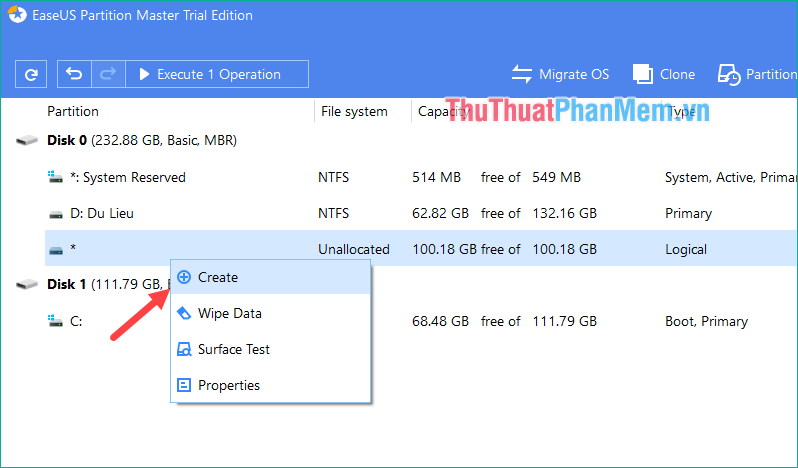
Step 3 : Now you will see a new partition appears, but this partition is an unallocated partition so it cannot be used, we must create a new partition on this same partition to use.
Right-click on an unknown partition and select Create

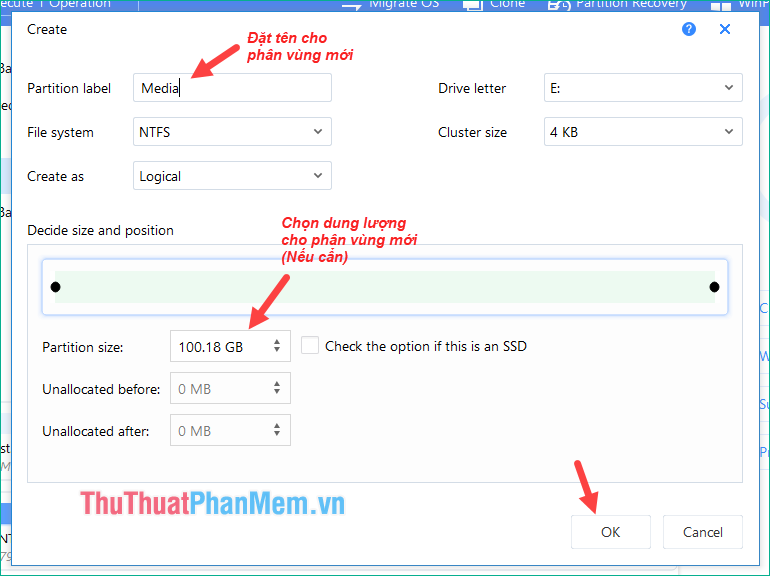
Step 4 : A new window appears and you name the new partition, then select the size for the new partition if needed. Here I will leave full 100Gb, if you want you can split into 2 drives each 50Gb drive. Finally click OK to confirm.

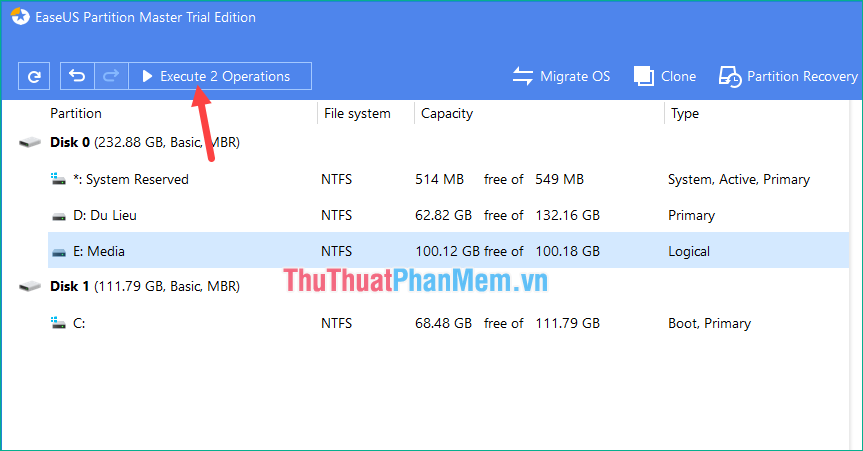
Step 5 : Go back to the main interface, click the Execute button to let the software perform the tasks that we have done above.

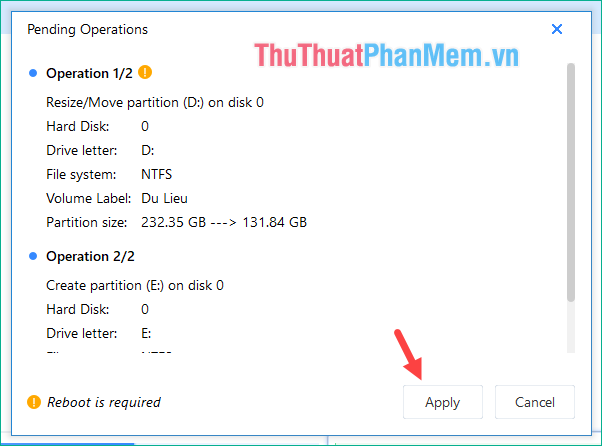
A new window appears, select Apply to begin the process of dividing the drive.

After the partitioning process is complete, you will see a new drive partition appear.
So with EaseUS Partition Master software we can easily partition your hard drive without worrying about losing data. Thank you for watching this article, wish you success!
You should read it
- ★ (Giveaway) Copyright free EaseUS Partition Master Professional Edition Best hard drive management software
- ★ What is the Master Partition Table?
- ★ Instructions for dividing hard drives right in Windows 10
- ★ Steps to divide hard drive using MiniTool Partition Wizard software
- ★ How to split MS-DOS hard drive (FDISK)?