Table of Contents
This practical guide explains how to share a Folder (folder) on Windows 10 in a clear sequence, including preparation, key settings, common mistakes, and troubleshooting steps.
What This Guide Covers
- Method 1: Share folders using the Windows 10 Share file feature
- Method 2: Share folder on Windows 10 using One Drive
- Method 3: Share folders on Windows 10 using File Explorer
On previous versions of Windows, sharing folders was quite difficult. However, on Windows 10, this process is much simpler. Some sharing options on Windows 10 also provide full folder control for users.
Method 1: Share folders using the Windows 10 Share file feature
Step 1: Open File Explorer.
Step 2: Navigate to the folder location and files you want to share.
Step 3: Select the files you want to share then click on the Share tab at the top left of the window and select Share.
You can also right-click on the selected file and click the Share option in the menu that appears for quick results.
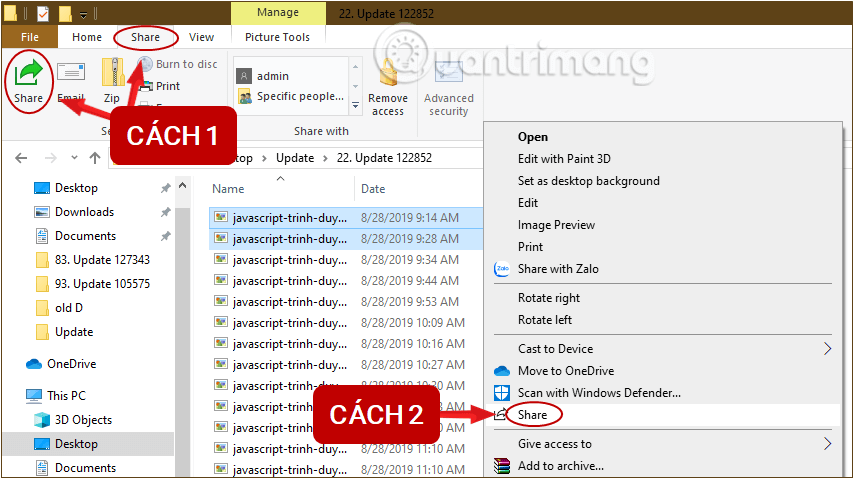
Step 4: Select an application you want to share via or scan for devices near you to share directly to the recipient by clicking Looking for nearby devices.

If you choose Looking for nearby devices , remember that both sending and receiving devices must have Near share turned on .
Method 2: Share folder on Windows 10 using One Drive
If you want to share files stored in OneDrive on your computer, follow these steps:
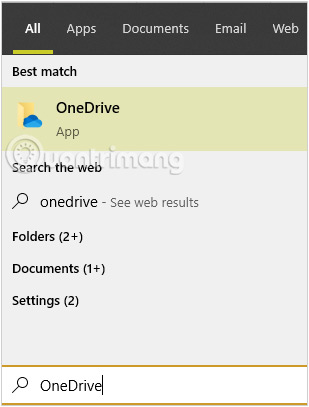
Step 1: First, enter the keyword OneDrive into the Search box on the Start Menu, select and open OneDrive to go to the folder.
Step 2: Select the files you want to share then right-click, select Share a OneDrive > Copy Link to create a link that can be shared with others.
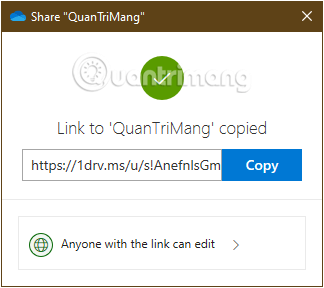
Step 3: Paste the link to send to the person you want to share with, possibly via email, text message.
The recipient will be able to access your folder at any time, even if your computer is not turned on.
Method 3: Share folders on Windows 10 using File Explorer
Step 1: Right-click the folder you want to share, then click Properties .
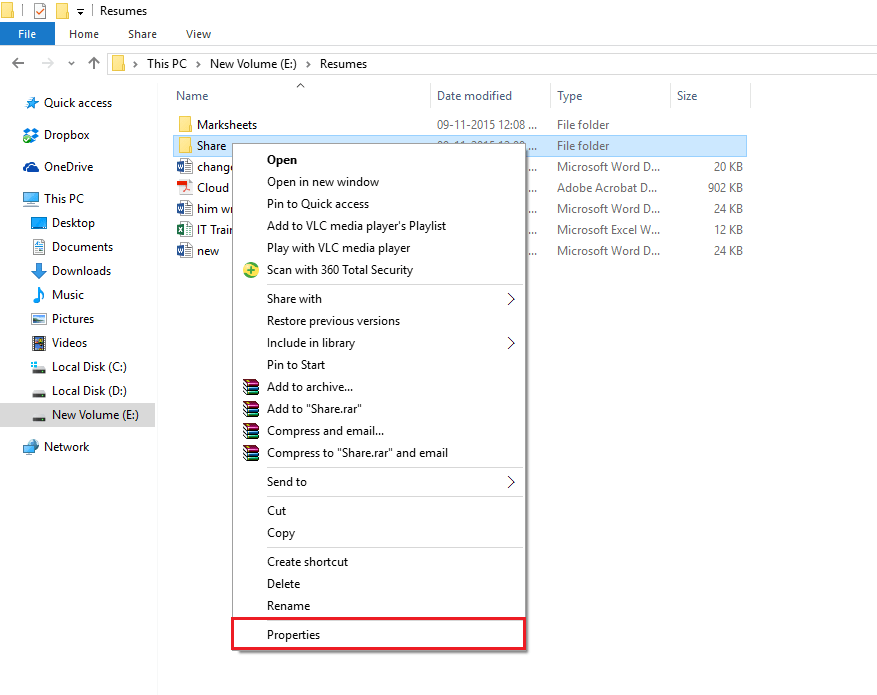
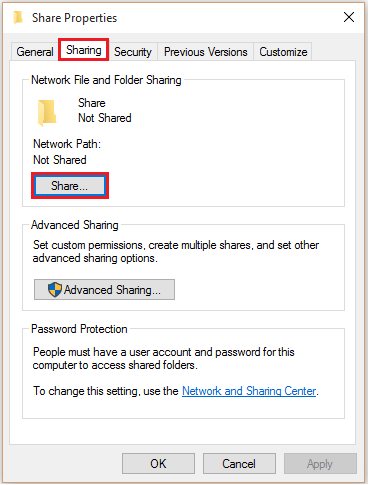
Step 2: On the Sharing Properties window, click the Sharing tab.
Under Network file and Folder Sharing section , click Share .
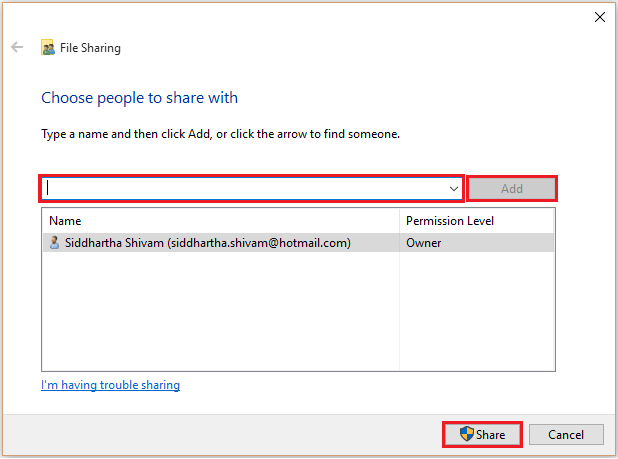
Step 3: Enter the name of the person you want to share the folder with. Next, after you have added the name to the list, click Share.
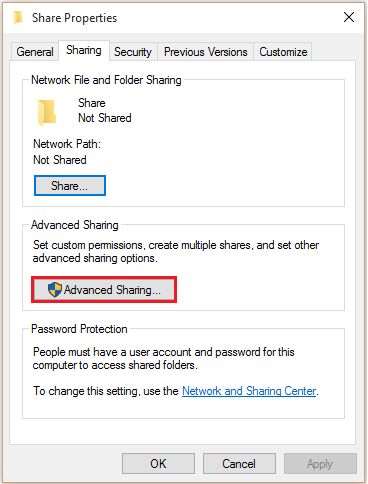
Step 4: If you want to control read and write access to the folder during the sharing process, click Advanced Sharing on the Share Properties window .
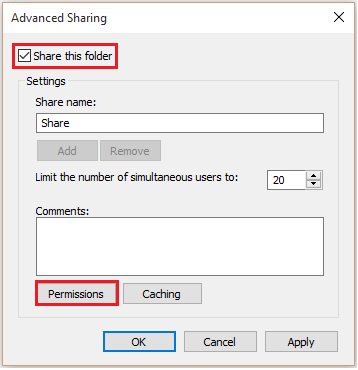
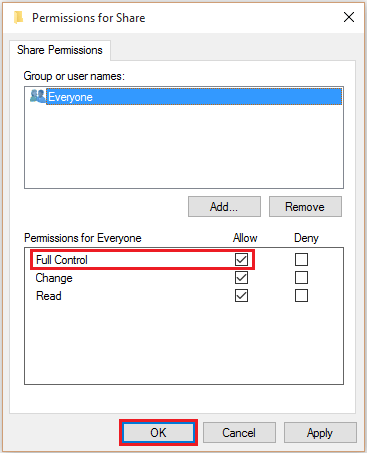
Step 5: Check the Share this folder option , and click Permissions.
Step 6: Next, check Full Control, then click OK .
Note:
- Edit permissions in the Security tab to provide full control over the folder during sharing.
- If the Security settings are not changed, there is at least one visitor count in Sharing and Security that will be considered during the sharing process.
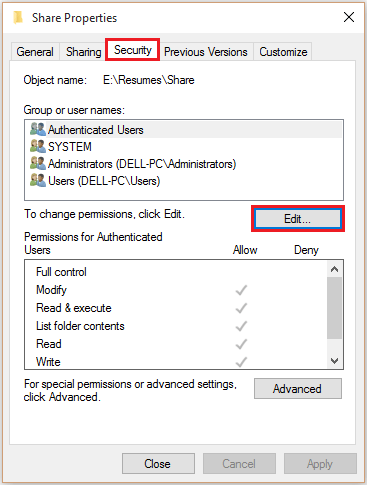
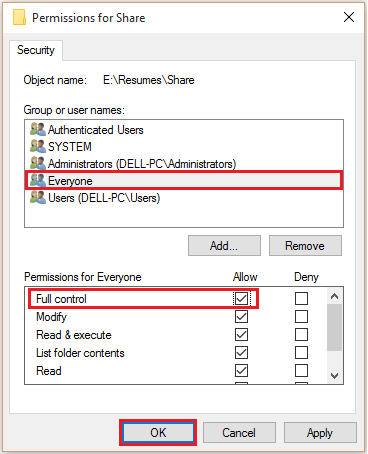
Step 7: Click the Security tab . To change permissions, click Edit .
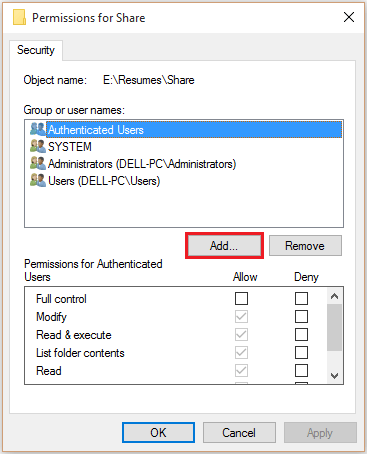
Step 8: Click Add.
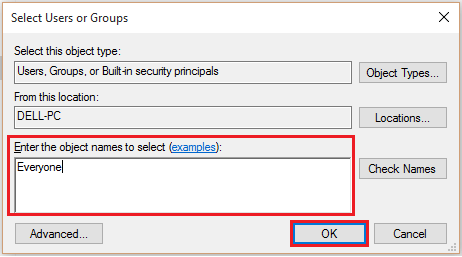
Step 9: Enter Everyone in the Enter the object names to select box and then click OK.
Step 10: In the Username section, select Everyone , then check Full Control .
Finally click OK to complete the entire process.
How to share folders with specific users in Windows 10
Follow the steps listed below to share folders with specific users in Windows 10.
1. First, open File Explorer and find the folder you want to share.
2. Right click on the folder you want to share.
3. Select the Give access to > Specific people option in the context menu.
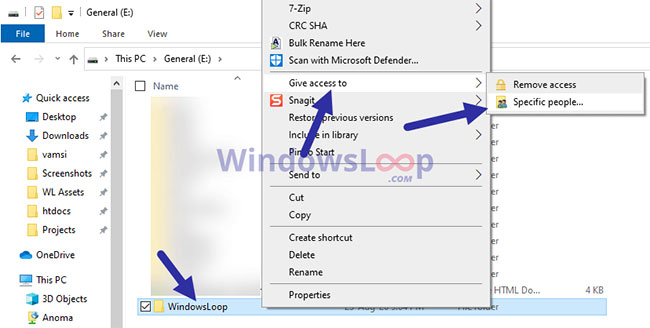
4. Now, enter the username in the blank field and click Add.
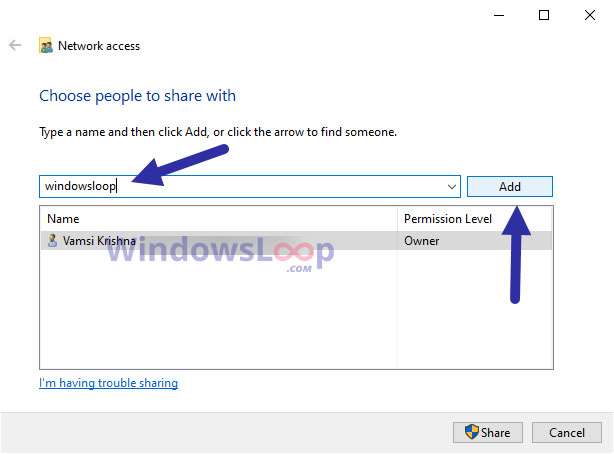
5. As soon as you click this button, the user will be added to the list.
6. By default, the permission level is set to Read-only , meaning users can read files but cannot modify or delete them.
7. (Optional) If you want to enable read and write, click the drop-down menu and select Read/Write.
8. After setting the permission level, click the Share button.
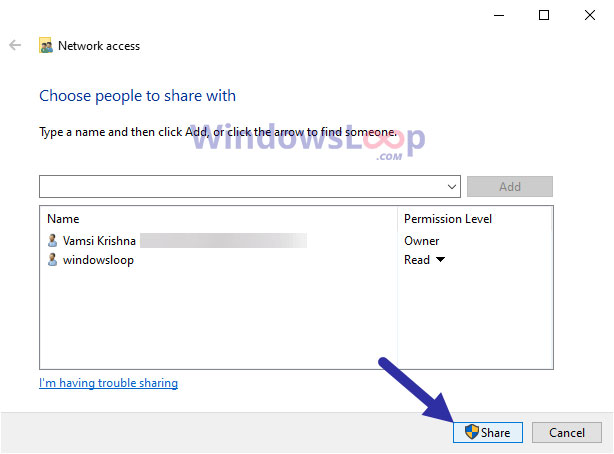
9. When you click this button, the folder is shared with that specific user.
10. Click the Done button to close the wizard.
That's all there is to it! You have successfully shared a folder with users in Windows 10. Users can then access that folder from the Network panel in File Explorer.
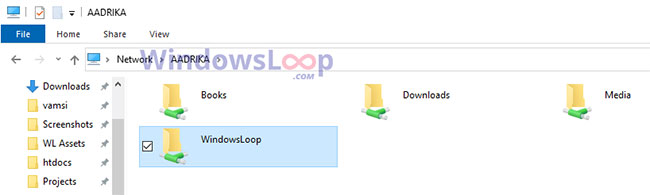
Stop sharing
If you want to remove a user, right-click on the shared folder and select the Give access to > Remove access option .
Next, click on the Stop sharing option.
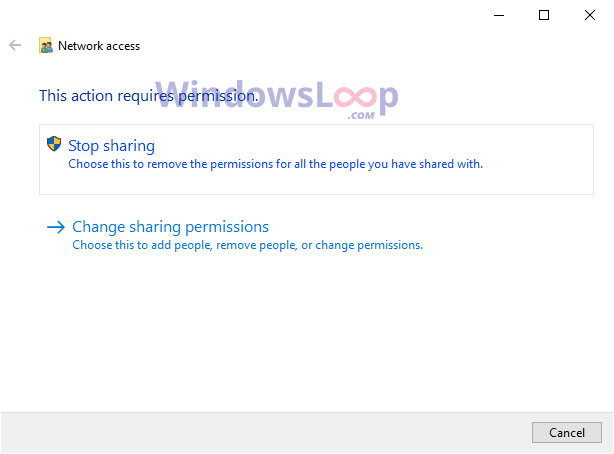
If you want to remove a specific user, select the Change sharing permissions option and select Remove from the Permissions level drop-down menu.
Refer to some more articles below:
Good luck!
Final Thoughts
Use the instructions and checks above in order, verify the result after each major step, and keep a backup whenever the process changes important files or system settings.
FAQ
What should I check before starting?
Confirm that your device or software version matches the instructions, save important data, and note the original settings before making changes.
What should I do if the steps do not work?
Restart the app or device, install available updates, review any error message, and repeat the steps carefully in the same order.
Can I undo the changes?
Many changes can be reversed, but the exact method depends on the feature. A backup or restore point gives you the safest way to recover.
Related Articles
 How to Activate the Sharing Folder Tab on Windows 104 minutes read
 How to Share a Folder (Folder) Via LAN on Windows 103 minutes read
 How to Share Folders, Drives in Windows3 minutes read
 How to Share Folders on the Pi Using Apple Filing Protocol (AFP)8 minutes read
 How to Synchronize Folders: Step-by-Step Guide13 minutes read
 How to Sync Folders: Practical Guide12 minutes read
Reader Comments 0
Sign in with email or Google to join the discussion.