How to turn off Bing search on Windows 10 Start Menu
On the Windows 10 Start Menu, the Bing search feature is integrated. However, for some reason you don't want to turn this feature off. In the article below TipsMake will guide you how to turn off Bing search on Windows 10 Start Menu..
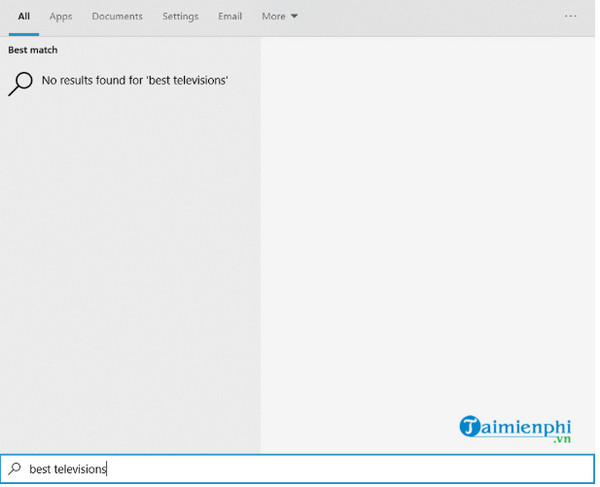
When users enter a search on the Start Menu on Windows 10, Windows will first search for local results such as settings, files or programs and display the search results on the screen.
In case if no local search results are found, Windows will search on Bing and you log in to your Microsoft account, the searches will be uploaded to Microsoft. If you are worried that Microsoft uses this data to track your browsing habits, you can turn off Bing search on Windows 10 at any time. Continue reading TipsMake's article below to learn how to turn off Bing search on Windows 10. Start Menu Windows 10.
How to turn off Bing search on Windows 10 Start Menu using Registry Editor
Follow the steps below to disable Bing search on Windows 10 Start Menu using Registry Editor:
Step 1 : First open the Windows Registry Editor window by pressing Windows + R to open the Run window, then enter regedit there and press Enter.

Step 2: If the UAC window appears on the screen, click Yes to continue.
Step 3 : On the Registry Editor window, navigate to the key below:
HKEY_CURRENT_USERSoftwareMicrosoftWindowsCurrentVersionSearch key.
Step 4 : Find and right-click Search , select New => DWORD (32-bit) Value as shown below:
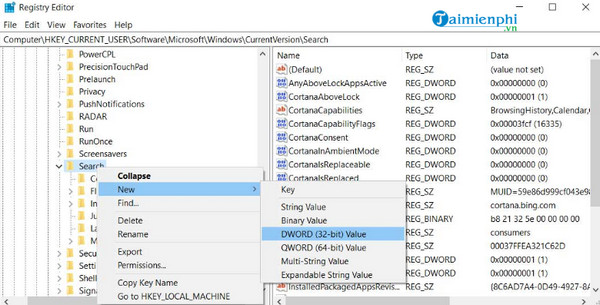
Step 5: Name the new DWORD BingSearchEnabled , then double-click the BingSearchEnabled setting, on the window displayed on the screen and set the value in the Value Data frame to 0 and then click OK.
Step 6: Next in the Search key , find and double-click the value named CortanaConsent, and set the value in the Value Data frame to 0 then click OK . If the CortanaConsent value does not exist, follow the steps above to create and set the value to 0.
Step 7: Finally close the Registry Editor window and restart your computer or Windows Explorer.
After the computer has finished booting, Bing search no longer appears on the Windows 10 Start Menu.
The above article TipsMake has just shown you how to turn off Bing search on Windows 10 Start Menu. Also, if you have any questions or concerns like how to search files on Windows 10 fastest?, read on. You can leave your opinion in the comments section below the article.