How to quickly create a UEFI bootable USB using Rufus
A UEFI-compatible bootable USB drive allows for quick and stable Windows installation. However, many people still encounter errors during setup. This article guides you through creating a bootable USB drive using Rufus, ensuring compatibility with UEFI systems.
This guide provides detailed instructions on how to create a UEFI bootable USB drive using Rufus for Windows installation, ensuring proper system recognition and preventing installation errors.
How to create a bootable USB drive using Rufus
Preparation:
- A USB drive with a minimum capacity of 8 GB.
- Download the Rufus bootable USB creation software.
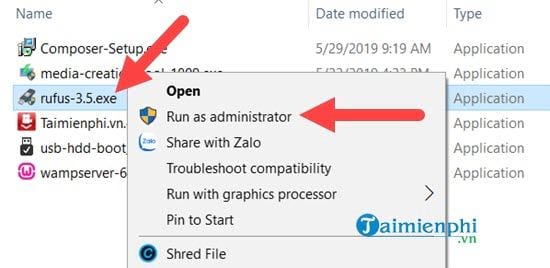
Step 1: After the download is complete, open the software and select "Run as administrator" .
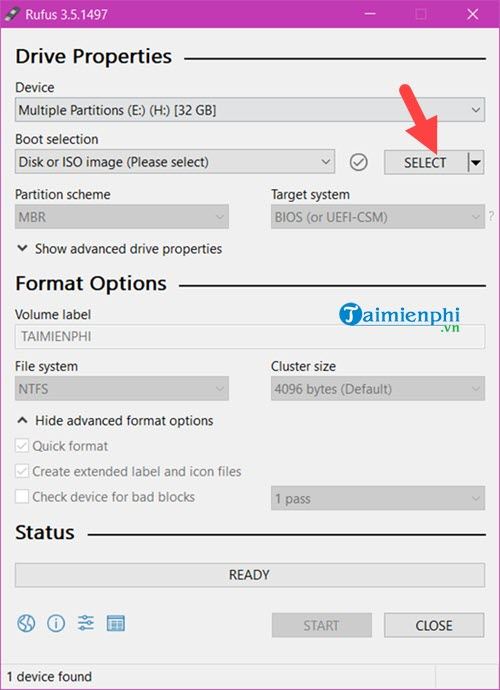
Step 2: Click on Select to proceed with selecting the ISO file .
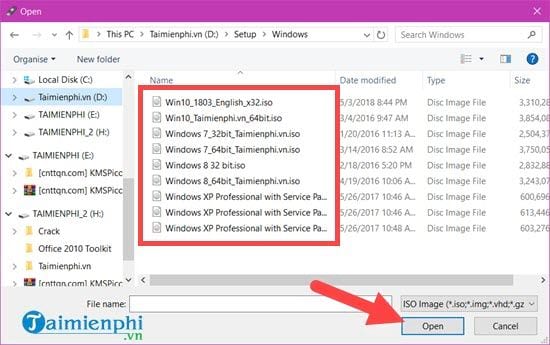
Here, we just need to choose any ISO file; you can download these ISO files from TipsMake depending on whether you want to use a USB drive to install Windows 7, 8, or Windows 10.
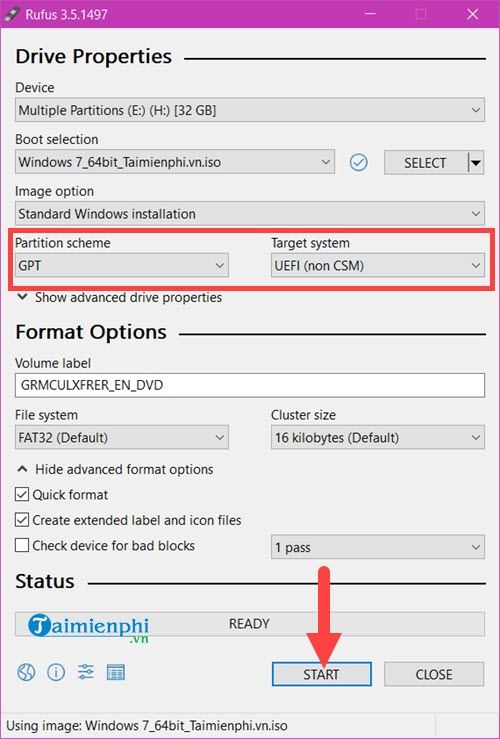
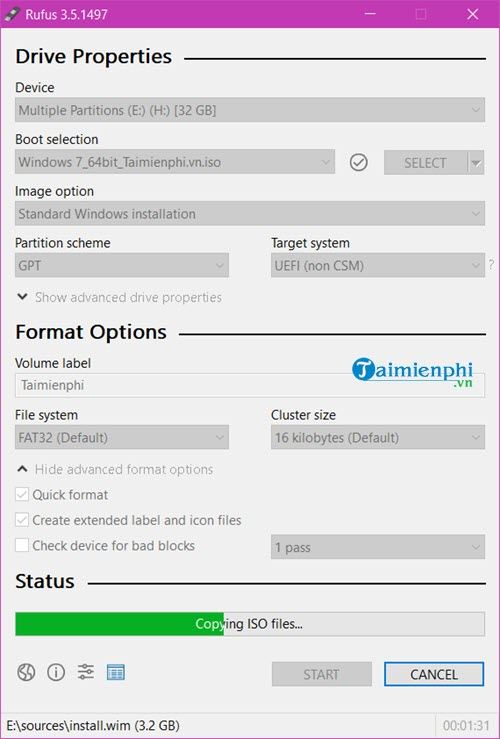
Step 3: After making your selections, the system will default the Partition scheme to GPT and the Target system to UEFI . All you have to do now is press Start.
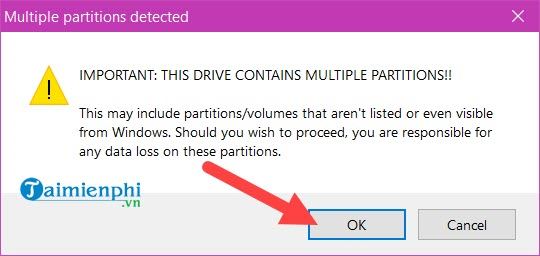
Step 4: The system will prompt you to format the USB drive. Of course, all data inside will be completely erased, so you need to copy any data you need to retrieve.
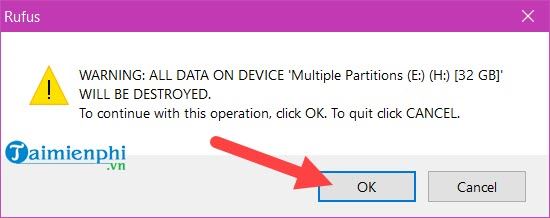
Additionally, Rufus warns that even if you partition your USB drive into multiple partitions, they will all be merged back into one.
Step 5: Creating a UEFI bootable USB drive using Rufus doesn't take very long, as it only takes time to copy the ISO file from the computer to the device.
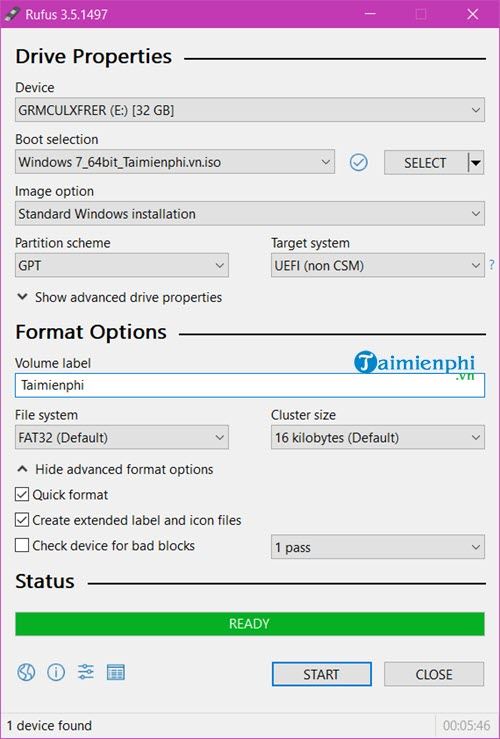
Step 6: When Rufus displays "Ready," the process is complete. Click Close, remove the USB drive, plug it into the computer where you want to install Windows, and install Windows as usual.
With Rufus, you can easily create a UEFI bootable USB drive to install Windows quickly and stably. Simply selecting the correct GPT, UEFI, and FAT32 formats will help you avoid many common errors. If you encounter difficulties, double-check your Rufus settings to ensure the USB boot is properly configured.
- Download Rufus 3.13: Utility to create bootable USB open source, free
- Instructions for creating UEFI standard USB boot using Rufus software
- Rufus - The easiest USB boot creation application
- How to create Windows 10 installation USB using Rufus, Boot UEFI and LEGACY
- How to Use Rufus
- Instructions for creating Windows installation USB on both GPT and MBR standards with Rufus
- How to create USB Boot, create a Windows installation USB with Rufus is simple and effective
- How to create a Windows 11 installation USB using Rufus and Media Creation Tool.
- How to create USB Boot, USB install Windows by Rufus
- 20 best USB boot software
- Download Ghost win xp, win 7, 8, 10 32 and 64bit Link Google Drive
- Fix ISO image extraction failure when creating USB Boot with Rufus
- Ghost Windows 10 Pro 1909 64 / 32bit Full Soft 2020
- Ghost Win 7 Ultimate 64 bit, 32 bit, Full Soft, Full Driver
- Link to download the ISO file Windows 10 20H1 directly from Microsoft
- Download Ghost Win 7 - No Soft, Full Soft, Full Update August - 2020
- Onekey Ghost v13.9 - Ghost Software Windows XP / 7/8 / 8.1
- Hiren's Boot CD for virtual machines
- Download Ghost ISO Windows 10 v20H2 Lite FullSoft V2
- Instructions for creating USB boot with Hiren's BootCD quickly
-
 A simple, detailed, and safe guide to installing Windows on a laptop, perfect for beginners.
-
[Guide] How to fix USB port errors on a laptop
-
How to create a multi-purpose Hiren's BootCD USB for computer rescue.
-
How to create a bootable USB drive using Grub4dos to install and fix operating system errors.
-
How to test the read and write speed of a USB drive.
-
What is USB 3.0? Does your computer support USB 3.0?
 A simple, detailed, and safe guide to installing Windows on a laptop, perfect for beginners.
![[Guide] How to fix USB port errors on a laptop](https://tipsmake.com/data8/thumbs_80x80/[guide]-how-to-fix-usb-port-errors-on-a-laptop_thumbs_80x80_Ka8tiOYLf.png) [Guide] How to fix USB port errors on a laptop
[Guide] How to fix USB port errors on a laptop How to create a multi-purpose Hiren's BootCD USB for computer rescue.
 How to create a bootable USB drive using Grub4dos to install and fix operating system errors.
 How to test the read and write speed of a USB drive.
 What is USB 3.0? Does your computer support USB 3.0?