Instructions for creating UEFI standard USB boot using Rufus software
UEFI or Legacy, MBR or GPT is always something that confuses many people during the process of creating a USB to install Windows. That's why the Rufus tool was born to help you create a UEFI standard USB boot using Rufus or Legacy without having to worry about what it is because your goal of creating a Windows installation USB has definitely been achieved. How to use Rufus is very simple, this tool is quite compact and TipsMake is sure that you only need to spend 1 minute reading the instructions below to master Rufus.
Instructions for creating UEFI standard USB boot using Rufus
Preparation:
- A USB with a minimum capacity of 8 GB.
- Rufus USB boot creation software, download Rufus here.

Step 1: After downloading Rufus according to the instructions above, to create a standard UEFI USB boot with Rufus, we must open this software first by right-clicking > selecting Run as administrator .

Step 2: The Rufus interface appears, here you just need to click Select to select the ISO file to be able to create a UEFI standard USB boot with Rufus.

Here we just need to choose any ISO file, you can download these ISO files on TipsMake depending on whether you want to use USB to install Windows 7, 8 or Windows 10.

Step 3: After selecting, the system will default to Partition scheme as GPT and Target system as UEFI . Our remaining task is just to press Start.
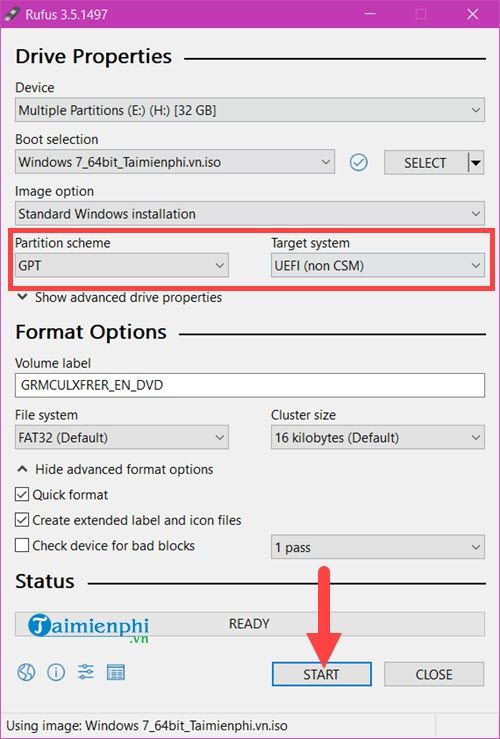
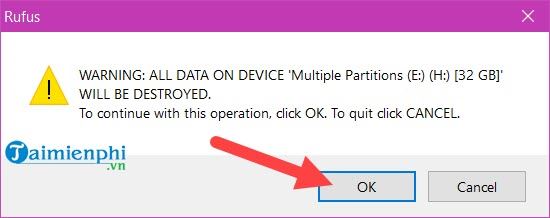
Step 4: The system will ask to reformat the USB, of course all data inside will be completely erased, so we need to copy the data if there is data to retrieve.
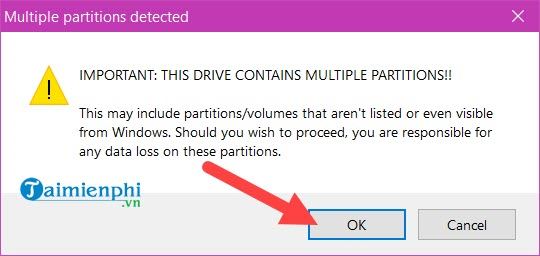
In addition, Rufus also warns that if you divide your USB into multiple partitions, it will also be merged into one.
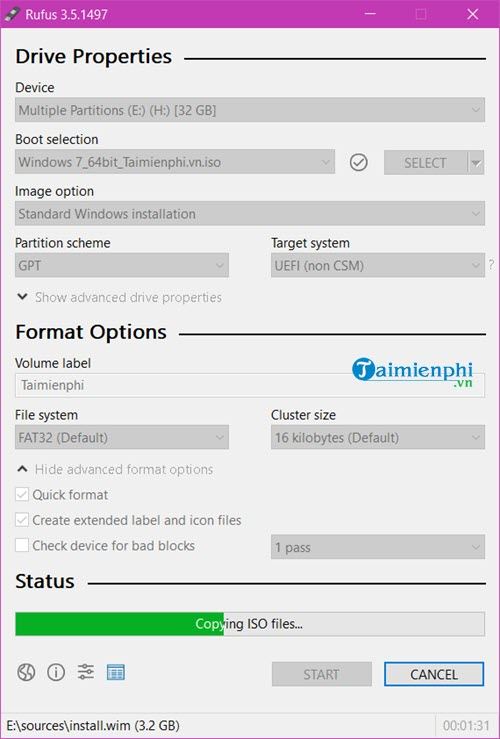
Step 5: The process of creating a UEFI standard USB boot with Rufus does not take long, because it only takes time to copy the ISO file from the computer to the device.
Step 6: When Rufus announces Ready, creating a UEFI standard USB boot with Rufus has been completed. Click Close, remove the USB, plug it into the computer where Windows needs to be installed and install Windows as usual.
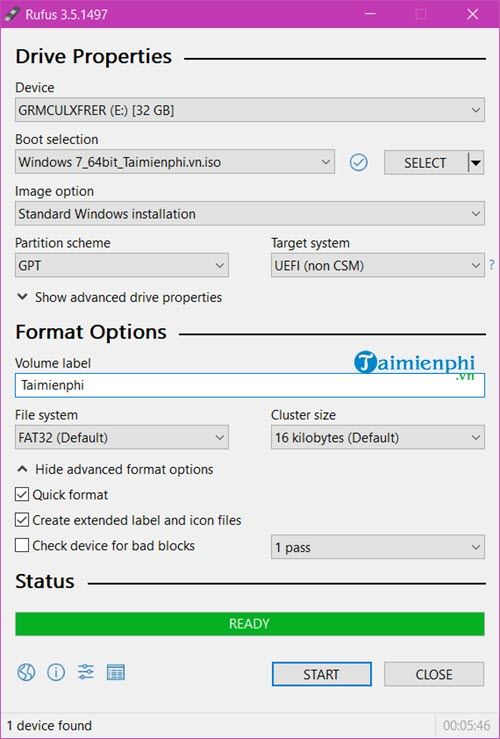
After creation, we can install Windows. Refer to 2 more articles on how to install Windows 7 and Windows 10 if you do not know how to install.
So with just a few basic steps we can create a standard UEFI USB boot with Rufus. In addition, TipsMake also believes that if you are planning to create a Windows 10 USB Boot or any operating system, choosing to create USB Boot Win 10 with Rufus is the most reasonable choice.
You should read it
- ★ How to create Windows 10 installation USB using Rufus, Boot UEFI and LEGACY
- ★ How to Use Rufus
- ★ Instructions for creating Windows installation USB on both GPT and MBR standards with Rufus
- ★ How to create USB Boot, create a Windows installation USB with Rufus is simple and effective
- ★ How to create USB Boot, USB install Windows by Rufus