Table of Contents
This practical guide walks through how to create Windows 10 Installation USB Using Rufus, Boot. It organizes the required steps, settings, and checks so you can complete the task with fewer mistakes.
Rufus is considered one of the best Windows bootable USB creation tools today. With compact size and simple settings, it still ensures stability for Windows. Creating a Windows 10 bootable USB with Rufus is an extremely smart choice when you don't want to burn a Windows installation disc.
Instructions for Creating USB BOOT WIN 10 USING RUFUS
Prepare
Before entering the step of creating a Windows 10 boot with Rufus, you need to prepare: - 01 USB with a capacity of 4GB or more - Rufus Windows boot usb creation tool: Download Rufus - 01 Windows 10 operating system installation: Download Windows ten
Implementation
Step 1: Connect the USB you prepared to the computer, then launch Rufus.

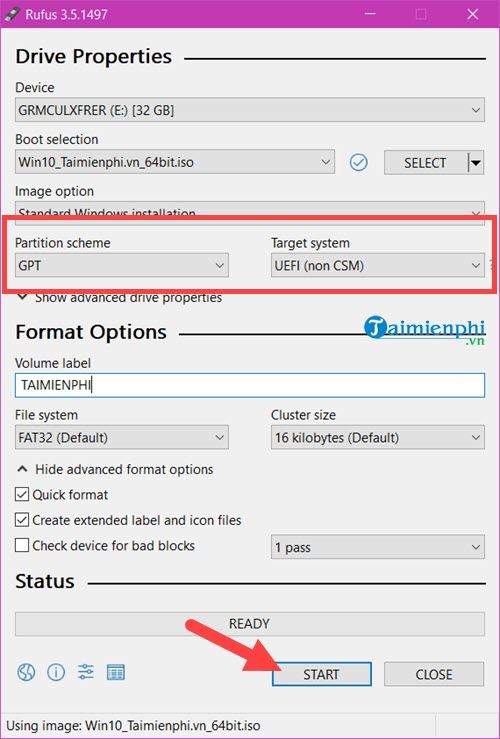
Step 2: In the Device Section, select the exact USB you want to create a Windows 10 boot USB with Rufus. then choose SELECT To navigate to the Windows 10 iso file you have prepared.

Step 3: Choose the appropriate version of Windows 10 That you want to boot. then choose Open To put the file into boot.

Step 4: Now in the Partition scheme Section, depending on your computer standard, choose GPT Or MBR . then choose Start. If you don't know what standard your computer follows, you can see the instructions to Check Windows uses UEFI or Legacy BIOS standard.
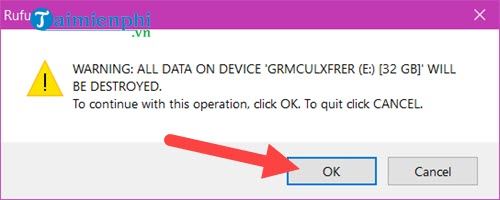
Step 5: Before decompressing, create a Windows 10 bootable USB with Rufus. The tool displays a dialog box warning that all data on your USB will be erased. You should Back up important data on Your USB then choose OK To start the process.
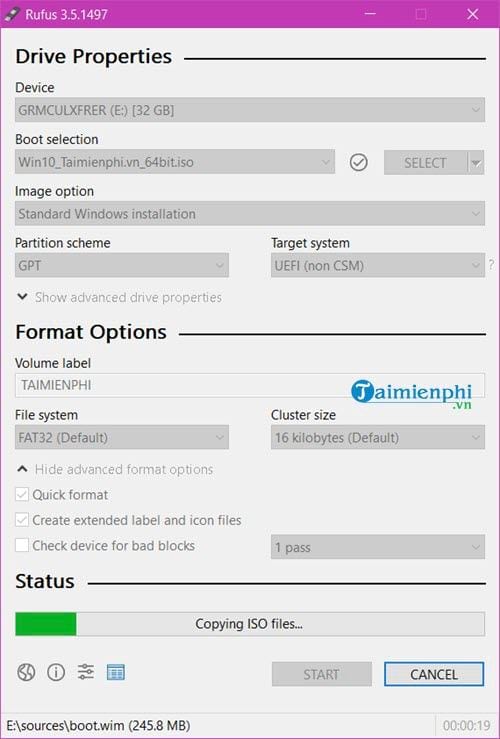
Step 6: It will take some time for Rufus to boot Windows 10 onto your USB.
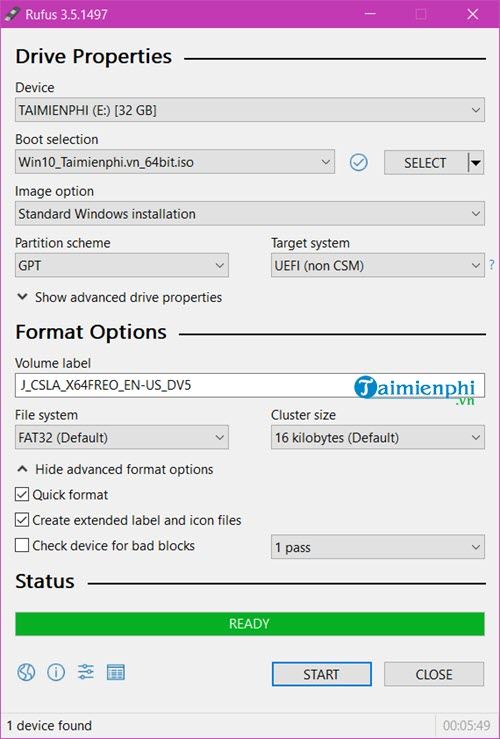
- When the word READY Appears, creating a USB boot to install Windows 10 with Rufus is complete
Then you can use MobaLiveCD to check if the USB can be booted instead of having to reset the computer, which will take time.
Hope you install Windows 10 successfully!
FAQ
What do I need before I create Windows 10 Installation USB Using Rufus, Boot?
Prepare the required device, software, account access, and any files mentioned in the steps. Back up important data before changing system settings.
Why does the process look different on my device?
Menus and options can vary by operating system, app version, device model, or region. Use the closest matching setting and check the official documentation when needed.
What should I do if a step does not work?
Restart the app or device, confirm permissions and connectivity, update the software, and repeat the step carefully. Avoid unofficial downloads or tools.
Related Articles
 Instructions for Creating UEFI Standard USB Boot Using Rufus4 minutes read
 Download Rufus 3.13: Utility to Create Bootable USB Open5 minutes read
 Create UEFI Standard USB Boot with DLC Boot6 minutes read
 Rufus - the Easiest USB Boot Creation Application: Key Facts16 minutes read
 How to Quickly Create a UEFI Bootable USB Using Rufus3 minutes read
 How to Check the Computer That Supports Efi // Uefi or Legacy4 minutes read
Reader Comments 0
Sign in with email or Google to join the discussion.