Instructions on how to successfully install Windows 7 on a virtual drive.
Installing Windows 7 on a virtual drive is a useful solution that allows you to experience the operating system without needing a USB or DVD. With the help of virtual drive creation software like PowerISO, the installation process becomes easier than ever.
Table of Contents
Want to install Windows 7 but don't have a USB/DVD? Try creating a virtual drive and installing Windows 7 directly from an ISO file using PowerISO. This method saves time and avoids the risks of installing from a physical device.
1. Preparation before installation
- A computer with minimum specifications: 9GB hard drive, 512MB RAM. It must have any operating system installed, be able to boot into Windows, and not be infected with viruses blocking .exe files.
- An installation file with the .iso extension of the Windows 7 operating system (e.g., Windows 7.iso)
- Virtual drive creation software: PowerISO , UltraISO… In this article, Taimienphi uses PowerISO. You can install PowerISO on your computer like any other software.
- The partition for installing Windows 7 on the virtual drive must be formatted as NTFS.
If it's not formatted as NTFS, press Start/Run (Window + R), type CMD and press Enter . Then execute the following DOS commands:
convert [partition]:/fs:ntfs (where [partition] is the partition to be converted)
For example: convert C:/fs:ntfs
Then the screen will display ' Enter the current volume label for driver C: '. Enter the name of drive C, for example, Windows 7. Finally, when the process is complete, restart your computer.
2. How to install Windows 7 on a virtual drive
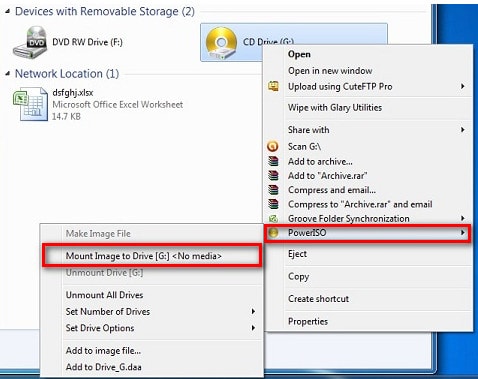
- Open My Computer , then right-click on the virtual drive created by PowerISO, find PowerISO and select ' Mount Image to Drive [G:]'
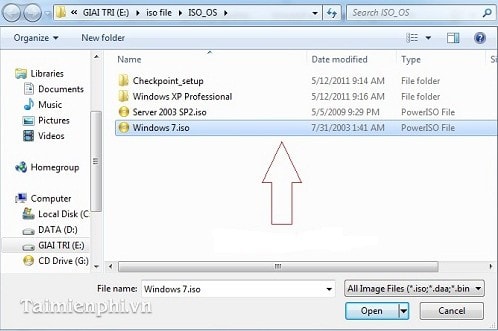
- Then point to the Windows 7 operating system installation ISO file.
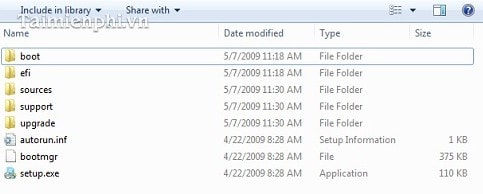
- Opening the virtual drive to check the Windows 7 installation files, we see that all files are fully preserved.
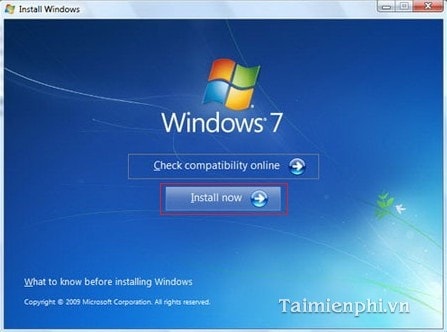
Double-click the setup.exe file to begin installing Windows 7. When the installation interface appears, click " Install now".
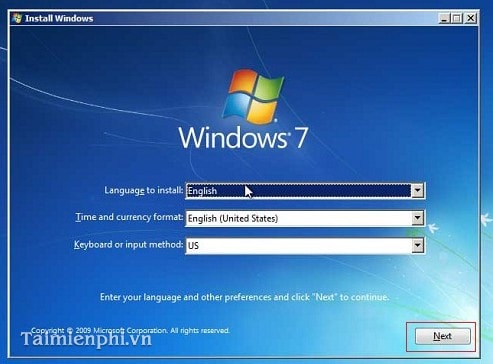
- Select the installation language as shown in the image and press Next.
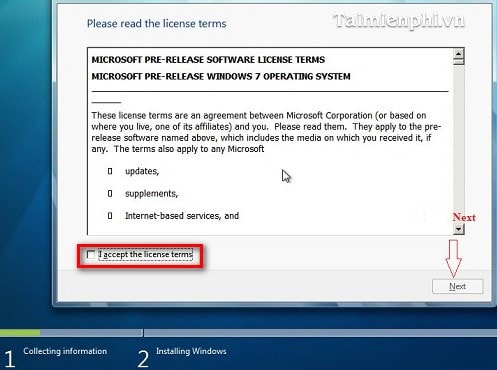
- Wait a moment, select ' I accept the license terms ', then press ' Next '.
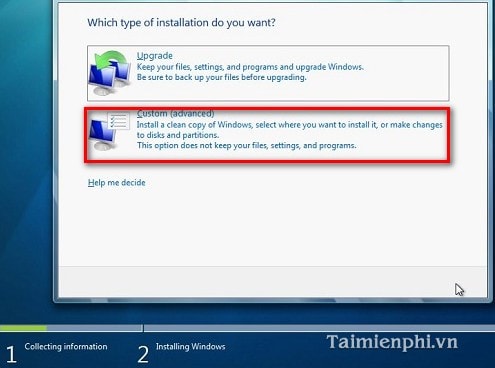
- Choose Custom (Advanced) instead of Upgrade (because we are performing a fresh installation).
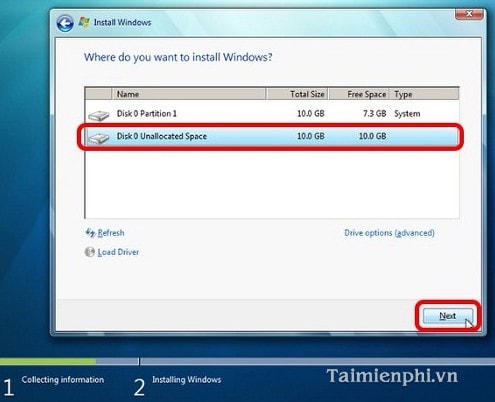
- Select the installation partition (you can overwrite the old partition or install on a new partition), then click Next/OK.
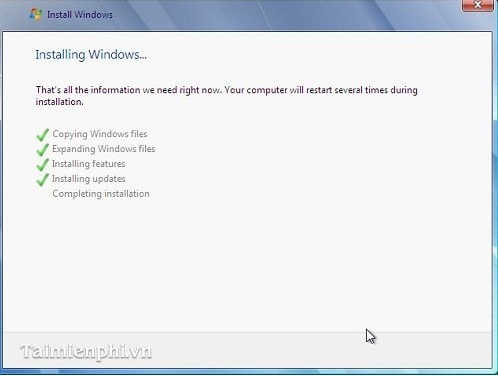
- The installation process has begun, and you just need to wait until it's complete. The computer will restart, and you can then enjoy the smooth and impressive Windows 7 operating system.
If you're using VirtualBox or VMware, you can also apply the same method to quickly install Windows 7 on a virtual machine. Be sure to check the virtual machine's configuration to ensure the system runs smoothly after installation.
Was this article helpful?
Your feedback helps us improve.
Related Articles
 Instructions to increase the virtual hard drive capacity on Virtualbox5 minutes read
 Instructions on how to install Windows 7 using a DVD, USB drive, or hard drive.5 minutes read
 Instructions for fixing errors do not install VMware Tools2 minutes read
 Create dualboot system with Windows 7 and 8 using VHD4 minutes read
 Detailed instructions for installing Virtual Drive3 minutes read
 Delete the virtual drive in Windows 71 minutes read
Reader Comments 0
Sign in with email or Google to join the discussion.