Instructions for creating Windows installation USB on both GPT and MBR standards with Rufus
Before going into details on how to create USB to install Windows on two standards GPT and MBR with Rufus . TipsMake would like to remind readers that this article will have some computer knowledge. For those who are new to computers, they may not understand the concepts of GPT and MBR, so we recommend that you immediately find out what is the difference between MBR Partition and GPT Partition before continuing to follow the steps to create a Windows installation USB above. two standards GPT and MBR with Rufus.
Instructions for creating Windows installation USB on both GPT and MBR standards with Rufus
1. What is Rufus?
Basically, Rufus is a tool that helps you quickly create Windows installation USBs according to many different standards, not by default like some Microsoft tools create. Rufus is also completely free so we do not need to worry about the features of this software.
In addition, this tool also helps you convert USB format from GPT to MBR and vice versa the fastest.
Latest Rufus download link:

2. How to create a GPT standard Windows installation USB
The GPT standard is one of the newest standards today and is used a lot to create USB to install Windows 10, so this guide will help you create a USB boot to install Windows 10 with Rufus.
Step 1: Open Rufus, set USB Boot creation parameters
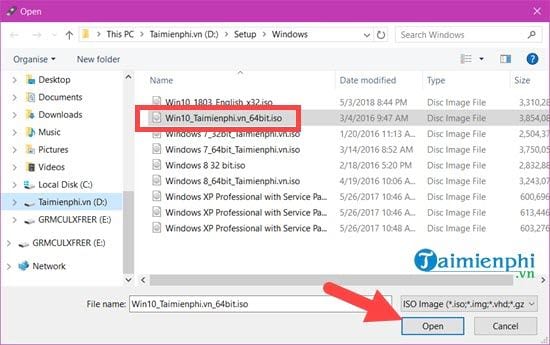
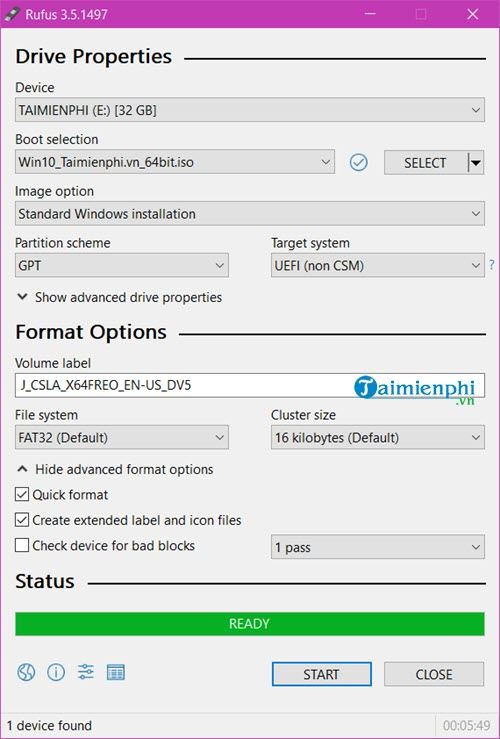
At the Rufus interface in the Device section , select your USB. In the Boot Selection section , select Disk or ISO image and then press Select to open the ISO file.
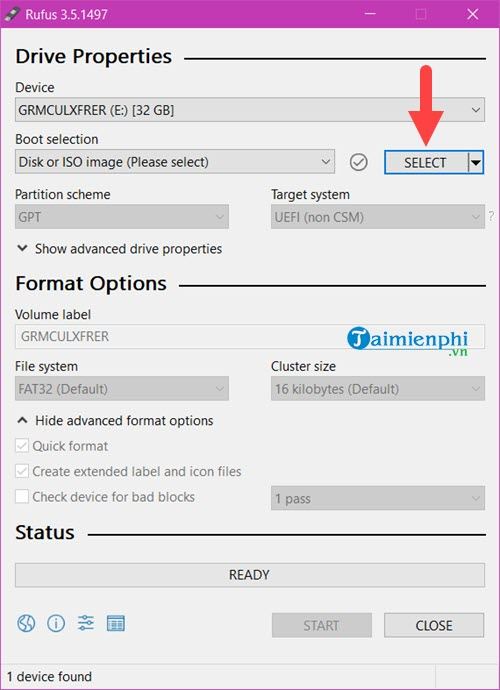
Depending on the Windows file you want to install, choose. In this article TipsMake uses Windows 10 as an example to install.
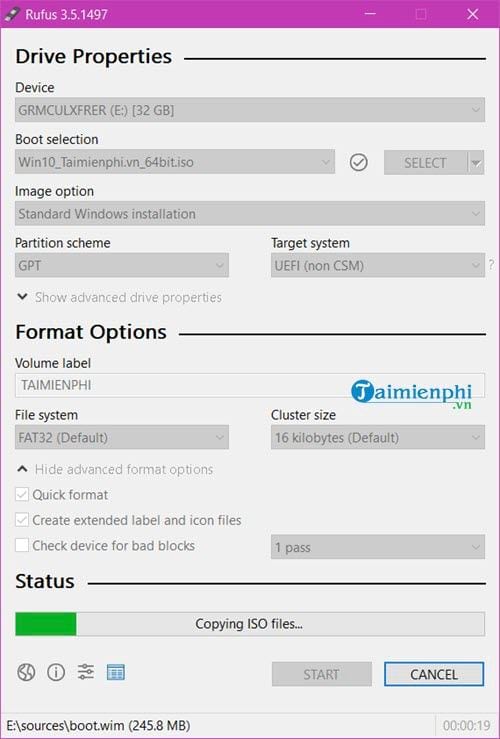
Step 2: Continue then in Image option select Standard Windows installation then in Partition scheme and Target system select GPT and UEFI respectively to install USB boot according to GPT standard and click Start .

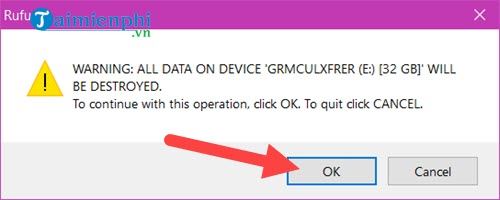
Step 3: Before creating a bootable USB to install Windows 10 with Rufus, the system will ask you in turn to format all data in the USB. Remember to clear all data before clicking OK.
The process of creating a USB boot to install Windows 10 with Rufus is fast or slow, completely depending on the speed of your USB as well as the ISO file version you use, but don't worry too much because it only takes you a few minutes. Stop.
Step 4: When the word READY appears, creating a USB boot to install Windows 10 with Rufus is complete.
3. How to create a USB boot to install Windows standard MBR
Basically, the way to create a USB boot to install Windows standard GPT or MBR on Rufus is quite similar, please rely on the instructions above until step 2 . Here we will choose the following:
- Image option: select Standard Windows installation
- Partition scheme : choose MBR instead of GPT .
- Target System : select BIOS (Legacy) and UEFI .
- File System : The default will be NTFS for you .
And continue to press Start and follow the steps above.
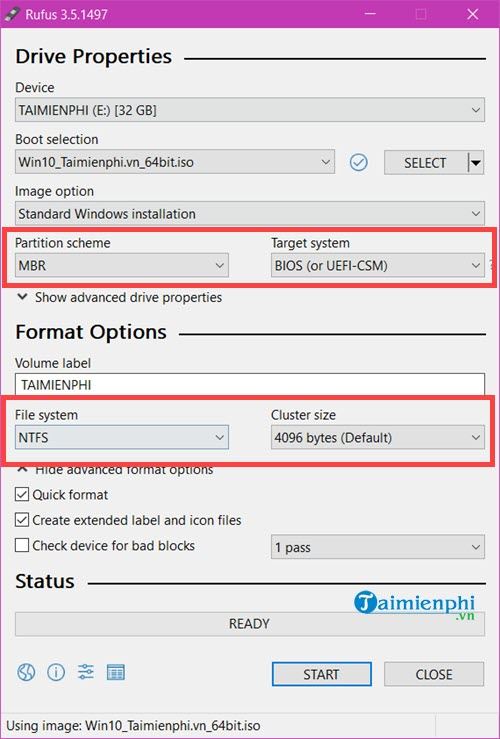
Then you proceed to create a USB boot to install Windows standard MBR with Rufus as usual. There is not much difference in how to create a USB boot to install Windows standard GPT and MBR with Rufus software. This is an advantage that few software can do like Rufus.
Above are instructions for creating Windows installation USBs on two standards GPT and MBR with Rufus. Using Rufus not only saves you time but also we have learned an extremely powerful tool to create installation USBs. Windows on your device.
To know what standard your Windows 10 is using, what should you do? How to check whether your Windows 10 computer is running UEFI or legacy will tell you a lot of useful information. Refer to how to check whether your Windows 10 computer is running UEFI or Legacy here.
You should read it
- ★ Common errors when using Rufus and the simplest and most effective ways to fix them
- ★ It is possible to create a USB to install Windows 11 on an unsupported machine with Rufus
- ★ How to create USB Boot, create a Windows installation USB with Rufus is simple and effective
- ★ Rufus - The easiest USB boot creation application
- ★ How to create USB Boot, USB install Windows by Rufus