How to create a Windows 11 installation USB using Rufus and Media Creation Tool.
Creating a Windows 11 installation USB drive not only helps you install a new operating system but also allows you to restore or repair the system when needed. Using Rufus or Media Creation Tool are two popular methods to quickly and efficiently create a bootable USB drive..
To create a bootable USB drive for installing Windows 11, you need a USB drive with a minimum capacity of 8GB and a tool like Media Creation Tool or Rufus. After downloading, simply follow the instructions to convert the USB drive into a Windows 11 installation media, making it easy to install on your computer.
Preparation before creating a Windows 11 installation USB.
- A USB drive with a minimum capacity of 8GB (16GB recommended).
- A computer or laptop to create the USB drive.
- A stable internet connection to download Windows 11 and necessary tools.
2. Files and tools needed
- Access the link to download the standard version of Windows 11 , download the appropriate version
. - Download the latest version of Rufus, 4.3 or higher.
- Download Media Creation Tool here.
Detailed steps to create a Windows 11 installation USB.
1. Method 1: Create a bootable USB drive for installing Windows 11 using Rufus
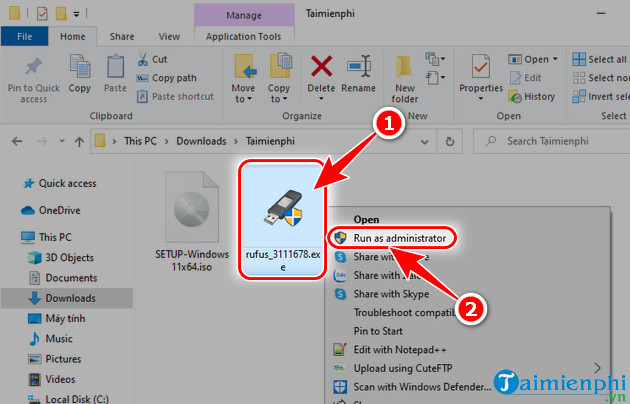
Step 1: Download and install Rufus software .
Step 2: Connect the USB drive to your computer and right-click on Rufus, selecting "Run as Administrator" .
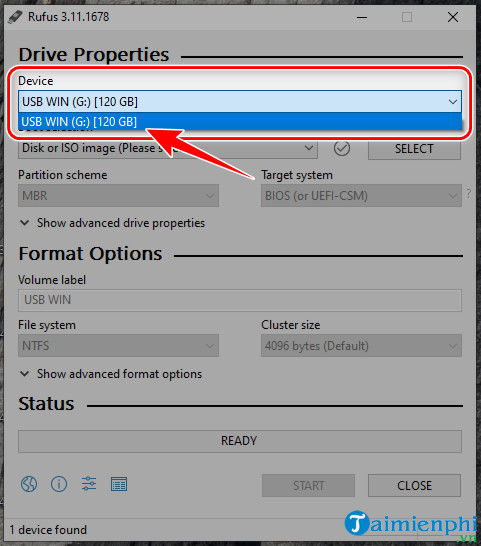
Step 3: In the Rufus interface , select the USB drive to create the Windows 11 installation media under Device .
- Note: Remember to plug the USB drive into your computer so the software recognizes the installation drive.
Step 4: Click Select to locate the Windows 11 installation files.
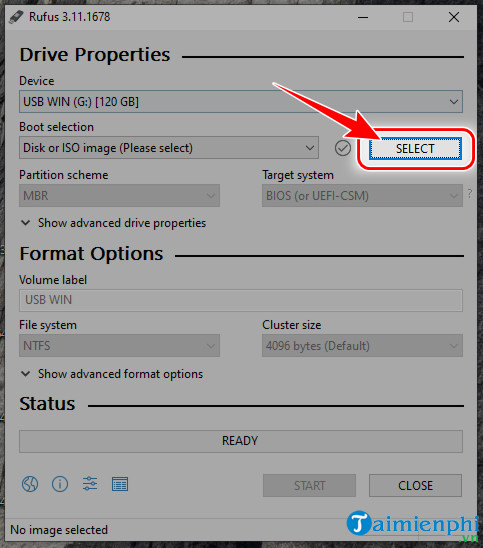
- Select the Windows 11 ISO file and click Open .

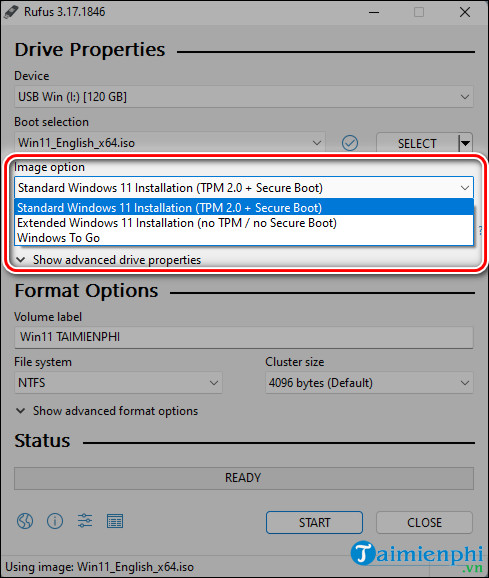
Step 5: This step is quite important, depending on your choice.
- Choose Standard Windows 11 Installation (TPM 2.0, Secure Boot) : Installs standard Windows 11 (requires TPM 2.0 and Secure Boot)
- Choose Extended Windows 11 Installation (no TPM/no Secure Boot) : Installs extended Windows 11 (skips the TPM 2.0 and Secure Boot requirements)
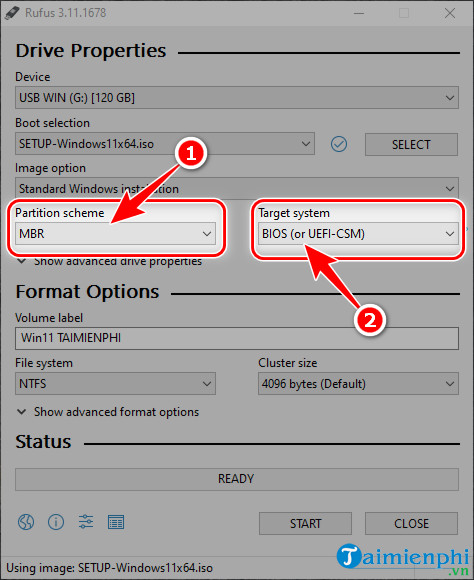
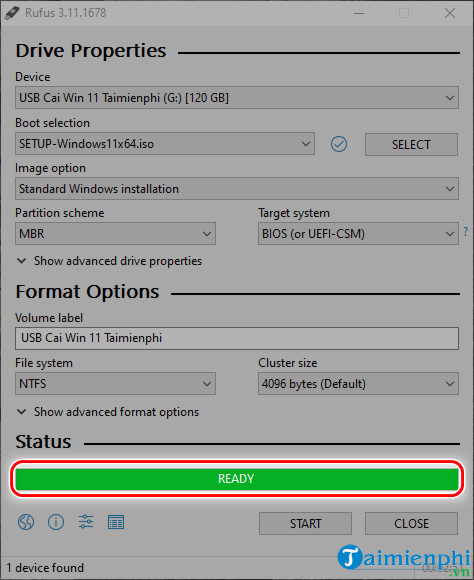
Step 6: Next, select MBR in Partition scheme => BIOS (or UEFI-CMS) on Target system to install Windows 11 in both UEFI and LEGACY formats.
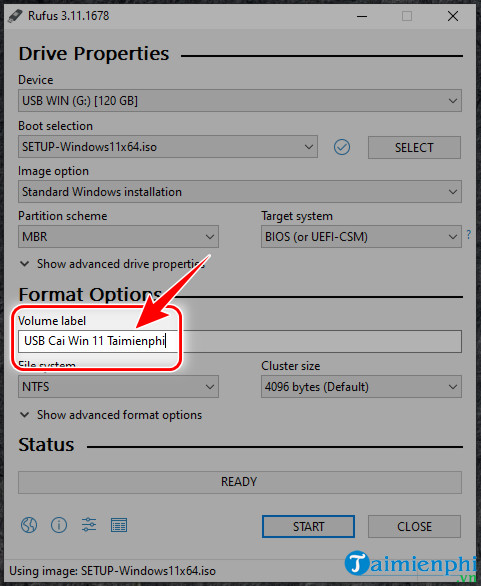
Step 7: Name your Windows 11 installation USB drive in the Volume Label field .
- Suggestion: You should choose a name that is as meaningful as possible (e.g., USB Install Win 11 Taimienphi).
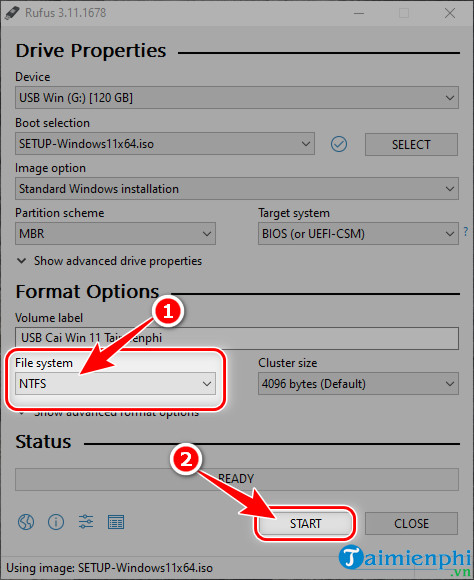
Step 8: In File System , select NTFS => click Start .
Step 9: Click OK to begin the process of creating the Windows 11 installation USB.
- Note: After clicking OK, all existing data on the USB will be completely erased. You should copy your data to avoid losing it and being unable to recover it.

- The green " READY " notification appears, meaning the Windows 11 installation USB creation process is complete. You can now use the USB as a tool to install the Windows 11 operating system on your computer.
2. Method 2: Create a Windows 11 installation USB using Media Creation Tool
Step 1: Right- click on Windows 11 Media Creation Tool and select Run as Administrator .
Step 2: Select Accept to agree to Microsoft's terms and policies .
Step 3: If you do not want to change the language, select Next .
- If you want to change the language, uncheck the box next to Use the recommended option for this PC and select Next .
Step 4: Select USB flash drive , then click Next .
Step 5: Select the USB from the displayed list, then click Next . If the USB doesn't appear, click Refresh drive list above.
Step 6: The Media Creation Tool will then automatically download and create the Windows 11 bootable USB .
Step 7: Once finished, the word Finish will appear. Select Finish to close the window, and you can now use that USB to install Windows 11.
How to check and use a Windows 11 installation USB drive.
1. Check if the USB drive has been successfully created.
After completing the process of creating a bootable USB drive for installing Windows 11, you need to check if the USB drive was successfully created. Here are some ways to check:
- Check the storage capacity: Open File Explorer (Windows Explorer) and click on the USB drive. If the displayed USB drive capacity decreases (usually around 8GB or more), this indicates that the installation files have been written to the USB drive.
- Check the files: Open the USB drive and check for files such as boot, efi, sources, setup.exe, etc. If they are present, this indicates that the USB drive has been successfully created.
2. How to use a USB drive to begin installing Windows 11
To boot from a USB drive and begin installing Windows 11, you need to follow these steps:
- Plug the USB drive into the USB port of the computer where you want to install Windows 11.
- Turn on the computer or reset it if it's already running.
- As soon as the computer starts booting, press the F2, F9, F12. or Esc key to enter Boot Options.
- Then follow the on-screen instructions to install Windows 11.
In summary, creating a Windows 11 installation USB is a simple but necessary process for upgrading or performing a fresh installation of the operating system. By following the instructions above, you can easily create a bootable USB and use it to install Windows 11 on your computer. If you don't have a USB, please refer to how to install Windows 11 without a USB here.
Microsoft recently released Windows 11 24H2 with many upgrades and improvements, but for those with low-spec computers, installation or upgrading can be difficult. Fortunately, Flyby11 has emerged to overcome this problem; users can use Flyby11 to upgrade to Windows 11 24H2 without any difficulties or obstacles.