Table of Contents
This updated guide examines How to Password Protect Your Windows Computer and organizes the essential facts, background, and practical takeaways in clear American English.
Responsible-use note: Apply security techniques only to systems you own or are explicitly authorized to test.
Method 1of 3:
Through the Control Panel
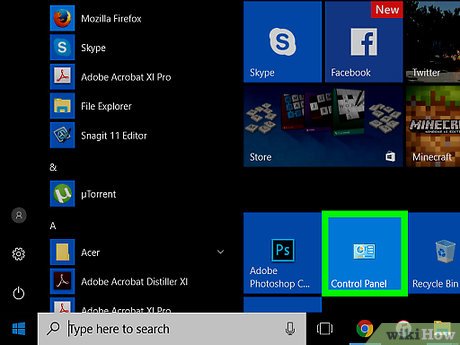 Open the Control Panel.
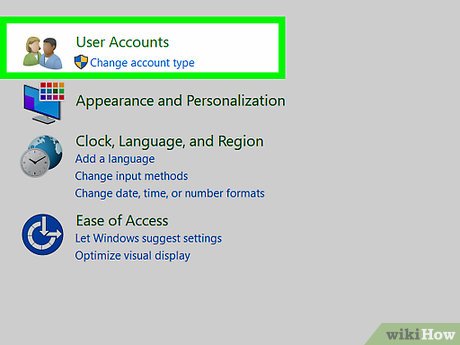 Click "User Accounts".
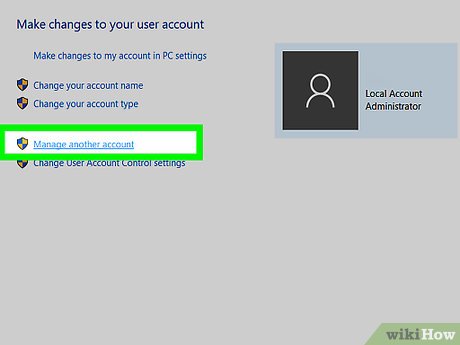 Make a new user account or if the existing one is yours then skip this step.
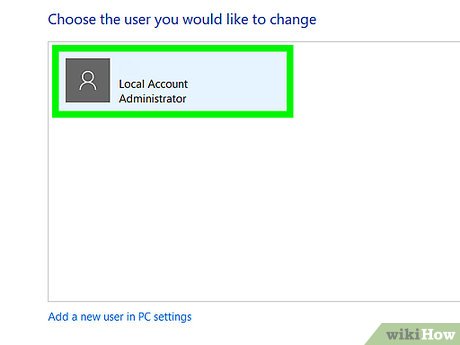 Click on your account.
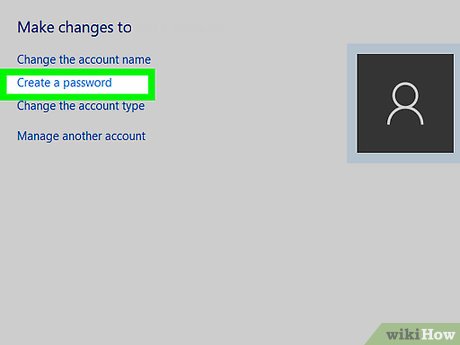 Click on "Change Password".
 Choose a strong password which cannot be guessed.
- Type a password hint (don't make it your password), which will come up if you enter the wrong password when you log in. The password hint might jog your memory if you forgot your password.
 Enter the password again to confirm it.
 Click onCreate password.
Method 2of 3:
Through the Settings App
 Open the Settings App
 .
. Open the "Accounts" page.
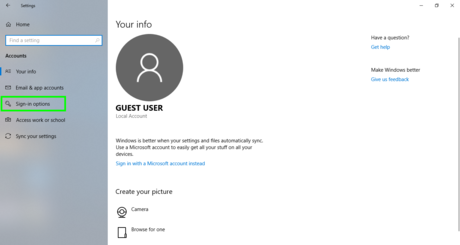 Click on the "Sign-in options" tab.
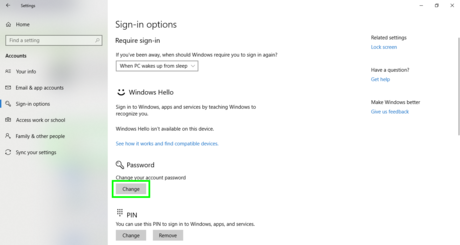 Under "Password", click onChange.
- If your computer does not have a password, then the button will say "Add"
 Choose a strong password.
- If your computer already has a password on it, then you will have to enter that password into the "Old password" box.
- Confirm the password by typing it again.
- Type a password hint (don't make it your password), which will come up if you enter the wrong password when you log in. The password hint might jog your memory if you forgot your password.
 ClickNext.
 SelectFinish. Your computer now has a password on it that will have to be entered whenever anybody tries to log in.
Method 3of 3:
Using a BIOS Password
 Understand what a BIOS password is. A BIOS password is the extremely strong password that locks up the hardware and makes the computer completely unusable. There are two different kinds of BIOS passwords, a User password, and a Supervisor password, their differences are listed below:
- Supervisor password: This is a password that only locks the BIOS configuration menu. You might want to at least set this password and make sure that your hard drive is the first boot device since it will prevent someone from removing your Windows password with a password reset disk.
- User password: This password locks down your whole computer. When you start up your computer the first thing that will come up will be a box asking you to enter this password. You have to enter this password before the computer will start.
 Open the BIOS. You have to press a button when you see the computer logo at startup to enter the BIOS. The button you press varies by computer manufactures, below are some of the more common ones:
- Dell:F2
- HP:F10
- Lenovo:F1
- Asus:Del
- If these buttons don't work, or if you have a different model, then you can try to search online for the correct way to access your BIOS.
 Navigate to theSecuritytab. The tabs will be show near the top and you will typically use the left and right arrow keys to change the tab selection.
 Decide what password you want to use. Review the differences between the two passwords above and decide which one you want to set, or if you want to set both of them.
 Enter the password that you want to set. Make sure that you remember this password as it can be difficult to reset it if you forget.
- You might want to write the password down on a piece of paper, and then lock the paper in a safe so that if you ever do forget it, you can still get access to your computer.
 Head over theExittab. Once there, select the option that allows you to save your changes and exit or reset. Once you do that, the BIOS password will be set.
FAQ
What is How to Password Protect Your Windows Computer about?
It provides a structured overview of password, explains the main context, and highlights practical takeaways for readers.
Why does this topic matter?
Understanding the main concepts helps readers evaluate the issue, avoid common mistakes, and make better-informed decisions.
How should readers use this information?
Use the guidance as a practical starting point, confirm details that may have changed, and follow current product, safety, or security recommendations.
Related Articles
 Steps to Set Windows 11 Computer Password to Better Protect3 minutes read
 How to Set a Windows 11 Computer Password, Set a Windows 113 minutes read
 How to Set a Windows 10 Password, Set a Password for Windows9 minutes read
 Set BIOS and UEFI Password to Protect Data on Your Windows 108 minutes read
 How to Change Your Windows User Account Password on a Computer5 minutes read
 How to Set a Password for a Windows 8 // 8.1 Computer5 minutes read
Reader Comments 0
Sign in with email or Google to join the discussion.