How to organize photos on iPhone
Arranging your own photos makes it easier to find and relive memorable memories. So what's the best way to organize photos on iPhone? That is the use of albums.
Table of Contents
The Photos app on iPhone is a great place to keep your growing library of memories. Thanks to the proliferation of smartphone cameras, millions of photos are taken every minute. Even if your iPhone automatically sorts your photos and videos by date, there's still plenty you can do to organize your photos.
Arranging your own photos makes it easier to find and relive memorable memories. So what's the best way to organize photos on iPhone? That is the use of albums. So, let's join TipsMake.com to start your first album!
1. Create an album
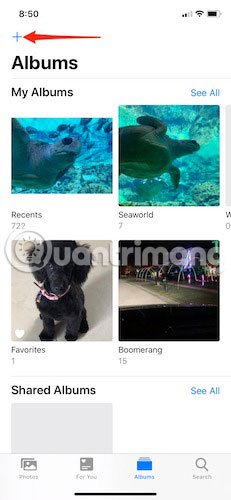
Getting started with an album couldn't be easier. Just open the photo app and look at the top left corner of the screen, where you'll see a + button and touch it. iOS will ask if you want to create a 'New album' (new album) or 'New shared album' (new shared album). The choice is up to you, but for most people, creating a new album is the more common option. Enter an album name and then click Save. This is all it takes to create an album and is easily accessible via the Album tab (second from right) on the Photos app.
2. Add to album
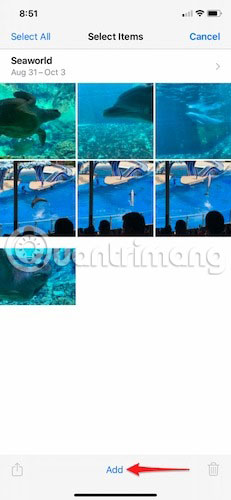
Once an album is created, adding photos or videos is extremely easy. If you haven't added anything yet at the start of the album, don't worry. Return to the album and press 'Edit' in the upper right corner. Now you can see the 'Add' option near the bottom. Please click that. You can now select any image or video in your entire collection on your iOS device and add it to the album.
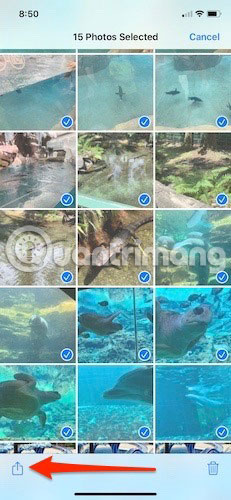
Add as many photos as you want, without any limits. Albums can be created for anything, whether it's a trip, your place, your people or your pet. Even adding photos to the album later is also very easy. Select the photos you want to add to an existing album and in iOS 12 or 13, click the up arrow icon in the square box and select 'Add to album' . You can do this as often as you like.
3. Idea album
Now you know how to create an album and add photos to it. But learning those things is just the beginning, because there are other ways to help albums get organized!
- Create a weekly album for easy reference: This way, you'll never forget the location of a photo and you don't have to scroll through hundreds of photos just to find a single photo.
- If creating a weekly album seems a bit too much, choose the monthly option. This option is still fairly basic, but it will help you keep things organized.
- Creating an annual album may seem a bit long, but for many, it is a perfect solution. Perhaps you want to remember the first year of your child's life or school. Creating an album for this purpose will help you quickly locate these memories anytime you want to review them.
4. Don't forget to Favorites!

When it comes to organizing photos on iPhones, albums attract attention. Don't forget your favorite option so you can quickly identify the photos that matter most to you. Every time you open an image in the Photos app, in the middle of the bottom of the screen is a heart. The first time it is clicked on the new iOS device, the Favorites album will be created. Here, you can save your most precious photos or videos, to quickly find and show off to friends, family or colleagues. Don't be too stressed about adding images here. Instead, make sure you only add the most important images in your collection to it.
Organizing photos on iPhone seems super simple. Everyone can quickly set up an album and add photos within seconds. No official documentation is needed, as everything is intuitive, as you would expect from Apple.
What is your favorite way to organize photos on your phone? Share your thoughts with everyone in the comments section below!
Hope you are succesful.
Was this article helpful?
Your feedback helps us improve.
Related Articles
 Complete on Photos apps on iPhone and iPad - Part 1: Positioning and Albums3 minutes read
 Useful tips for organizing bookmarks in the browser9 minutes read
 How to organize photos with the Photos app on Windows 104 minutes read
 3 tips to make it easier to find photos on your computer2 minutes read
 Complete the Photos app on iPhone / iPad - Part 4: Edit photos12 minutes read
 How to delete, restore photos and videos on iPhone and iPad3 minutes read
Reader Comments 0
Sign in with email or Google to join the discussion.