Table of Contents
This guide explains how to draw Directly on Photos on iPhone, with clear steps, practical tips, and important checks before you begin.
Instructions to draw pictures on photos in iPhone
Step 1:
You open the Photos app on iPhone and then click on the image to edit. Click the Edit button in the top right corner. Next, click on the 3-dot icon at the top of the image, and select Mark .



Step 2:
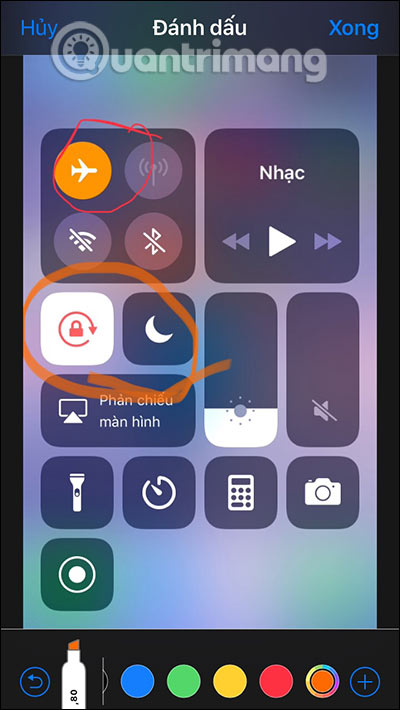
Now you see there are many different pen styles and erasing strokes with the X symbol. Firstly, choose the pen type you want to use, then click the circular icon to select the color for the brush stroke.
To enlarge the color, click the color circle icon .


Step 3:
After you've selected the colors, you just need to draw on the image is done. In addition, clicking the plus circle icon also displays a few other options. To return to the operation, press the circle arrow, to delete, click the erase icon x.
Finally, when you have finished drawing, click the Done button in the top right corner to save the stroke in the image.


FAQ
What should I know about Draw Directly on Photos on iPhone?
Focus on the key features, requirements, limitations, and practical use cases explained in this guide.
How do I get the best results with Draw Directly on Photos on iPhone?
Follow the recommended steps, use current software or information, confirm compatibility, and review settings before major changes.
Are there any risks or limitations?
Potential limitations depend on compatibility, data quality, cost, privacy, support, and how the product or method is used.
Related Articles
 How to Edit and Add Watermarks to Photos on iOS 10 Is Simple3 minutes read
 How to Transfer Images Directly from the Camera to iPhone7 minutes read
 How to Transfer Photos from iPhone to Computer: Complete Guide5 minutes read
 Corel Draw: What Is Corel DRAW - Introduction12 minutes read
 How to Draw Pixel Art Images with Paint4 minutes read
 How to Draw Mind Maps with Word6 minutes read
Reader Comments 0
Sign in with email or Google to join the discussion.