How to Make a Bug in GIMP
Gimp is good for all kinds of things. Making your own graphics is fun and can be fulfilling because you are learning new things while you do it! Here is how you make a bug in GIMP. Open Gimp and start a new project. Make it 2000 X 1500..
Part 1 of 4:
Making the Insect Head
-
 Open Gimp and start a new project. Make it 2000 X 1500.
 -
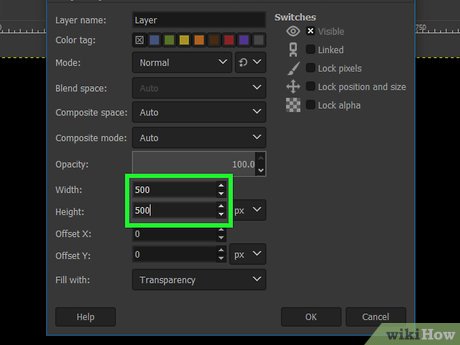 Create a new layer. It needs to be 500 X 500 and transparent.
 -
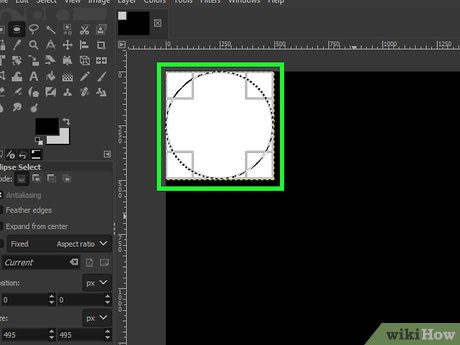 Click on the ellipse icon and in the square layer, create a circle. Be sure you are in the correct layer when you do that.
 -
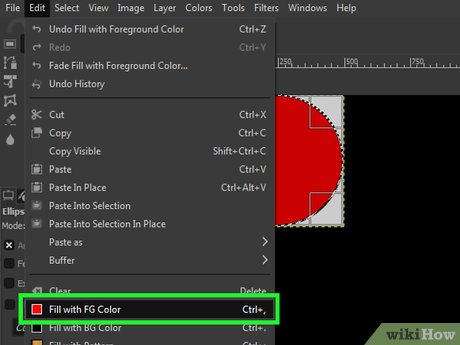 Select the gradient icon with the following settings:
- FG to BG (RGB)
- Radial
- Be sure that the background is black.
- Make the foreground red.
-
 Start the gradient in the upper left hand corner of the 500 X 500 square layer. Drag it to the lower right side of the square.
 -
 Go to Filters >> Distorts >> Mosaic...
 -
 Change the settings to the following:
- Tiling Primitives: Hexagon
- Tile size: 15.0
- Tile height: 10.0
- Tile spacing: 1.0
- Tile neatness: 1.00
- Light direction: 135.0
- Color variation: 0.00
- Check Antialiasing and FG/BG lighting.
- Make sure the other 3 are unchecked.
-
 Give the eye some depth. Do this by going to Filters >> Distort >> IWarp. Use the following settings:
- Deform Mode: Grow
- Deform Radius: 175
- Deform Amount: 1.00
- Be sure that Bilinear is checked.
-
 Click three times in the center of the eye. Then press OK.
 -
 Duplicate the layer.
 -
 Click on the Move icon and move the other eye so that it is exactly beside the first one.
 -
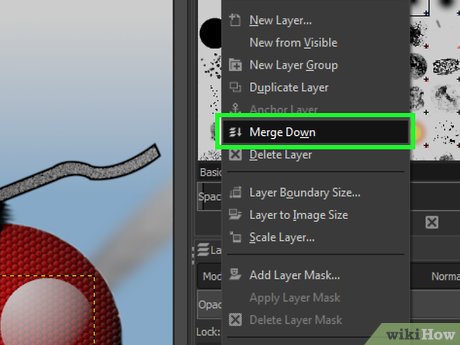
 Put the two eyes on the same layer. Right click on the top layer and select Merge Down.
 -
 Go to Select >> None to deselect the eyes.
 -
 Click on the eyes, select the Alignment tool, then click on the horizontal center, then the vertical center. However, instead of Relative to: First item, select Image.
 -
 Add a new layer. This time, it can be the full size of the project, 2000 X 1500. Be sure that it is transparent.
 -
 Make sure that Show Guides is enabled. Go to View >> Show Guides and make sure that it is checked.
 -
 Click on the ruler that you see at the top of the Gimp desktop and pull down guidelines. Do this three times and place them as you see in the screenshot. Do likewise with the ruler on the left side for the vertical guidelines.
 -
 Click on the Path tool and do the following:
- Find the center of the left eye and then click on the guideline directly above the eye at that point.
- Go to the point where the eye meets the guideline as shown in the screenshot.
- Continue clicking on the guidelines as shown in the screenshot.
- Find the center of the right eye and clicking on the guideline above it, as shown.
-
 Finish the path by selecting the points as shown in the screenshot. Finish the last point by hitting Enter.
 -
 Click on the top center line and pull down until it is slightly below the bottom guideline above the eyes.
 -
 Repeat for the bottom center line, as well. Press Enter to lock in the change.
 -
 Fill the created path with white.
 -
 Go to Select >> Shrink and reduce the selection by 5 pixels. Fill that with black.
 -
 Deselect the shape by going to Select >> None.
 -
 Get rid of the guidelines by dragging them off of the screen.
 -
 Look at the color swatches and have the foreground as white and the background a light blue.
 -
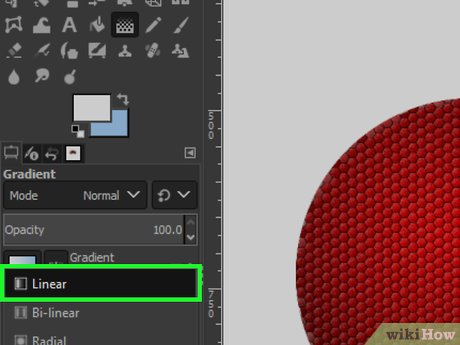 Click on the Gradient tool and be sure that the 'shape' is linear.
 -
 At the top center of the screen, click and drag down a short way. Release the mouse key. This will fill the background with a blue/white gradient.
 -
 Select the eraser tool. Be sure that you have selected the brush with hardness of 100. Set the size to be 800 pixels.
 -
 Be sure that you are on the top layer. Set the Eraser brush so that it covers the eyes as shown. Do this for both sides. What this does is have eyes that aren't quite perfectly round.
 -
 Add bristles to the top of the 'head'. Do this by selecting the Smudge tool. Set the brush for 50px, and select the Bristles 02 brush.
 -
 At the top of the head, just inside the edge of the black, press and hold the mouse button and pull it straight out. Do this all the way around, except for where the eyes are. After all, your insect doesn't want hair in its eyes.
- Here is where you should be at this point.
-
 Add more bristles in between the eyes. Change the foreground to a light brown. Select the airbrush tool and, still using the bristles 02 brush, draw alongside the eyes in the black. Do this on both sides and fill in the center just a bit. Do this also below that area as you see in the screenshot.
 -
 Change the foreground to white and, still using the airbrush, paint a little bit of white on top of the brown.
 -
 Change back to the smudge tool and smudge the white and black together. Also, smudge the small bit of brown at the bottom.
 -
 Zoom in closer to the bottom of the eyes for the next step.
 -
 Add a guideline just below the eyes. You will be making fangs for your insect.
 -
 Select the path tool again, and create a fang as you see in the screenshot.
 -
 Select the leftmost line of the fang and pull it away from the center. Repeat the same with the other side of the fang.
 -
 Fill the fang with black. Select the paint bucket tool and be sure that Fill whole selection is marked.
 -
 Reduce the selection by 2 by going to Select >> Shrink and change it to 2.
 -
 Change your tool to the gradient tool and with the colors still black and white, add a gradient to the reduced selection.
 -
 Repeat the process for the second fang.
 -
 Make the antenna. To do this, select the paths tool again and create an antenna like you see in the screenshot.
 -
 Follow the same pattern as before. Fill with black and reduce by 5 this time.
 -
 Add another layer and be sure that it is transparent. It can be the same size at 2000 X 1500.
 -
 Apply a gradient to the antenna in this layer. Take it from the bottom up when creating the gradient.
 -
 Change the mode from Normal to Dissolve and reduce the capacity to 50%.
 -
 Deselect the gradient and then merge this layer with the one directly below it.
 -
 Repeat the process to create the other antenna. It's ok if they aren't identical. Here is what it should look like at this point.
Part 2 of 4:
Making the Insect Wings
-
 Add a new layer. Make sure it is transparent and the same size as everything else.
 -
 Add 3 guidelines as seen in the screenshot.
 -
 Using the paths tool, start just left of the left fang, up to the top guideline to the left of the antenna, down to the next guideline, then back to NEAR the start point.
 -
 Press Enter to finish the wing's initial shape.
 -
 Select the 'top' line and give it some bend. Do this with all three of the longer lines.
 -
 Add a linear gradient to the wings. Do it from the top to the center guideline. Be sure that the foreground is white and the background is black.
 -
 Repeat for the other wing.
 -
 Add the wing demarcation. Select the paintbrush, a hardness of 100 and a width of 2. Draw in lines similar to what you see in the screenshot.
 -
 Duplicate the layer.
 -
 Select the Scale icon, then click in the middle of your insect. It doesn't matter where. There will be a grid on your screen.
 -
 Start adjusting your wings. To move everything, be sure to use the handles at the top center and side center. Do this for the size.
- Once you have the size right and approximate location, click on the gold circle in the center and put on the finishing touches in locating it.
-
 Click on Scale and your wings are done. Merge the top two layers.
 -
 Move the merged wings until that layer is behind the eyes.
 -
 Making sure you are on the wings layer, select Filters >> Blur >> Gaussian Blur and select 20. This will give the image depth by adding blur to the wings.
Part 3 of 4:
Making the Insect's Body
-
 Create a new transparent layer. It needs to be above the wings, but behind everything else.
 -
 Select the ellipse tool. Start at the center of the left eye and drag it down to the right and down until it looks like the screenshot.
 -
 Fill the ellipse with white using the bucket fill tool.
 -
 Shrink the selection by 5 pixels.
 -
 Fill the reduced selection with black.
 -
 Click on the airbrush tool, change the brush to Bristles 02 and make it 50px wide. Color in the body. Don't make it solid, just add some brown, like in the screenshot.
 -
 Go to Select >> None. Then use the smudge tool again to add the appearance of hair.
 -
 Apply a Gaussian Blur with a radiance of 10.0.
 -
 Add a branch for your insect to land on.
 -
 Select the Free Selection tool. Draw a rectangle (ish) shape at the bottom of your image.
 -
 Change layers and move to the Background layer.
 -
 Fill it with a gradient. Click on the Gradient tool and change the gradient to the Greens gradient.
 -
 Start at the top and pull down to fill the selection with the gradient.
 -
 Move back to the body layer.
 -
 Select the Brush tool. Change the brush to one with a hardness of 50 and a size of 50px.
 -
 Click where you want to start a leg. Hold down the SHIFT key and draw a short distance away. Continuing to hold down the shift key until you have a leg like the one in the screenshot. Click here it needs to bend.
Part 4 of 4:
Finishing the Insect
-
 Create a new layer. Make it 200 X 200 and transparent. It will be in the top left corner.
 -
 Select the ellipse tool and create a circle in the layer.
 -
 Select the gradient tool. Make sure the foreground color is white.
 -
 Choose the FG to Transparent gradient and select a Radial shape.
 -
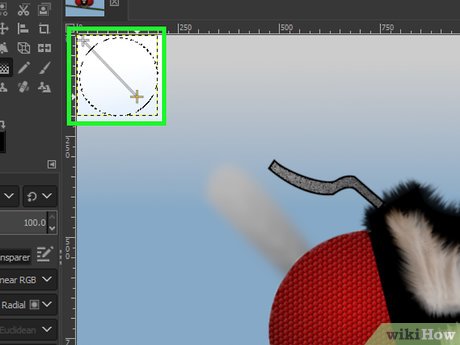 Starting in the upper left corner drag it down to the bottom right corner. Because of its placement at the moment, you won't see it, but it is there.
 -
 Move the layer that you are in up to the top of the layers. It will be the furthest away from the background.
 -
 Select the move tool and then move the eye shine to the top left corner of the eye.
 -
 Once you have the shine in place, then duplicate the layer.
 -
 Move the shine for the other eye over to the other eye and place it in a similar position.
 -
 Merge the two eye shine layers.
 -
 Change the mode on the eye shine layer to Grain merge.
 -
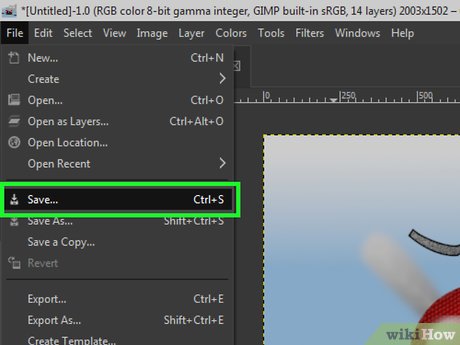 Once you like the way it looks, flatten all the layers. Save the original file first in case you want to do some more work on it. Enjoy your work and show everyone what you can do!!