How to Install Microsoft Windows using a USB 2.0 Flash Drive
Part 1 of 4:
Getting the ISO File
-
 Purchase or obtain a copy of Windows. You can create a bootable USB drive from the installation DVD or from the ISO file that Microsoft provides as a download if you buy from their web store. You can easily install Windows Vista, 7, and 8 from a USB drive.
- If you download an ISO file for your version of Windows, you can skip down to the next section.
-
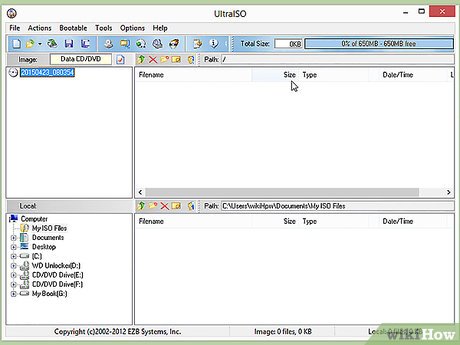
 Install a free burning program. There are a number of free burning utilities available online. You need one that can create ISO files. ImgBurn is one of the more popular free choices.
 -
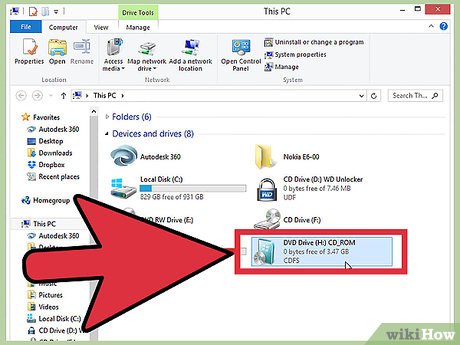
 Insert your Windows DVD. Open your new burning program. Look for an option such as 'Copy to Image' or 'Create Image.' If prompted, select your DVD drive as the source.
 -
 Save your ISO file. Choose an easy to remember name and location for the file. The ISO you make will be equal in size to the disc you are copying. This means it can take up several gigabytes of space on your hard drive. Be sure you have enough storage available.
- The ISO file is essentially an exact copy of the installation DVD.
Part 2 of 4:
Creating a Bootable USB Drive
-
 Insert your flash drive. Your flash drive will need to be at least 4 GB in size in order to successfully copy the ISO file onto it. All of the data on your flash drive will be lost when you turn it into an installation drive, so be sure to back up any important files before continuing.
 -
 Download the Windows 7 USB/DVD Download Tool. This is available for free from Microsoft. Despite its name, this tool works with Windows 8 and Vista ISO files as well. You can install and run this tool on virtually any version of Windows.
- If you would prefer to get your hands a little dirtier and create a bootable USB drive from the command line, check out this guide.
-
 Select the Source file. This is the ISO that you created or downloaded in the first section. Click Next.
 -
 Select USB device. You are given the option to either burn to a DVD or create a USB device. Click the USB Device option. Select your flash drive from the list of available devices.
 -
 Wait while program works. The program will format the USB drive to boot correctly, and then copy the ISO file onto the drive. Depending on the speed of your machine, the copying process can take up to 15 minutes to complete.[1]
Part 3 of 4:
Booting from the USB Drive
-
 Insert the USB drive into the computer you want to install Windows on. Boot or reboot the computer. When the computer reboots, you will need to press the Setup key in order to enter your BIOS to change the boot order. This will allow you to boot from the USB drive instead of your hard drive.[2]
- The Setup key must be pressed when the manufacturer's logo is displayed on the screen. This is typically a very short window of time, so if you miss it you will have to reboot and try again.
- The key varies from computer to computer, but will be displayed on the screen when you can press it. Typical keys include F2, F10, and Del.
-
 Navigate to the Boot menu. While each BIOS layout is different, they will all typically have a Boot menu, though it may be worded slightly different. This menu will display the order in which the computer will look for a bootable operating system. Typically, computers are set to boot from the hard drive first so that the installed operating system loads automatically.
 -
 Switch the boot order. Once you have found the Boot menu, you will need to switch the order so that your USB drive is listed at the top. Again, this will vary from computer to computer. Some BIOS setups will list the USB drive by its name, while others will simply say 'Removable Device' or 'USB'.
- You will typically use the '+' and '-' keys on your keyboard to swap around the boot order.
-
 Save and exit the BIOS. Once you have changed the boot order, save your changes and exit the BIOS. The key for this is typically F10. The computer will reboot, this time booting from the USB drive first.
Part 4 of 4:
Installing Windows
-
 Press any key to start the Setup process. You will see a message after the manufacturer's logo telling you to press a key to start Setup. Press any key on your keyboard to continue.
- If you do not press a key, your computer will move on to the next device in your boot order, and you will need to restart your computer again.
-
 Wait for Setup to load. Once you press a key, setup will begin loading the files required to install Windows. This may take several minutes on slower computers.
 -
 Begin installing Windows. Once the files have been loaded, Windows installation will begin normally, just as if you were installing from an installation DVD. Check out the following guides for specific instructions for the version you are installing:
- Install Windows 8
- Install Windows 7
- Install Windows Vista
Share by
Jessica Tanner
Update 04 March 2020


