Instructions for using USB Flash drive with iPhone
If you need more storage space on your iPhone, the easiest way is to use a special flash drive that has lighting on one end and a USB port on the other end. You will need an application designed for that flash drive to manage files.
However, there is not only one way to manage flash drives on iOS. Each flash drive has its own application for managing files. The article cannot guide you in detail each application for each flash drive, but will give you a general operating procedure.
- The best USB flash drive models according to each criterion
Different applications and drives have some limitations. For example, it is not possible to transfer photos, videos and audio files. There seems to be no way to transfer other file types, regardless of the drive or application you use.
In this article use the Omars flash drive of Amazon (43 USD). This flash drive is one of the most popular options. If you have not bought a flash drive, this is an appropriate option. In addition, you can get additional benefits when following the steps below.
Step one: Download the application
The first thing you need to do is download the application for the flash drive. In this case, the article using the Omars application is called Witstick.
Download the Witstick app for iPhone
If you don't know which application to use for the flash drive, there are several options. First, check the manufacturer's documentation. If you can't find useful information, you can plug the drive into the phone and it can notify you of compatible apps from the App Store, but this may not confirm all models.
Once you've found the application you need and installed, follow the next steps.
Step two: Plug in the flash drive and start the application
After installing the compatible application, plug the flash drive into the phone. If the application is not running, you will receive a message to launch it.

From the next step you will see the difference if you do not use the Omars drive. As mentioned before, if you use different flash drives will require different applications, but the technique is relatively similar.
Witstick application has a clear and beautiful interface. At the top, you can see the capacity on the phone and on the flash drive.
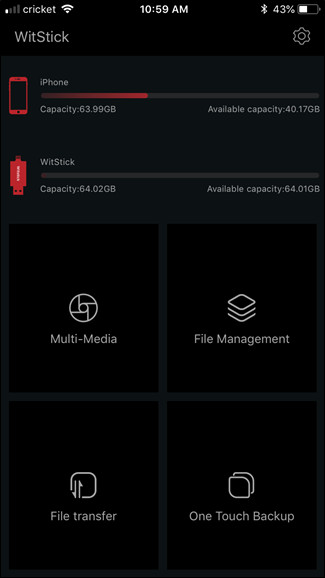
Here are some useful file transfer options, including multimedia options, file management, file conversion, and one-touch backup. Here are some of its options and functions.
- Multi-Media : This only launches the camera to take a picture, but then records the image and video directly onto the flash drive.
- File Management : Manage files on USB as well as transfer files from phone to USB stick and vice versa.
- File Transfer : Almost like file management, but only for images.
- One Touch Backup : Backup All image, video and / or audio files with one click. In addition, it also has the option to automatically perform backups when connecting flash drives.

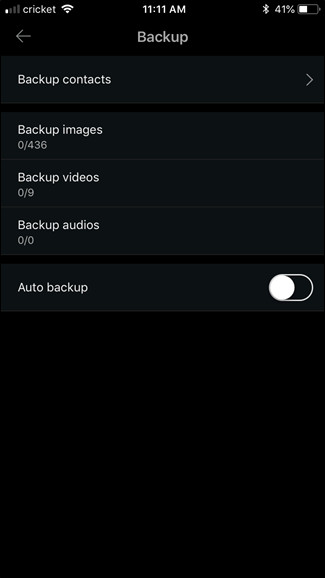
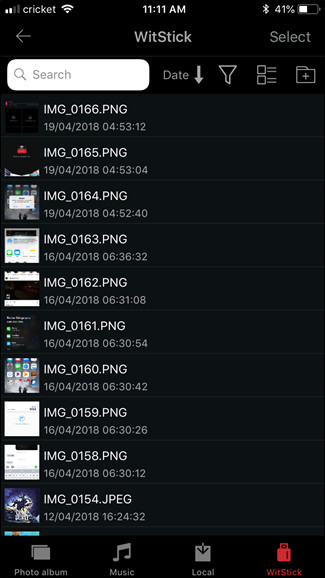
Among these options, perhaps the most used option is File Management. Its layout is very similar to the file management tool. Default interface - WitStick option displays what is on the flash drive. Other options at the end of the interface: Photo album, Music and Local. Local options are used only to transfer things from the flash drive back to the phone.
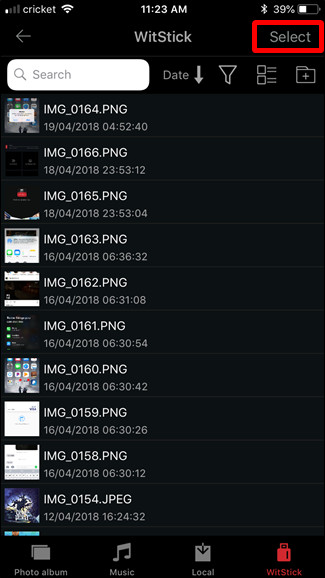
To transfer files that have been transferred to the flash drive to your device, simply use the ' Select ' button at the top and touch all the items you want to transfer.
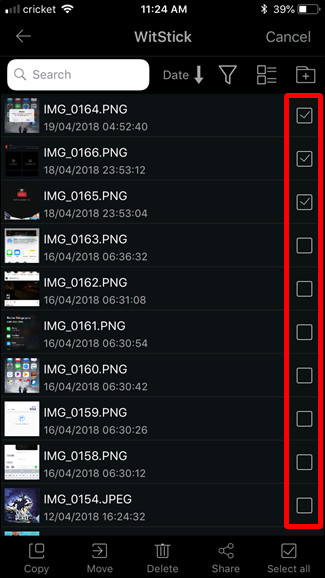
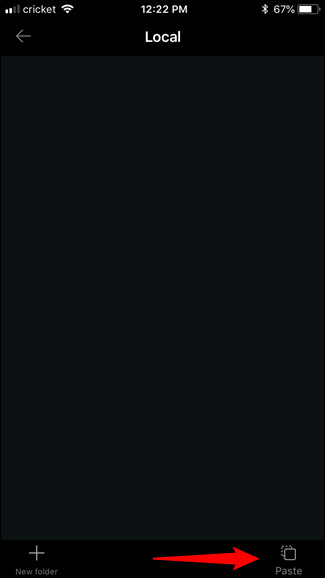
Click the " Move " button at the bottom, then select the location you want to move the items to. Finally, touch the ' Paste ' button to start moving.
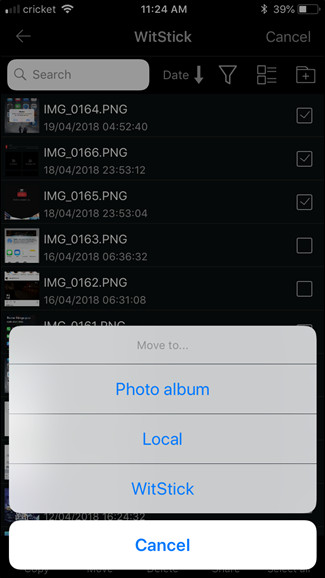
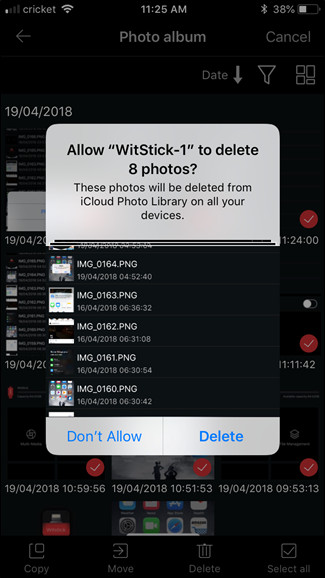
If you are moving the image or video from the phone to the USB stick, then there will be a message asking if you want to delete these items on the phone after the transfer.
Although it is not possible to provide detailed instructions for other flash drives when connected to iOS, I hope this article helps you have a preliminary look to be able to use other flash drives on iOS devices.
See more:
- Instructions for using USB Flash drive with Android device
- Automatically run your favorite applications in USB Flash
- How to directly connect USB to iPad