How to install LibreELEC on Raspberry Pi 4
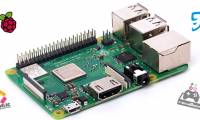
The Raspberry Pi 4 is the most powerful piece of hardware to come from the Pi platform. It has USB 3.0, more RAM and faster CPU. For this reason, the Pi 4 is perfect for a Linux-based media player operating system like LibreELEC.
Table of Contents
In this guide, TipsMake.com will show you how to install LibreELEC on Pi 4.
Download LibreELEC for Pi 4

You must download LibreELEC as an image from the developer's website. Follow the step-by-step instructions below to get started.
Step 1 : To initiate the download, open LibreElec.tv. Once you have reached the web page, look for the Downloads button at the top of the page. Click on it to go to the download page.
Step 2 : On the download page, you'll see download options for the LibreELEC image tool, as well as download options for Windows, Mac, and Linux. Ignore them and scroll down to the bottom of the page, looking for the Direct Downloads option .
Step 3 : In the Direct Downloads area , you will see images of various available devices. Find the Raspberry Pi button and click it with the mouse to hide all devices except the Raspberry Pi devices.
Step 4 : Take a look at the different Pi options for the Raspberry Pi 4 image and click on it to access the LibreELEC downloads for Pi 4.
Step 5 : On the LibreELEC download page for Raspberry Pi 4, download LibreELEC-RPi4.arm-9.2.1.img.gz to your computer.
Alternatively, if you use Linux and love the command line, open a Terminal window by pressing Ctrl + Alt + T or Ctrl + Shift + T on your keyboard and run the download wget command below to download the file.
wget http://releases.libreelec.tv/LibreELEC-RPi4.arm-9.2.1.img.gz -O ~/Downloads/LibreELEC-RPi4.arm-9.2.1.img.gzOnce the LibreELEC file has been downloaded to your PC, move on to the next section of the tutorial.
Flash LibreELEC to SD card
Now that the LibreELEC has been downloaded to the computer, it's time to flash it to the SD card so that the Pi 4 can read and use it. Flashing LibreELEC to an SD card can be done with a variety of programs. However, in this guide, we will use Etcher, as it works on Mac, Linux, and Windows and has the same user interface.
To start the process of taking pictures, download Etcher from the official website, install it on your PC and launch the tool. Then, follow the step-by-step instructions below.

Flash LibreELEC to SD card
Step 1 : In the Etcher app, find the Select image button and click it. After clicking Select image , a file opening window will appear on the screen. Use the dialog box to browse to the LibreELEC-RPi4.arm-9.2.1.img.gz , which you downloaded to your computer earlier.
Step 2 : Find the Select drive button and click it. After clicking Select drive , Etcher will display the user interface on the screen. In this user interface you will see all removable drives plugged into the system (USB flash drives and SD cards).
Select the device that you used to mount the SD card to your computer.
Step 3 : Locate Flash option ! and click on it. Click Flash! will begin flashing the LibreELEC image. Please be patient! It may take some time, depending on the speed of your computer.
When the process is complete, remove the SD card from the computer, insert it into the Pi 4 and connect the Pi 4 to the TV. Also, be sure to plug in a USB keyboard and mouse or USB-based remote into the Pi 4, as you'll need them to complete the final part of this tutorial.
Setting up LibreELEC
To set up the new LibreELEC system, follow the step-by-step instructions below.
Step 1 : Power on Pi 4 and wait. Don't turn off the Pi if you see a blank screen! The first launch of LibreELEC will take some time!
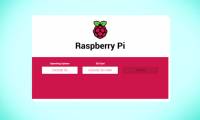
Step 2 : After powering on LibreELEC, you will see 'Welcome to LibreELEC' screen . On this welcome screen, you will be prompted to select your language. Do so by clicking on the menu below 'Language'.
Click 'Next' to continue after selecting a language.

Step 3: Once you have selected a language, LibreELEC will ask you to set the hostname for your device. Click the menu below Hostname to name the Raspberry Pi 4 media device.
Click Next once you have set the hostname to continue.
Step 4: With the language and hostname selected, it's time to connect the Raspberry Pi 4 to the Internet. Go through the list of on-screen networks to connect to your home WiFi connection.

Once you have successfully connected to WiFi with the Raspberry Pi 4, click Next to continue.
Step 5 : After WiFi, LibreELEC will ask you to set up remote access permission for the new Pi 4 media device. For most users, it's best to leave these settings as is. However, if you are an advanced user, go ahead and enable SSH.

When finished setting up remote access, click the Next button to go to the next page.
Step 6: After setting up remote access on Raspberry Pi 4 in LibreELEC, you will see a 'Thank you' screen.
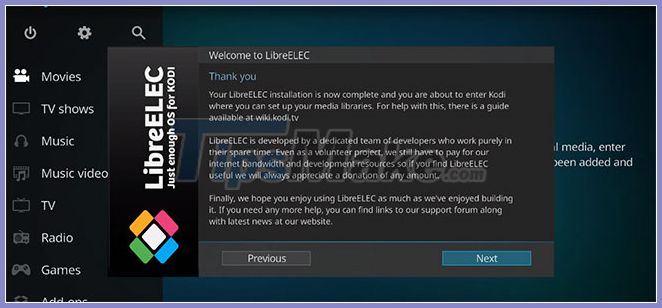
The 'Thank you' screen is the final step in the setup process
This screen is the final step in the setup process. Click Next to finish.
With the LibreELEC setup wizard complete, you're ready to start adding your favorite media content to your Raspberry Pi 4!
Was this article helpful?
Your feedback helps us improve.
Related Articles
 The best Linux distributions for Raspberry Pi5 minutes read
 How to use Raspberry Pi Imager to install Raspberry Pi OS9 minutes read
 How to install Android on a Raspberry Pi4 minutes read
 How to start Raspberry Pi 3 from USB8 minutes read
 Learn Pi Imager, How to Use Raspberry Pi Imager4 minutes read
 How to install an operating system for Raspberry Pi9 minutes read
Reader Comments 0
Sign in with email or Google to join the discussion.