Table of Contents
This updated guide examines How to Install Android on a Raspberry Pi and organizes the essential facts, background, and practical takeaways in clear American English.
Perhaps the best solution is to install Android on a Raspberry Pi. But how well does Android work and is there any significant difference from the mobile version? Let's find out through the following article.
Things to prepare
To install Android on a Raspberry Pi, you will need:
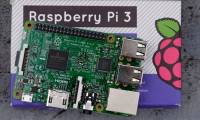
- Model Raspberry Pi 3 or 3B +
- Suitable, reliable power source
- High quality microSD memory card has at least 16GB
- Screen (The official 7-inch Raspberry Pi touch screen is a good option)
- Mouse and / or keyboard if you are not using the touch screen
You must also download the Android image for Raspberry Pi 3. Finally, you'll need the Etcher software, which is used to burn the drive image to flash memory.
- Download Android for Raspberry Pi 3
- Download Etcher
How to install Android on a Raspberry Pi
Step 1: Flash Android to a microSD memory card
Start by installing Etcher on the computer. Next, insert a memory card into the card reader. Also, make sure you have extracted the Android image file and are ready to use.
Launch Etcher. If you've used this tool before, you'll find it much simpler than any of the alternatives. Etcher has a three step process:
1. Click Select image.
2. Browse the device to select the ISO file.
3. Click OK.
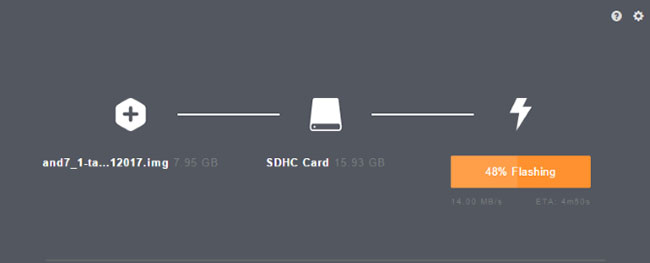
Etcher will also reformat the SD card. The application will automatically detect the microSD memory card. If not, press Select Drive (or Change if the wrong device is selected) and browse to it.
Finally, click on Flash to start writing to the microSD memory card. Wait for the process to complete, then close Etcher and remove the microSD memory card safely. You can then insert the card into the powered Raspberry Pi 3. Connect the monitor and input device (keyboard, mouse, touchpad or touch screen), then start the Pi.
Step 2: Install Android on the Raspberry Pi
When you turn on the Raspberry Pi, Android will boot. From here, you can access the default and online default Android apps via the drop-down menu. Raspberry Pi 3 can connect to the network via Ethernet or WiFi.
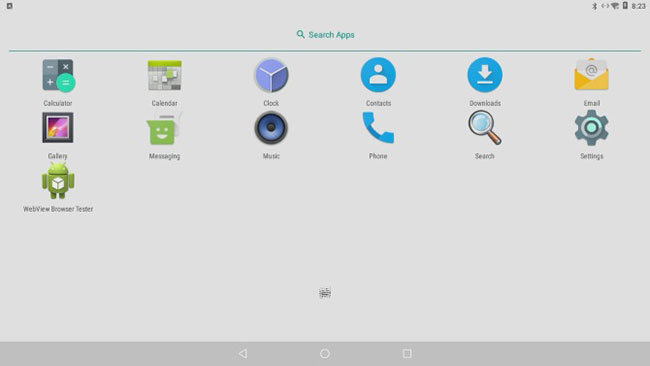
At this time, the operating system is up, running, and usable. If you want to install the application, the only option is to download and import the Android APK file from an external hard drive or cloud.
However, to do this, you first need to enable Unknown Sources in the Settings menu > Security . Find Settings by moving your mouse to the upper right corner of the screen.
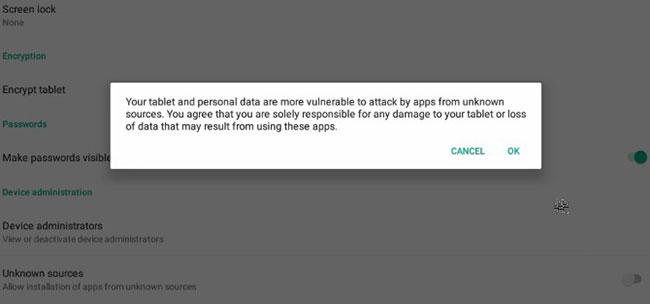
If you want to install the APK file from cloud storage, open the memory in the browser and download the APK file. After downloading, drag down the notification bar from the top of the screen and select the APK file to install.
Check the permissions, then install. Things are not as simple as accessing Google Play, but still quite okay. If desired, use an alternative to Google Play.
FAQ
What is How to Install Android on a Raspberry Pi about?
It provides a structured overview of android, explains the main context, and highlights practical takeaways for readers.
Why does this topic matter?
Understanding the main concepts helps readers evaluate the issue, avoid common mistakes, and make better-informed decisions.
How should readers use this information?
Use the guidance as a practical starting point, confirm details that may have changed, and follow current product, safety, or security recommendations.
Related Articles
 How to Use Raspberry Pi Imager to Install Raspberry Pi OS: Practical Guide11 minutes read
 How to Build Android TV Box with Raspberry Pi9 minutes read
 The 5 Top Options to Run Android on Raspberry Pi: Expert Selection Guide8 minutes read
 How to Start Raspberry Pi 3 from USB9 minutes read
 Learn Pi Imager, How to Use Raspberry Pi Imager4 minutes read
 How to Install an Operating System for Raspberry Pi10 minutes read
Reader Comments 0
Sign in with email or Google to join the discussion.