How to install an operating system for Raspberry Pi
Your Raspberry Pi doesn't come with an operating system. However, this is not a weakness. It means that you can select multiple operating systems, each operating system can be flashed to the SD card (or microSD card for Raspberry Pi B +) in a few simple steps. Here's how to install and run your new operating system on Pi, as well as how to copy your perfect settings to fix errors quickly.
Operating systems like Raspbian, ArchLinux, Risc OS and even Android are ready to run on your Raspberry Pi. The article will show you two main ways to add an operating system, and once you have set up the Pi the way you want, we will consider how to copy the card to be able to recover the following errors (or temporarily Use your SD card).
The following instructions assume that you have a basic Raspberry Pi and Windows package to manage your SD card recording and replication.
How to install an operating system for Raspberry Pi
- Flash an operating system into an SD card and start your Raspberry Pi
- Run Raspbian for the first time
- Install Raspbian, XBMC, Risc OS, OpenElec and ArchLinux easily with NOOBS
- Perfect your Raspberry Pi operating system
- Risk response: Duplicate the operating system
Flash an operating system into an SD card and start your Raspberry Pi
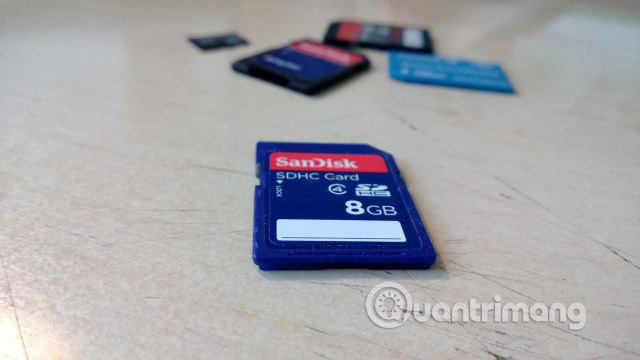
Whichever operating system you download for Raspberry Pi, the process of writing it to SD card is the same. However, there are some differences in recording SD cards between desktop operating systems. You will also need to make sure your card is empty, formatted and has at least 2GB capacity.

For Windows users (and Mac OS X too), the tool selected to write the operating system to the SD card is SD Formatter. With the card inserted into your computer's card reader and make sure you have selected the correct drive letter in the menu, open the Options menu and select Full (Erase) and On. This ensures that all storage card capacity is ready for use.
Click OK, then select Format to start.
To record the drive image, use the Win32DiskImager. You may need to run with admin rights. Select the correct drive letter for your SD card, browse to the image file and click Write to start the process. Win32DiskImager will notify you when the data has been written.
(Link download Win32DiskImager: https://sourceforge.net/projects/win32diskimager/)
If recording drive images seems too complicated or beyond your capabilities, you can buy SD cards with Raspbian pre-installed.
Run Raspbian for the first time
With Raspbian installed, you will need to log in with the following credentials:
- Username: pi
- Password: raspberry
For other operating systems, check to find the default login information.
Remember that the password will not be displayed when you enter it and no * symbol will appear. Instead, it will appear as if you have not entered a password. This is a security feature in Linux to prevent people from guessing your password length. Just enter your password correctly.
In Raspbian, you can change your password by running:
sudo raspi-config
and select the Change Password option .
Install Raspbian, XBMC, Risc OS, OpenElec and ArchLinux easily with NOOBS
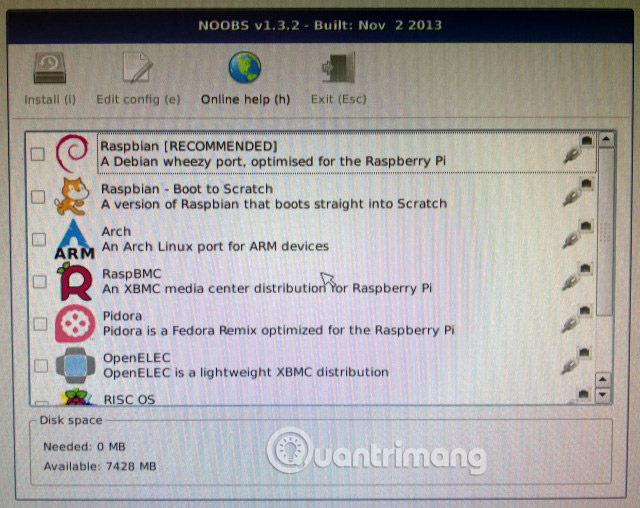
For a simpler installation of more popular Raspberry Pi distributions like Raspbian, ArchLinux, XBMC and OpenElec media center, as well as Risc OS and Pidora, you can use NOOBS, the newly released software installation system. .

You can download NOOBS for use and it does not require writing to SD card in the way Raspbian and other Pi operating systems do. You will need a larger card, with a capacity of about 4GB and should use the SD Formatter tool to format it. When downloading NOOBS, note that both offline and online installers are available and their sizes vary. The small size will require your Raspberry Pi to be connected to the Internet via Ethernet.
A keyboard and / or mouse will be needed when installing an operating system with NOOBS.
With Raspberry Pi being booted into the NOOBS interface, you can choose your operating system (s).
Perfect your Raspberry Pi operating system
Different Raspberry Pi installation processes will require different software numbers. It all depends on what you intend to do.
For example, if you want to use your Raspberry Pi as a media center, then you can use NOOBS to install XBMC or OpenElec.

After this is done, you will need to install different updates from within the media center software. There may be other applications you need, complement this media center like Vimeo or YouTube, Talk TED, etc.
As with any computer system, installing the operating system is only the first step. Updates, optional software and other tools will also need to be added, before the computer is ready to use. The same process will take place, if you configure your Pi as a wireless print server or even a web server.
Once this is done, you should make your Raspberry Pi installation perfect.
Risk response: Duplicate the operating system
When you are satisfied with the settings for your operating system, you should make a copy for it. That will be a full backup image of the SD card saved to your hard drive (or a second SD card), which can be easily retrieved for use if you're in trouble.
Windows users can once again use the Win32DiskImager here. Make sure the Raspberry Pi SD card is inserted into your Windows card reader before launching the utility.

Find the Image File field and browse to the folder where you will save your SD card image. In Device, select the drive letter of SD card and after confirming that both are correct, click Read to start cloning and follow any instructions on the screen. Wait for the process to complete before continuing.
If you need to revert the SD card to a "perfect" state later, you will need to delete all partitions ( WIN + R to launch Disk Management, right-click on the SD card and select Delete), before image recovery. You can also reformat using SD Formatter, as explained above.
Once again using the Win32DiskImager, browse for the image file, set the drive letter, and then click Write. When the process is complete, your SD card will be reverted to the "perfect" configuration you have previously done and your Raspberry Pi will be ready to use again.
There is one thing that is clear about Raspberry Pi: It relies on SD cards on many levels, one way or another. So it's important to understand how to use this type of media with Raspberry Pi.
Writing an operating system to an SD card is to install an operating system for Raspberry Pi. As you have noticed, this installation is much faster than installing Windows into a HDD, and with NOOBS, things are even simpler!
When you see your Pi doesn't work correctly, having a quick recovery file is really important.
If you have any questions, please leave a comment in the comment section below!
Good luck!
See more:
- How to connect Raspberry Pi remotely to a Windows computer
- How to run, Raspberry Pi emulator on computer?
- How to connect directly to a Raspberry Pi without Internet