How to backup Raspberry Pi
Since the Raspberry Pi uses a microSD card for storage, creating a Raspberry backup is pretty easy on any platform. Here's how to back up a Raspberry Pi SD card on Windows as well as how to restore the card from that backup..
It's fun to start a new Raspberry Pi project. However, it can be frustrating to have to redo something you did before. That's why being able to back up Raspberry Pi memory on a PC or Mac is so useful. And, since the Raspberry Pi uses a microSD card for storage, creating a Raspberry backup is pretty easy on any platform. Here's how to back up a Raspberry Pi SD card on Windows as well as how to restore the card from that backup.
The first thing to do is to safely disable the Pi (how you do this will depend on the operating system you're running - for Raspbian, now just type sudo shutdown now in the command line) and remove the tag microSD out. Then, place the card in the card reader of the computer.
How to backup Raspberry Pi SD card on Windows
Step 1: Open Win32 Disk Imager
If not, you can download Win32 Disk Imager here.
Step 2: Set the drive and destination folder
In Win32 Disk Imager, use the drop-down menu labeled Device to select the drive corresponding to the SD card. Then, click the folder icon and choose the folder where you want to place your backup - but don't press Open yet .
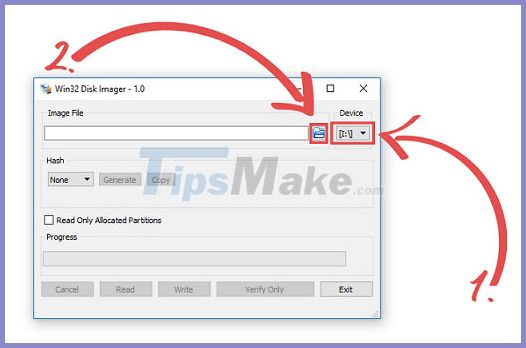
Set the drive and the destination folder
Enter a new file name in the File name: box (this will be the file name of the backup). The file type will be .img by default, which is fine, since that's what you want. Now, you can go ahead and click Open.

Enter a new file name in the File name box:
Step 3: Write the file
Now, just press the Read button . Your job here is done! Win32 Disk Imager will do the rest. Pull out the SD card when all is done.
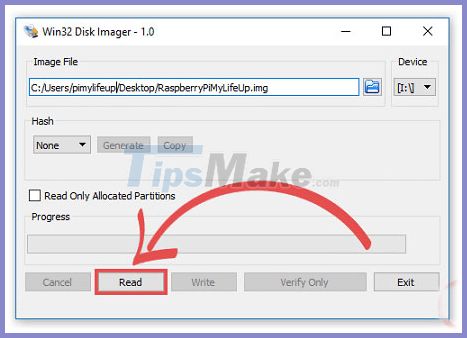
Click the Read button
Restore Raspberry Pi on Windows
If the date when you have to use this backup comes, you will find the process looks very familiar. Again, you must insert the SD card and select the appropriate drive from the drop-down window. Next, you will need to select your .img file.
Since the file already exists, you will find that the Write button is a viable option. Of course, that's exactly what you should do and after you hit the Write button , Win32 Disk Imager will replace whatever is on the SD card with a backup disk image. So easy!

After you press the Write button, Win32 Disk Imager will replace whatever is on the SD card with the backup disk image.