How to install Windows 10 IoT Core on Raspberry Pi 4
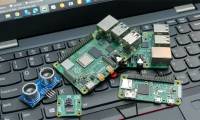
With the recent release of the Raspberry Pi 4, people are once again flocking to single computers. The Raspberry Pi 4 is as small as ever, but potentially more powerful than before.
Table of Contents
With the recent release of the Raspberry Pi 4, people are once again flocking to single computers. The Raspberry Pi 4 is as small as ever, but potentially more powerful than before.
Most people choose to install a Linux distribution on a Raspberry Pi, especially because this is what the Raspberry Pi Foundation itself recommends. That means, if you plan to use the Raspberry Pi for projects in a Windows environment, you might prefer to install Windows 10 IoT Core instead.
Warning
Windows 10 IoT Core does not officially support Raspberry Pi 4, or even the previous Raspberry Pi 3 Model B +. With hardware similarities, you should be able to install software on newer hardware in the same way, but cannot guarantee that it will run perfectly.
For the following steps, you will need to install a standard Windows 10 running on a desktop or laptop computer. You also need a Microsoft account.
Prepare to install Windows 10 IoT Core
First, you will need to download Windows IoT Core from the Microsoft website. The article will use Windows IoT application Core Image Helper.

Right-click the downloaded file to mount the image, and then double-click the .msi installer. Make sure the SD card you plan to use with your Raspberry Pi is inserted and ready to record.
Run the application and select the folder containing the downloaded image with the .ffu extension. You will see a dialog box showing progress of writing to SD card. Once this process is successful, it's time to start the Raspberry Pi for the first time.
Boot image on Raspberry Pi
Insert the SD card into the Raspberry Pi and turn on the power. Make sure you have a wired Ethernet connection. This is a slow process, so be prepared to wait 10 minutes. Once turned on, you can technically run, but there is a chance of a boot problem and you don't have WiFi or Bluetooth.
Fix installation errors
Back to the standard Windows 10 installation that you used to download the image, you will now want to download and run the Windows IoT Dashboard. Upon booting, you'll see a list of Windows 10 IoT devices connected to the network, including the Raspberry Pi 4.

Double-click the device when you see it to go to the Properties page, then click the link to the device port at the bottom. This will launch the Windows Device Portal for Pi.
From here, click on Apps, then Apps Manager, then click on Check for Updates . The device will download and apply the updates. You will want to repeat this process until there are no more updates available.

When this is over, you will want to change the default driver controller to improve performance. Click Devices on the left side of the Device Portal, select 'Direct Memory Mapped Driver' , then click 'Update Driver' . The device will reboot and you will have much better usage time.
Looking for project ideas?
Now it's time to start building a project. You may want to consult Microsoft documentation or start building right away, depending on whether you are sure you want to do something.
The DIY community has built many interesting projects on the Raspberry Pi. Many of these projects are built on Linux, but not all. If you're looking for a place to start, check out the list of 10 amazing projects that combine Raspberry Pi and Windows 10 IoT Core that TipsMake.com has suggested.
Good luck!
Was this article helpful?
Your feedback helps us improve.
Related Articles
 How to install Windows 10 IoT Core on Raspberry Pi 39 minutes read
 10 great projects combining Raspberry Pi and Windows 10 IoT Core8 minutes read
 How to install Windows 11 on Raspberry Pi 47 minutes read
 How to use Raspberry Pi Imager to install Raspberry Pi OS9 minutes read
 How to install Android on a Raspberry Pi4 minutes read
 How to use Ubuntu Core on Raspberry Pi6 minutes read
Reader Comments 0
Sign in with email or Google to join the discussion.