How to Install Java on Linux
This wikiHow teaches you how to install the latest version of the Java Runtime Environment (JRE) on a computer running Linux. Open the [https://www.java.com/en/download/linux_manual.jsp Java for Linux download page]. You'll see several...
Table of Contents
Method 1 of 4:
Installing on Non-RPM Linux
-
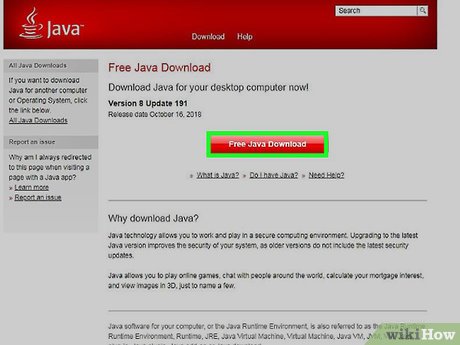
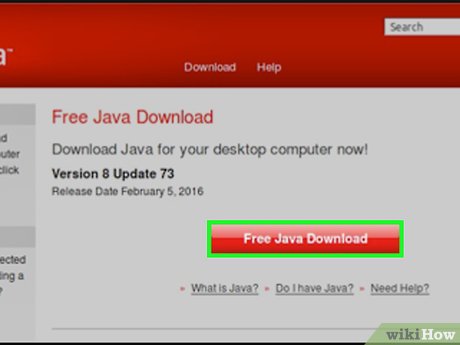 Open the Java for Linux download page. You'll see several options listed here.
 -
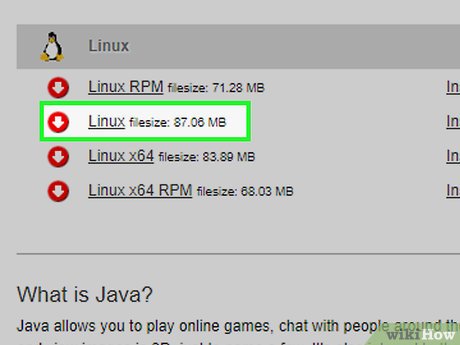 Click Linux. It's a link in the middle of the page. Doing so will prompt the Java installation file to download.
- You can also click the Linux X64 version if you want to install 64-bit Java.
-
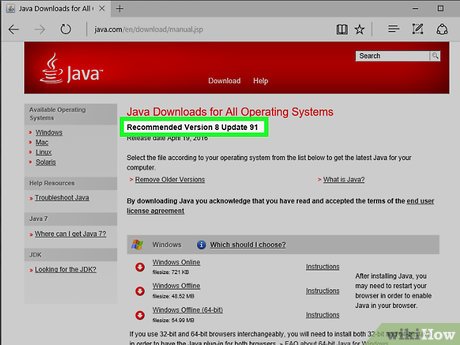
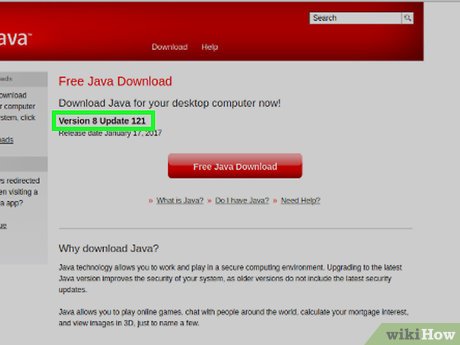 Note the file's name. The latest version of Java is version 8, but you also need the update version number, which is written in the file name after the "8u" section.
- For example, your file might be named "jre-8u151", signifying that it is version 8, update 151.
-
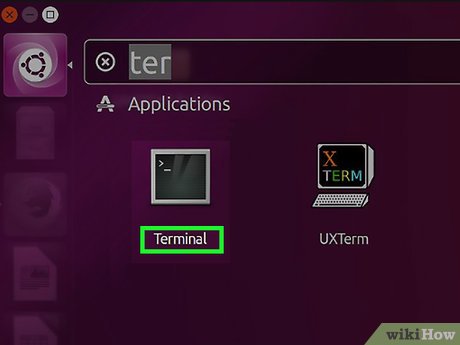 Open the command line. This step will vary depending on your version of Linux, but you can usually find the command line by opening the Terminal app or by clicking a bar at the top or bottom of the screen.
 -
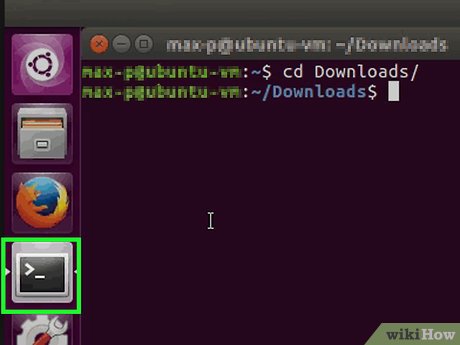
 Change the installation directory. Type cd into console, press the spacebar once, and then type in the path (e.g., /usr/java/ and press ↵ Enter.
 -
 Enter the installation command. Type in tar zxvf, press the spacebar once, and then type in the full file name. This will vary depending on the Java version and when you downloaded it.
- As of October 2017, you'd type in tar zxvf jre-8u151-linux-i586.tar.
-
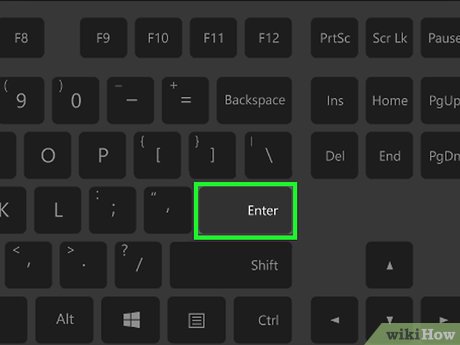 Press ↵ Enter. Doing so will install Java on your computer in a folder entitled "jre1.8.0_[update]" where "[update]" is the update version number (e.g., 151).
Method 2 of 4:
Installing on RPM Linux
-
 Open the Java for Linux download page. You'll see several options listed here.
 -
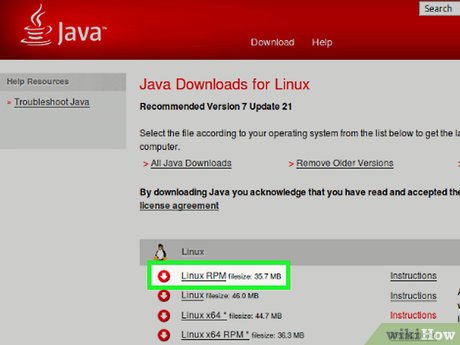 Click Linux RPM. It's in the middle of the page. Doing so will prompt the Java for RPM installation file to download.
- You can also click the Linux RPM X64 version if you want to install 64-bit Java.
-
 Note the file's name. The latest version of Java is version 8, but you also need the update version number, which is written in the file name after the "8u" section.
- For example, your file might be named "jre-8u151", signifying that it is version 8, update 151.
-
 Open the command line. This step will vary depending on your version of Linux, but you can usually find the command line by opening the Terminal app or by clicking a bar at the top or bottom of the screen.
 -
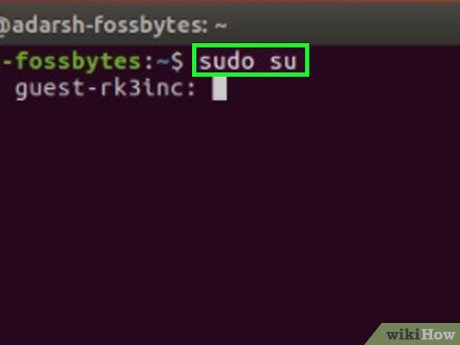 Enter the root command. Type in sudo su and press ↵ Enter. This will prompt the command line to request your user password.[1]
 -
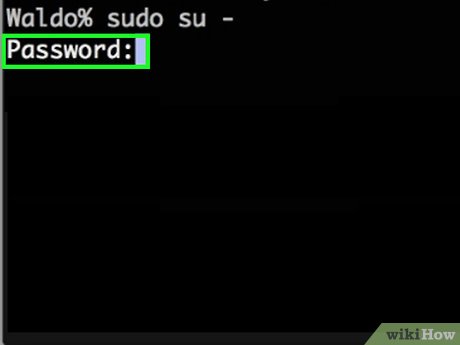 Enter your account password. Type in the password for your account and press ↵ Enter. As long as you have root access on your account, doing so will allow you to install Java.
- If you don't have root access on your account, you'll need to enter the password for an account that does have root access.
-
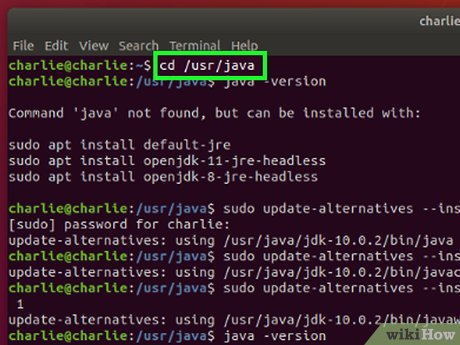 Change the installation directory. Type cd into console, press the spacebar once, and then type in the path (e.g., /usr/java/ and press ↵ Enter.
 -
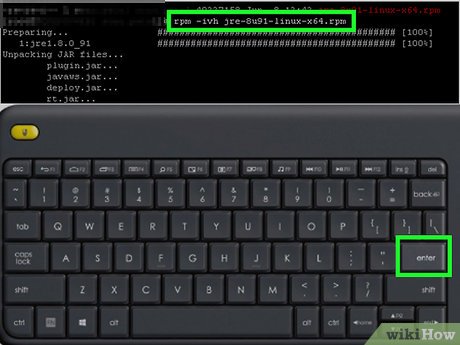 Enter the installation command. Type in rpm -ivh, press the spacebar once, type in the full file name, and press ↵ Enter. This will install Java on your computer.
- The file name will depend on when you downloaded the file. As of October 2017, you'd type in rpm -ivh jre-8u151-linux-i586.rpm and press ↵ Enter.
- Upgrade the download. Type in rpm -Uvh jre-8u73-linux-i586.rpm and press ↵ Enter. This will check for updates for the Java package and, if possible, apply them.
Method 3 of 4:
Installing on Ubuntu (OpenJDK)
-
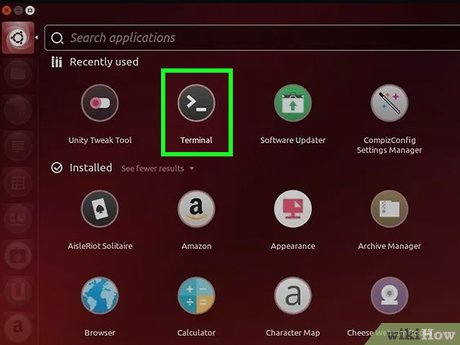
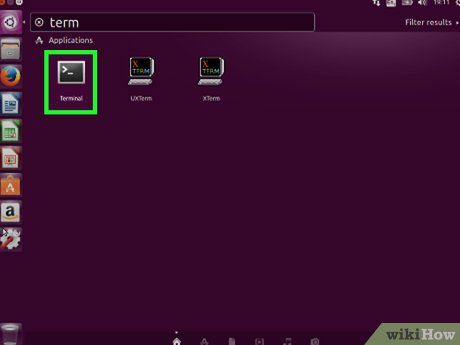 Open the command line. Press Ctrl+Alt+T on the keyboard, or click the black box icon with a white ">_" on it on the left side of the screen.
 -
 Enter the update command. Type in sudo apt-get update && sudo apt-get upgrade -y and press ↵ Enter. This will refresh the package list and install all available updates for you.
 -
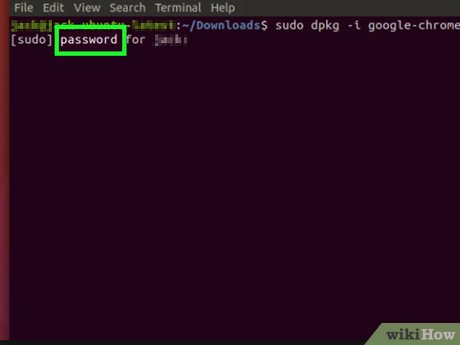 Enter your password if prompted. If asked for your user password, type it in and press ↵ Enter.
 -
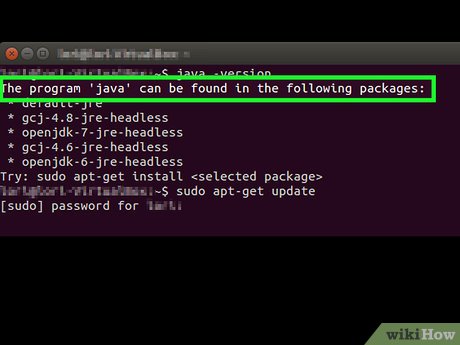 Make sure that you don't have Java already installed. Type in java -version and press ↵ Enter. If you see a line that says "The program 'java' can be found in the following packages" appear, Java is not installed on your computer.
- If Java is installed, you'll see a line that reports the current version of Java instead.
-
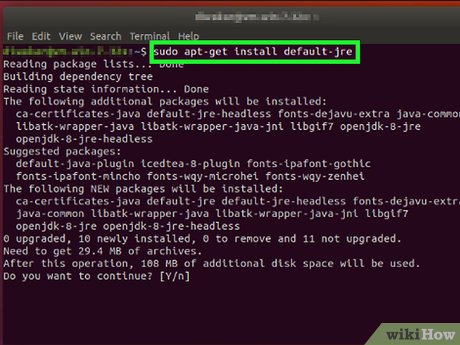 Type in the installation command. Type sudo apt-get install default-jre into the command line, then press ↵ Enter. This will install Java on your Ubuntu computer in the default directory.
- If this doesn't work, try entering sudo apt-get install openjdk-8-jdk instead
Method 4 of 4:
Installing on Ubuntu 16.04 via PPAs
-
 First of all, this is a 3rd party package, your distro's maintainer can't audit this package, use with caution. That being said, first open a terminal by pressing Ctrl+Alt+T.
 -
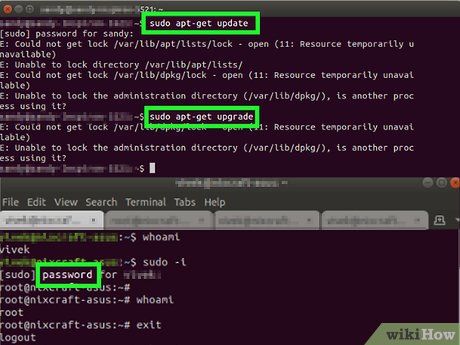 Ensure you have an updated system. Type in sudo apt-get update && sudo apt-get upgrade -y, you might get prompted for a password, type it in and press ↵ Enter, no dots or asterisks will appear as you type, this is normal.
- While technically optional, this step is always recommended before installing anything, keeping your system updated will help prevent many problems.
-
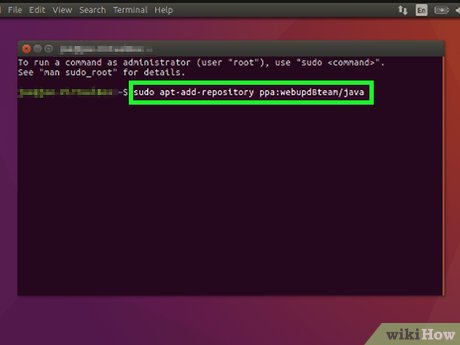 Add the PPA repository to your system. Type in sudo add-apt-repository ppa:webupd8team/java, and then press ↵ Enter.
 -
 Update your package lists again. Type in sudo apt-get update and wait for the lists to be refreshed.
 -
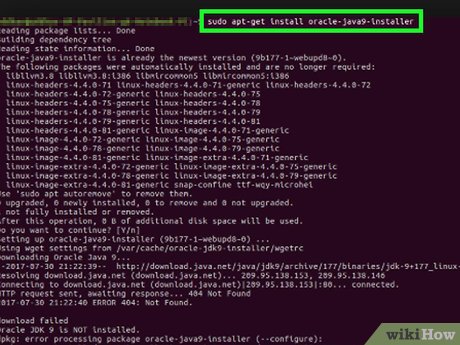 Install the package. Type in sudo apt-get install oracle-java9-installer -y.
- You might get prompted for a password, type it in and press ↵ Enter, no dots or asterisks will appear, this is normal.
-
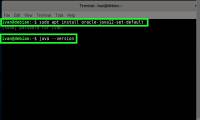
 Make Oracle's Java the default. In many Ubuntu derivatives, OpenJDK is set to be the default Java to be used, if you want Oracle's Java to be used by default you need to type sudo apt install oracle-java9-set-default.
Was this article helpful?
Your feedback helps us improve.
Related Articles
 How to Install Java on Linux7 minutes read
 How to Install Oracle Java JRE on Ubuntu Linux5 minutes read
 Download and install Java on the computer3 minutes read
 How to install Java on a Raspberry Pi4 minutes read
 How to fix the error does not install Java13 minutes read
 How to Install JDK in Linux2 minutes read
Reader Comments 0
Sign in with email or Google to join the discussion.